16.6 User groups
The E-Marketing Manager is organized in such a way that it is not necessary to assign each right individually to each user, as this can be quite time-consuming and error-prone. Instead, you can define rights sets for specific user groups. If you assign the corresponding group to a user, he automatically has all rights of this group. It is not possible to create a user without a user group. However, if you want to give completely individual rights to a user you can create a separate user group for it.
Note: The individual user can still be assigned rights by the administrator that exceed the standard rights of the group, but no group rights can be withdrawn from the user. If this is necessary, either all users in the group must have their rights revoked, a group with fewer standard rights must be used as a basis, or a completely new user group must be created for it.
The E-Marketing Manager comes with a set of predefined standard user groups that have already assigned the rights sets for typical roles. You can find an overview of the existing user groups under the menu item Administration under User groups. E-Marketing Manager now shows you all already created user groups with Name and Description in a list view. The Number of users using this user group is also displayed in another column. The predefined roles are:
-
Administrator: The administrator role has the most extensive rights in E-Marketing Manager and can control and operate all areas of the system. This user group is equipped with all standard rights. The only exceptions are premium rights, which are only activated when a booking is made, special rights, which require instruction by AGNITAS and negative rights, which reduce the range of functions.
-
Analyst: This role has access rights to all statistical functions in the E-Marketing Manager as well as to the menu items required to navigate there. The analyst can also create, activate and delete reports.
-
Datamanager: The Datamanager role can upload and download files, view, edit and delete recipients, manage mailing lists, perform imports and exports, create and delete target groups and access some statistical data.
-
Editor: The Editor role can create, edit, delete and activate campaigns, create, edit, delete and send all types of mailings, create and manage templates, create and manage archives, read access to recipients, target groups, mailing lists, forms and actions and access some statistics data.
-
Read rights/view only: A user assigned this group has read access to all areas of the system, but cannot edit, activate or delete content.
-
Manager: The role of the manager can access all areas of the system - with the exception of Import & Export -, obtain an overview and, if necessary, take corrective action on content. However, the manager does not have delete rights and cannot change critical areas, since a manager usually only accesses the EMM for controlling purposes and usually has no insight into the detailed processes.
-
Starter: The Starter role is especially suitable for new users or users who rarely work with the E-Marketing Manager, as it simplifies the EMM interface and hides rarely needed setting options. If you want the full range of functions to be displayed, you can simply activate the Advanced Settings user right.
-
Technician: The Technician role can create, edit and delete campaigns, create, edit, delete and send mailings, create and manage templates, create and manage profile fields, read access to recipients, mailing lists and target groups, view statistics, create, edit and delete forms, create, edit and delete actions, manage XML content sources and bounce filters.
-
Web Push: The Web Push role has basically the same rights as the Editor role, only it is additionally extended by all rights needed to create, edit and manage Web Push messages.
Note: This role has no effect on the functionality of the EMM as long as the Premium Feature Web Push has not been booked.
The default user groups cannot be changed or deleted. However, by clicking on the user group you can see which rights set is assigned to this group. The advantage of standard user groups is that they are automatically extended by new rights when new features add rights. This is not the case with individual user groups, because we do not know the intention behind the individual user groups.
You can also define any number of your own user groups. You can edit an individual user group by clicking on the list entry. If you want to remove an individual user group, you can either use the recycle bin icon in the overview or click on the Delete button in Edit mode.
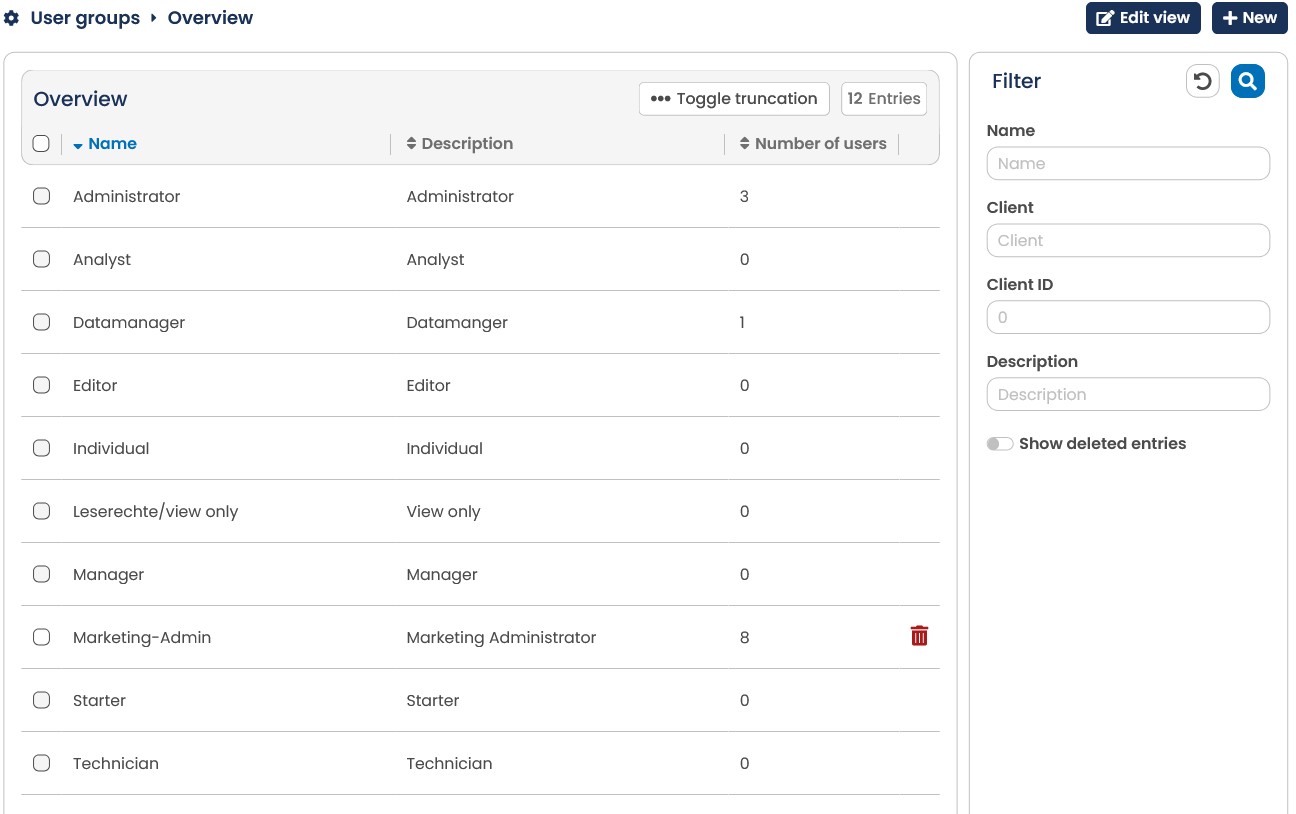
Fig. 15.16: As well as the predefined user groups Editor, Technician, Data Administrator, Analyst, Manager and Administrator, you can also set up your own user groups.
You create a new user group by clicking on New. First enter a name and optionally a description and then select the rights that the owners of this user group should have. The rights are sorted thematically into boxes such as Mailing, Data management, Target groups and Recipient, and in their entirety include all functions of the E-Marketing Manager. You can assign or remove all rights of one category with one click using the Toggle on/off slider.
For the sake of clarity, you also open and close the boxes individually. You can recognize assigned rights by an activated slider. If you want to add or remove a right, simply click on the corresponding right.
Grayed out sliders indicate that this right cannot be granted. There are several possibilities why a slider is grayed out:
-
The right belongs to a premium feature that has not been booked for your client.
-
It is a special right that can only be activated after consultation with \<%FIRMA OHNE> via the master, because it requires e.g. further database settings or should only be used after prior instruction.
With a click on Create the new user group is created and can be assigned to users.
Please note that individual user groups are not automatically extended with new rights. In this case, the account admin must regularly check whether he has to give a group additional rights so that the users can also use new features. The Filter for type on the right helps you identify new rights or unassigned rights with just one click and add them as needed.
Note: One user can be assigned to several groups. In addition, you can also bundle several subgroups to define a user group. For example, it is possible that you combine a user group Mailing creation with the group Target group creation. The new parent user group then has the rights of both the one and the other group. In addition, user groups can be copied.