1.4 Creating and sending a mailing
In this chapter you will learn how to create and send a mailing with E-Marketing Manager.
Content of this chapter
-
The methods for creating mailings are briefly presented.
-
Mailing creation with the Assitent
-
Mailing creation with the E-Mail Creator
-
Test and send mailing
1.4.1 Methods for creating mailings
If you want to create a new mailing, E-Marketing Manager will first ask you which method you want to use to create your new mailing. So that you know which method is most suitable for you, we will briefly introduce the methods here.
-
Standard Mailing: There are two typical applications for this method:
-
The standard method is particularly recommended for users whose mailing design can vary greatly from time to time and who want to remain as flexible as possible by entering HTML.
-
The standard method is also used if you have a "rigid" framework - i.e. your editors only have to store texts, links and images, but the structure is otherwise always the same. HTML is not absolutely necessary for this method.
-
E-Mail Creator: The E-Mail Creator makes the creation of your newsletter a breeze. It allows you to arrange content modules by drag & drop. So you can immediately see the visual impact of your newsletter. Knowledge of HTML is not absolutely necessary in this method
-
SMS: Select this type, if you want to create a new SMS.
-
Import mailing: The import is only indirectly a method. You can import a finished mailing template from another client or from AGNITAS AG. It does not matter whether the direct mailing to be imported was created with the standard method or the E-Mail Creator.
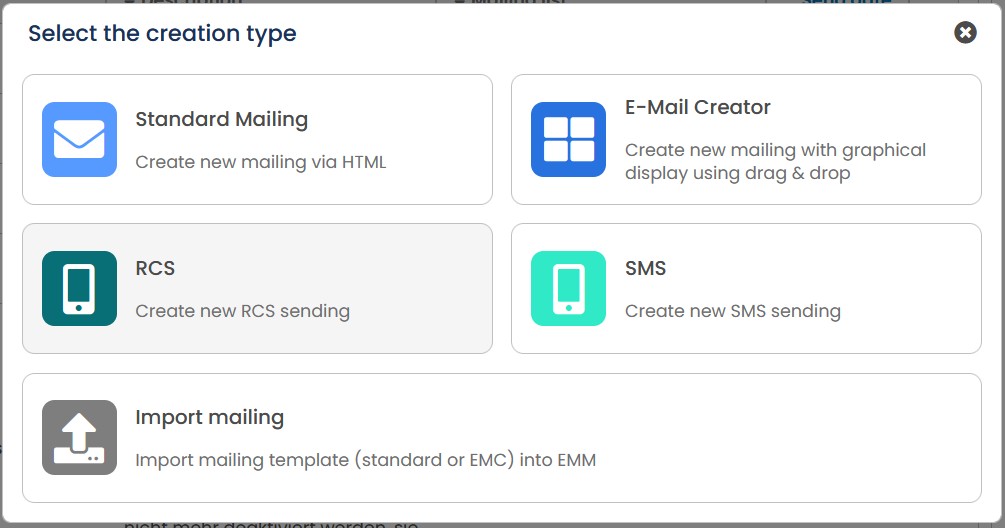
Fig. 16.27: The system offers different methods to create a new mailing.
With all methods, you basically have the possibility to enter your content in different ways:
-
On the one hand, you can insert and format content in the same way as on a homepage by using HTML.
-
On the other hand, it is also possible to edit texts with the so-called WYSIWYG editor (what you see is what you get) - similar to Word.
1.4.2 Creating a new mailing with the standard method
The procedure for the standard method is explained below.
Open the Mailings menu item and click on New in the top right corner. Now select Standard mailing.
Working steps
- First select whether you want to use a template for your mailing or not. As soon as you have made your selection, a new window will open in which you can enter all the base information for your new mailing. As soon as your details are complete, click Generate mailing.
Excursus: What is a template? Most mailings, especially regularly sent newsletters, always have the same structure: There is a header, subheadings, text blocks with pictures, separator lines, a closing credits with imprint and a link to unsubscribe. Building up the entire content from scratch for each mailing is cumbersome, time-consuming and error-prone. E-Marketing Manager helps you to reduce this effort to a minimum by using a template (also: template). You define a fixed framework (content) and only add the variable content in the mailing.
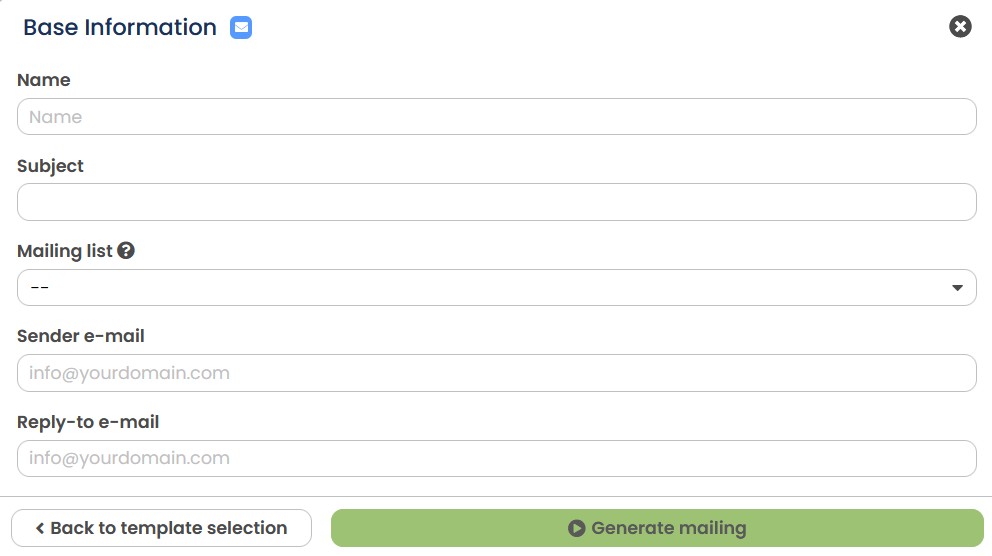
Fig. 16.28: Enter all the required base information.
- Your mailing has now been created and EMM will take you to the Settings tab. In the General settings, only deactivate the Advertising slider if you have to prove for legal reasons that a recipient has clicked on a link, e.g. for double opt-in. In the case of advertising mailings, the tracking objection of affected recipients is taken into account. In the same area, you also specify the type of mailing you want to send. With the default setting Normal mailing, you create a regular newsletter. The other mailing types are not sent out all at once, but on an event-related basis, e.g. birthday or order confirmation, or as a follow-up to a specific recipient behavior in a previous mailing.
Next, specify which mail format should be sent. You can choose between only text, text and HTML as well as text, HTML and offline HTML. The HTML format allows images and formatting to be integrated into the mailing. With the offline HTML format, these images are integrated into the email, whereas with the normal HTML version, the images are loaded from the server after opening. Optionally, you can assign the mailing to an archive. Under Measure opening rate, you specify whether the measurement pixel is loaded at the beginning or end of the mail. The placement may influence the opening rate values.
- Enter the sender details in the Sender settings. The sender e-mail is relevant for spam filters and bounce messages. You should therefore enter an email address that makes as much sense as possible, such as news@yourcompany.com, which actually exists. If you use a DKIM signature, the domain must match your signature.
You can use different real names for the sender full name and the reply-to full name. If you only enter one name in the sender full name, this will automatically be used as the reply-to full name. If you wish, you can also enter a different Reply-to address under Reply-to e-mail.
In the Pre-Header field, you define the preview text that is displayed below the subject by most email clients.
- In the Targeting Settings area, select a mailing list - i.e. the distribution list to which the mailing is to be sent. This mailing list is a mandatory entry. When you add target groups, you restrict your mailing list to recipients who meet the characteristics of the target group. If you add more than one target group, you will also receive the selection Recipient has to be in all target groups - and you can choose whether you only want to write to the intersection of the target groups.
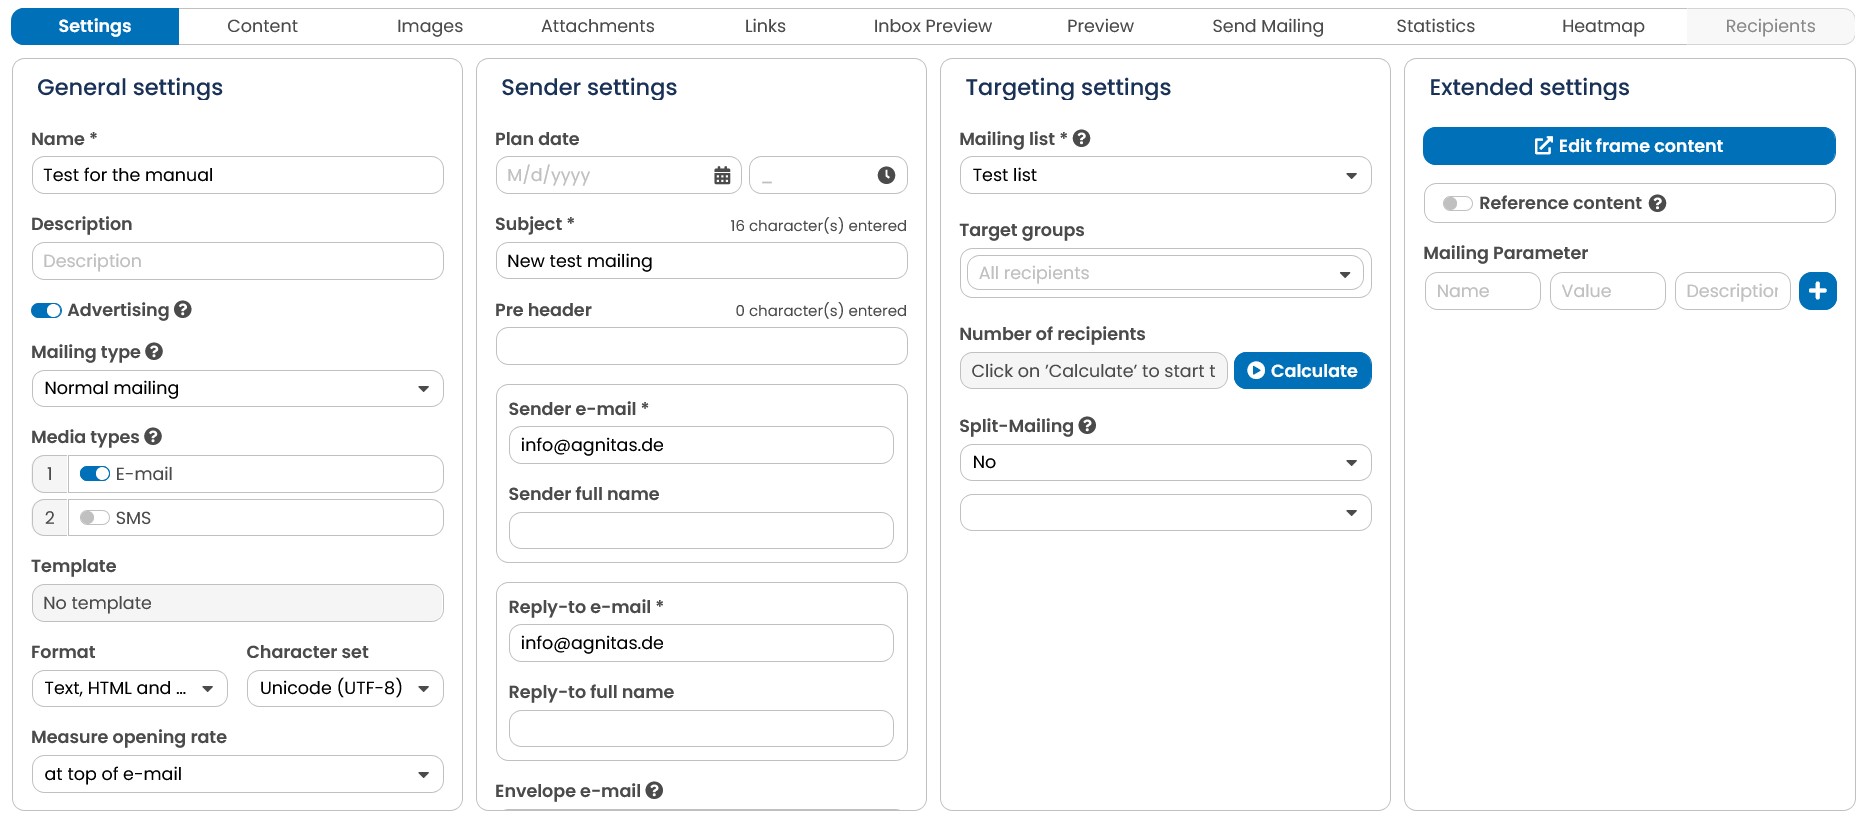
Fig. 16.29: Define all the important settings for your new mailing.
- Once you have set all the details for your mailing, switch to the Content tab at the top. Here you can now create text and HTML content for your mailing. For the HTML version, you also have the option of using the WYSIWYG editor, which makes it easier for you to enter the content.
EMM uses so-called AgnTags to personalise and individualise content. With the help of tags, you can reach the personal form of address in the newsletter and insert the contents of any profile field in the text. What tags are available and how they are used is described in a complete chapter in the manual (Appendix A: AGNITAS tags).
Tip: The EMM logo in the WYSIWYG editor (next to symbol for special characters) opens a selection list of all tags.
Note: If you want a text module to show different content for different target groups, add a new target group under Manage target groups. After you have closed the selection, you can select the desired target group in the dropdown next to the button and enter the content for these recipients in the editor. If the selected target groups overlap, make sure to place the smallest group first and the largest last, e.g. all women first and then all recipients, as EMM processes the modules from top to bottom when generating the mailing and women would otherwise see exactly what everyone else sees.
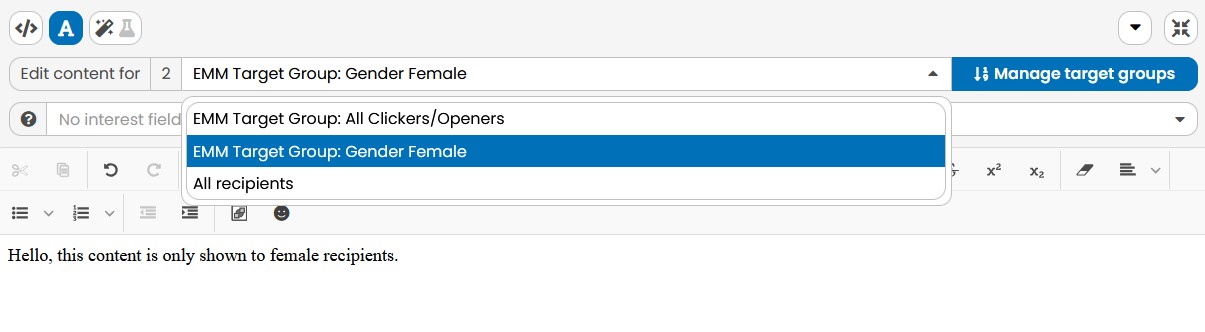
Fig. 16.30: Select the desired target group next to "Edit content for" and add suitable content.
- As soon as you are satisfied with the content of your mailing, open the Links tab. Here you can edit the links that you have previously inserted into your mailing content. Connect individual links with triggers here if a link click should result in an action (e.g.: trigger counts the number of clicks on the link). You can find out how to create a trigger in the chapter Create or change triggers.
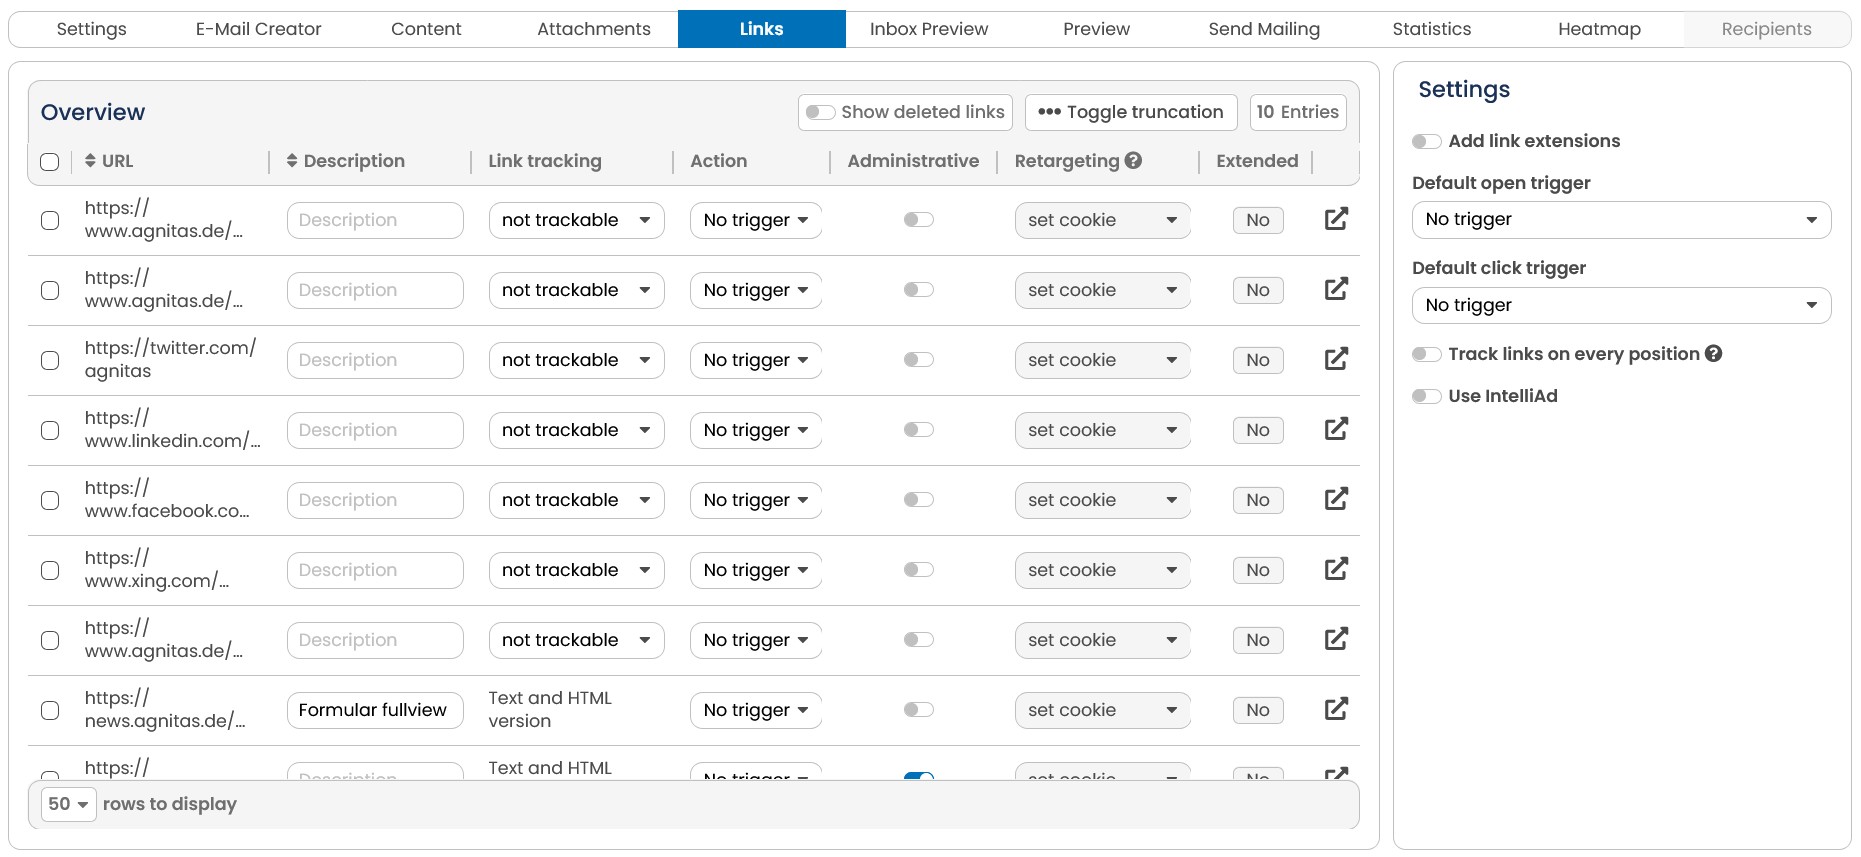
Fig. 16.31: You can optionally edit your links, e.g. change the measurability or assign certain triggers.
- In the Attachments tab, you have the option of adding a file attachment to your mailing. However, you should be very careful here, as attachments are often classified as dangerous by spam filters.
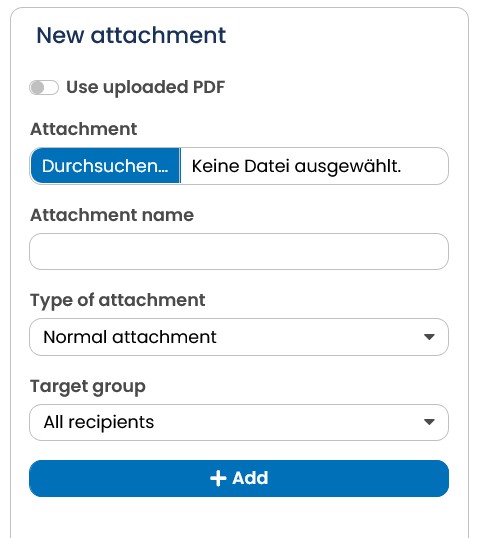
Fig. 16.32: After entering the file name and selecting the target group, click Add to transfer the attachment to EMM.
- In the Preview tab, you can view the mailing in EMM and check target group-specific content for various recipients before sending.
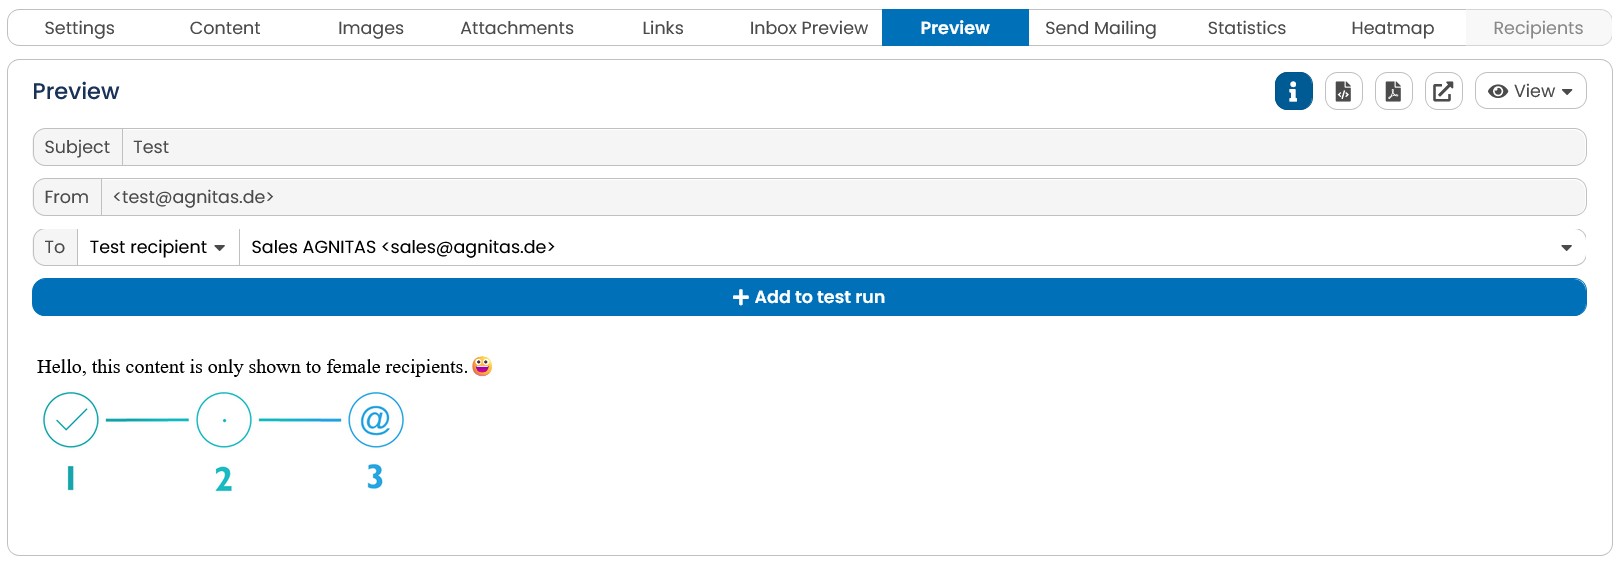
Fig. 16.33: Call up the preview to check the content of your mailing.
- In the Send mailing tab, you can then send an admin mailing to the admin recipients of the selected mailing list. With test mailing, all test recipients of the mailing list are delivered accordingly.
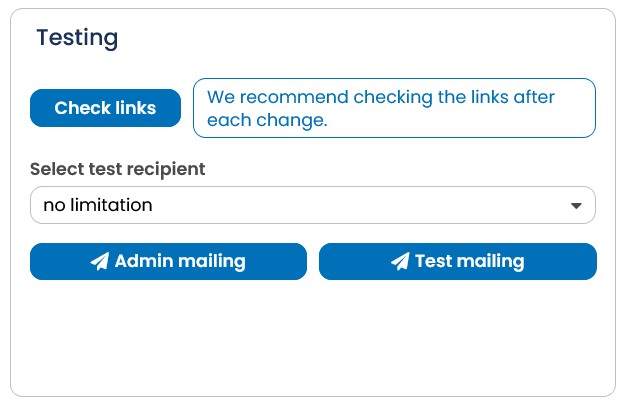
Fig. 16.34: Check your mailing via admin or test mailing before final dispatch.
Since testing is an important part, which is the same for all creation methods, this is described in more detail in the chapter Preview Function and Testing.
1.4.3 Creating a new mailing with E-Mail Creator
- The following describes how to create a new mailing using the E-Mail Creator method:
Open the menu item Mailings and click on New in the top right corner. Now select the E-Mail Creator method.
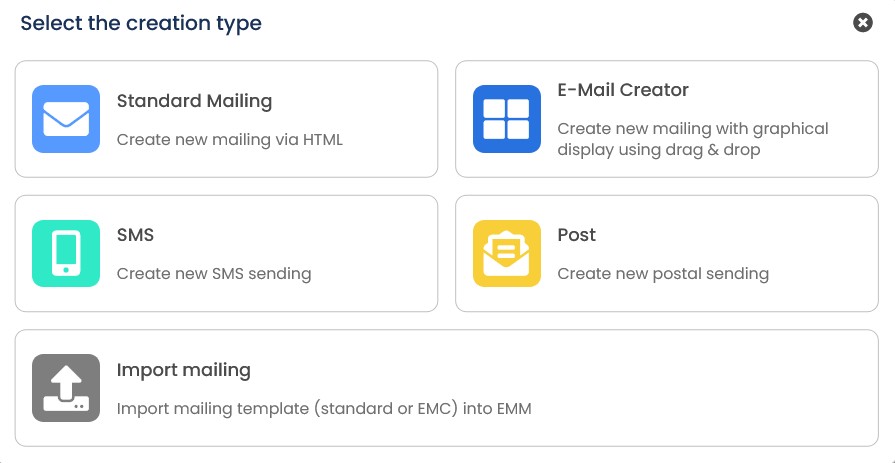
Fig. 16.35: The system offers various methods for creating mailings, including the E-Marketing Manager.
- E-Marketing Manager now shows you an overview of the available templates. EMM contains a number of standard templates (recognizable by the prefix [Sample]). In addition, individual templates with your corporate design also appear here if you have created a corresponding template yourself (with the Layout Builder) or AGNITAS AG has created one for you. You can display the overview as a list or preview. Once you have decided on a template, simply click on it.
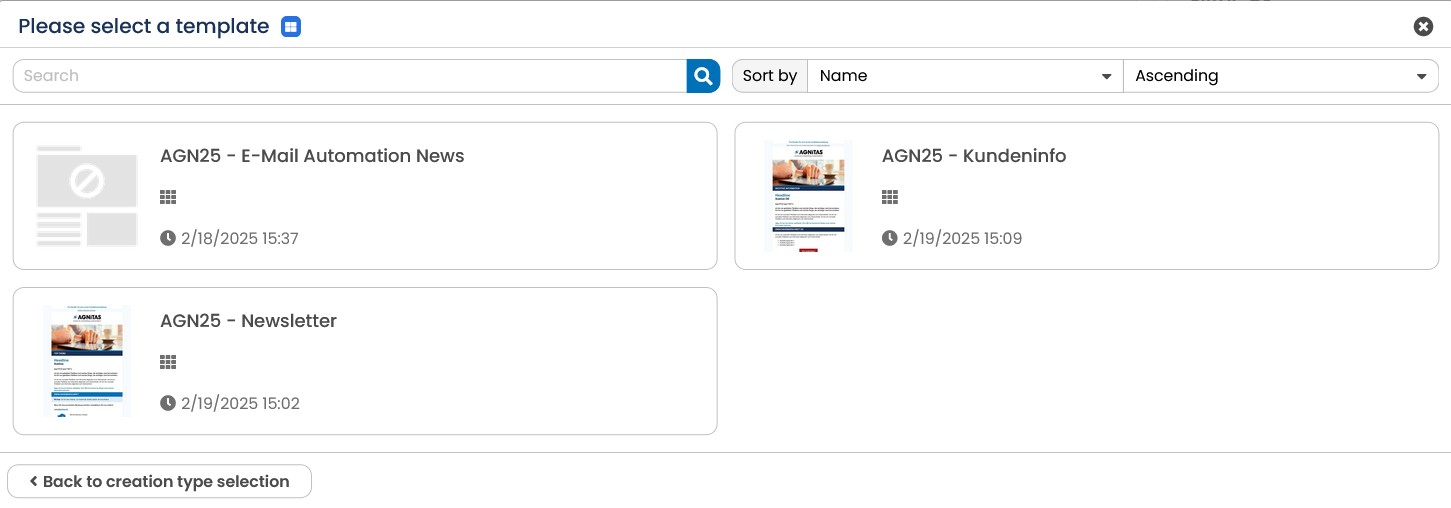
Fig. 16.36: First select a template for your mailing.
- After selection you will be redirected to a page for the base settings of your mailing. Here you enter all the essential information for your new mailing. If you would prefer to select a different template, you can click on Back to template selection at the bottom left of the page and adjust your selection accordingly. As soon as your details are complete, you can click generate mailing.
Note: As soon as you have confirmed the basic settings with Generate mailing, the template can no longer be changed. You can still edit all other settings at any time before sending and in some cases even afterwards.
- Your mailing has now been created and EMM will take you to the Settings tab. In the General settings, you have space in the Description field to add further information about your mailing to provide you with an overview of your internal processes. The content of the field is only intended for your organization. Only deactivate the
Advertising slider if you have to prove for legal reasons that a recipient has clicked on a link, e.g. for double opt-in. In the case of advertising mailings, the tracking objection of affected recipients is of course taken into account. You then select the Mailing type you would like to send. With the default setting Normal mailing, you create a regular newsletter. The other mailing types are not sent out all at once, but on an event-related basis, e.g. birthday or order confirmation, or as a follow-up to a specific recipient behavior in a previous mailing. You will also find further setting options for Character set and Measure opening rate. As a rule, you can simply leave the default settings here. You will also see a selection field for Archive and the Show in online archive slider. Both settings are optional.
The Plan date in the Sender settings serves as an orientation for you as long as you have not yet scheduled the mailing. This date causes the mailing to appear in the calendar. In the Pre-Header field, you define the preview text that is displayed below the subject by most email clients. Next, enter the sender details. The sender email is relevant for spam filters and bounce messages. You should therefore enter an email address that makes as much sense as possible, such as news@yourcompany.com, which actually exists. If you use a DKIM signature, the domain must match your signature. You can use different real names for the sender full name and reply-to full name. If you only enter one name in Sender full name, this will automatically be used as the reply-to full name. If you wish, you can also enter a different Reply-to address under Reply-to email.
In the Targeting settings, use the mailing list to specify the distribution list to which the mailing is to be sent. Below this you will see the Target groups selection. This is an important element. When you add target groups, you restrict your mailing list to recipients who meet the characteristics of the target group. If you add more than one target group, you will also see the selection Recipient has to be in all target groups and you can choose whether you only want to write to the intersection of the target groups. You also have the option of displaying the number of recipients at the current time with Calculate. Split mailing allows you to divide the recipient group in a variety of ways, e.g. into two groups of equal size to test two layouts against each other.
In the Extended settings area, you can edit the frame content and define an individual basic structure for the text version of your mailing.
- As soon as EMM directs you to the Settings page of your mailing, additional editing options appear. In addition to the active tab, you will now see further tabs and the Action button at the top of the screen.
You can use the Action drop-down menu to copy the mailing, create a follow-up mailing, export the mailing, undo the last step or delete the mailing. If the mailing is part of a campaign, you have the additional selection option to campaign at this point. This will take you directly to the linked campaign.
When you are finished with your settings, confirm the changes by clicking Save at the top right.
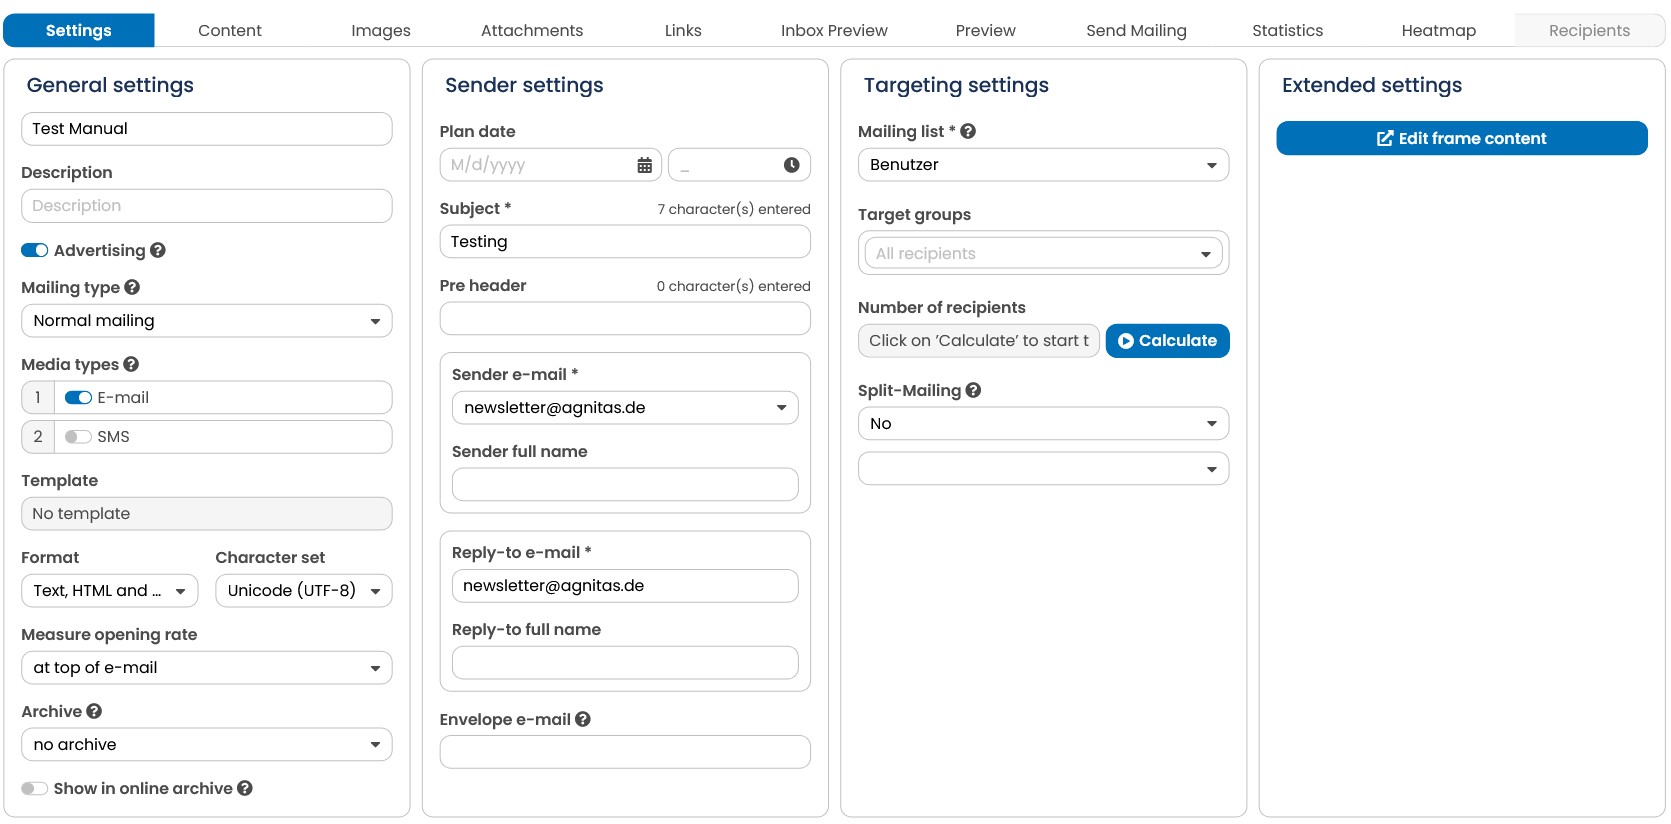
Fig. 16.37: The Settings tab of your new mailing.
- Now switch to the E-Mail Creator tab. On the left, E-Marketing Manager shows you the Building blocks that are included in the selected template by default. The 3-dash menu above takes you to the Contentpool with blocks that you can use for this template, as well as to the Recycle bin with blocks that you have deleted in the active session. The content area can be found in the middle. If you are using the classic layout builder, you can use the Arrow symbol on the left-hand side to insert or hide spacing between the lines. On the right-hand side, you can remove the row using the trash can icon. You can use drag & drop to place new modules in your mailing. If several target group-
specific modules are placed on top of each other, you can recognize this by the blue border and the scroll function.
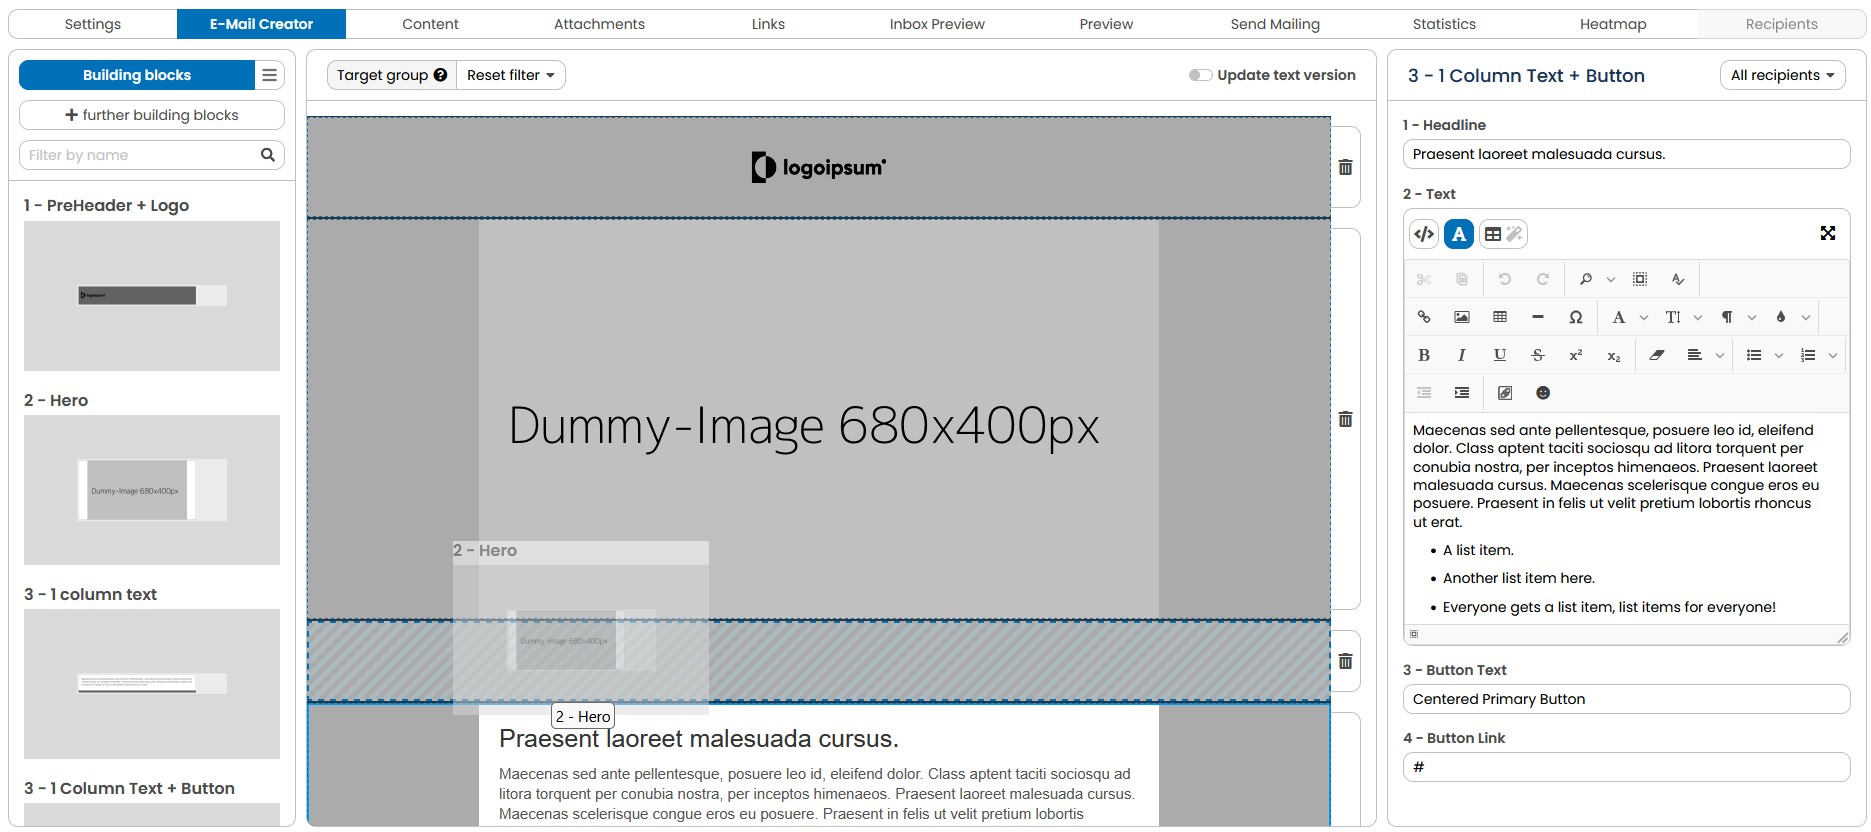
Fig. 16.38: You can place building blocks in the content conveniently by using Drag & Drop.
- If you move the mouse over a building block, several editing tools appear: Double-click to edit the content of the building block on the right-hand side of the screen. The two leaves stand for Copy block. You can delete the block with the trash can. If you hold down the mouse, you can drag the block to another position or use the edges and corners to reduce or enlarge it. At the bottom right of the block, you can see whether the block has been assigned to a target group or is for all recipients. If you want to place several contents for different target groups in one place, simply drag several building blocks to the same place. You can use the scroll function to edit the underlying content at any time.
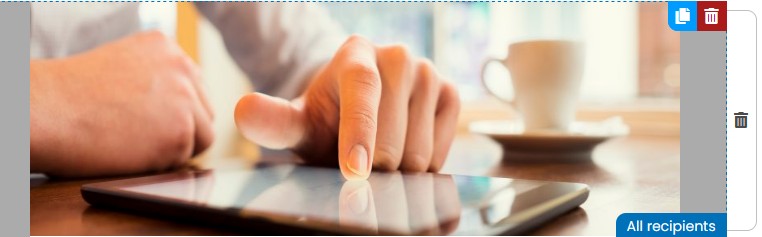
Fig. 16.39: On mouseover, various tools appear with which you can edit the block.
- in the edit mode you can enter different contents such as images, texts, links, buttons and design instructions depending on the module. The fields are completely different for each module. For all modules, however, there is a name field that can be used for internal explanations and a selection field for target group at the top.
For larger text fields, you always have the option to choose between the HTML view and the WYSIWYG view. To personalize and individualize the EMM works with so-called AgnTags to individualise content. With the help of tags, you can achieve a personal form of address in the newsletter and insert the content of any profile field in the text. What tags are available and how they are used is described in a complete chapter in the manual (Appendix A: AGNITAS tags).
Tip: The EMM logo in the WYSIWYG editor (next to symbol for special characters) opens a selection list of all tags.
After you have finished with the block, confirm the changes with Save.
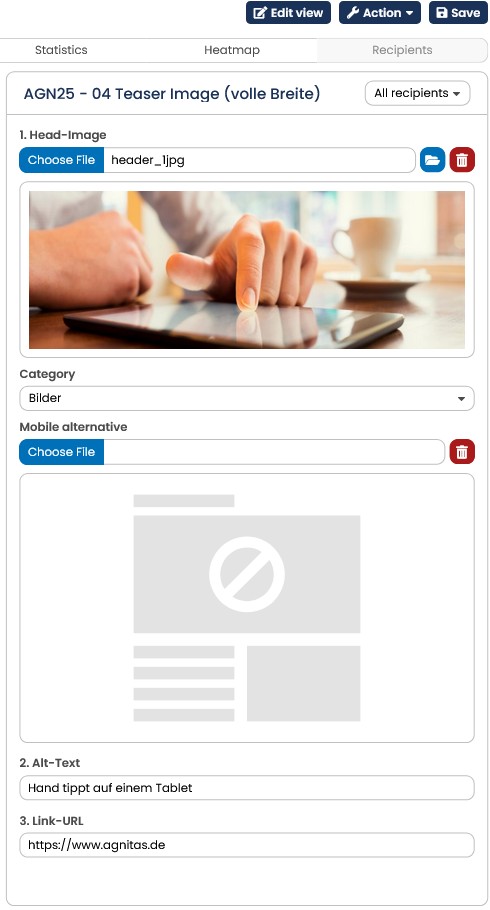
Fig. 16.40: In edit mode you can edit content and assign a target group.
-
When you are finished with the content of your mailing, click on Save in the upper righthand corner.
-
Some email clients suppress the HTML version first and display the text version until the recipient reloads the HTML. In order to keep the effort for you within reasonable limits, EMM offers a way to generate the text automatically with the Generate text from HTML button. Since EMM attempts to translate each HTML module into a text module, you should check whether the content fits this way. You can either remove the superfluous text modules in the Settings tab in the Edit frame content option using the Extended settings tab, or you can edit the affected modules on the Content tab and delete content if necessary. Of course, you can also simply copy the text of your mailing into the standard text version module. If the text version is not displayed directly in the Preview area, click on View in this area at the top right. There you can change to the setting to Text.
Note: If you have personalized your subject or sender name with dynamic tags in the Settings tab, you can also store the subject in the Content tab.
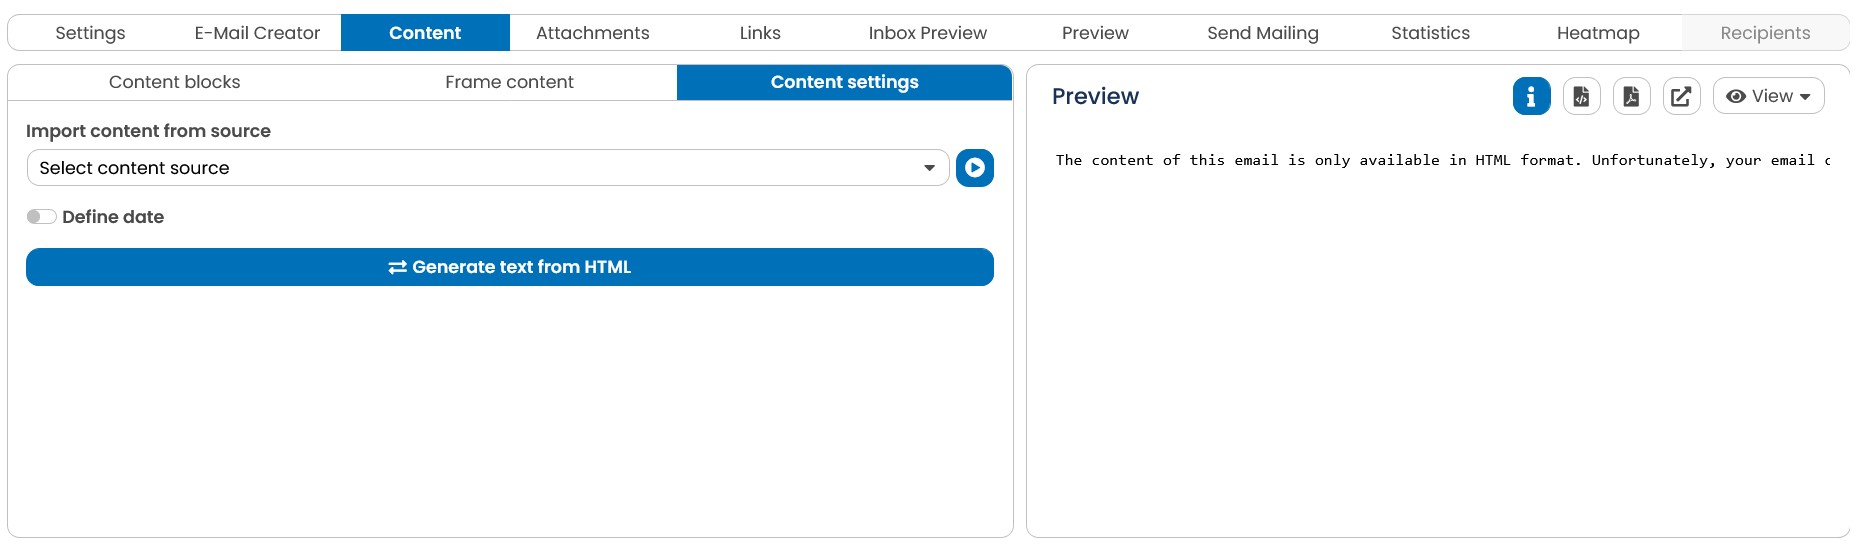
Fig. 16.41: To create a text version, simply click on the button Create text from HTML or enter the content manually.
- The register Styles gives you the possibility to adjust basic color values in your mailing. For example, you can edit the background of the mailing and the background of building blocks as well as the gutter color here. The color value for font color is only used as a fallback; the settings for the modules dominate here. When you have finished making your changes, click on Save in the lower right-hand corner. The adjustments are immediately visible in the preview.
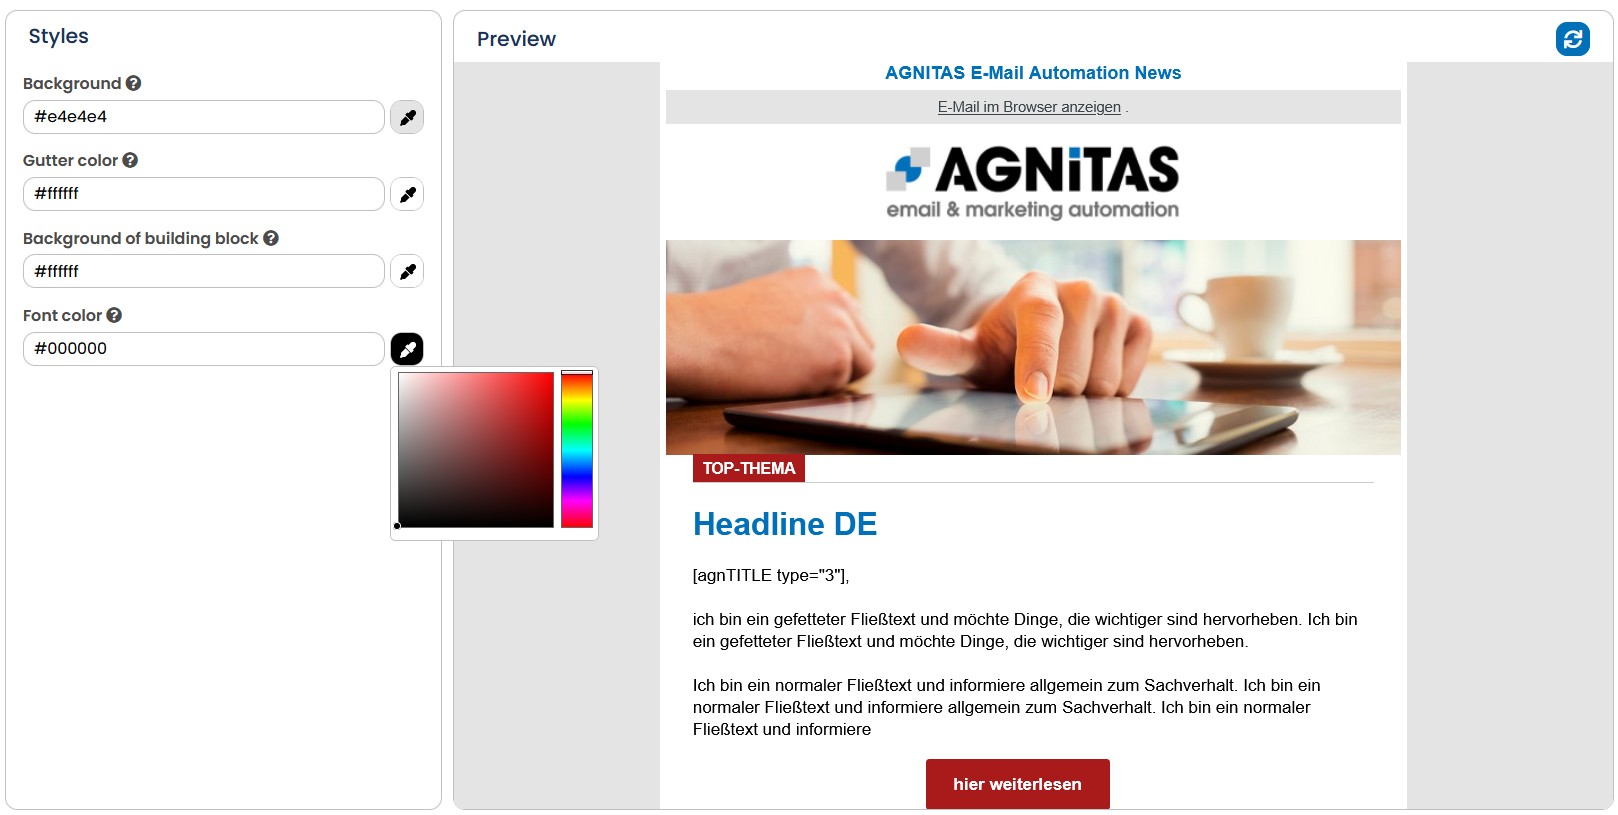
Fig. 16.42: In the tab Styles you can adjust basic color values of your mailing and change the effect.
- In the next tab you have the option to upload attachments and send them with your mailing. However, you should be very careful here, since attachments are often classified as dangerous by spam filters. It is therefore advisable to only link to the document if you have the opportunity to do so. This procedure also does not affect the loading time of the mailing.
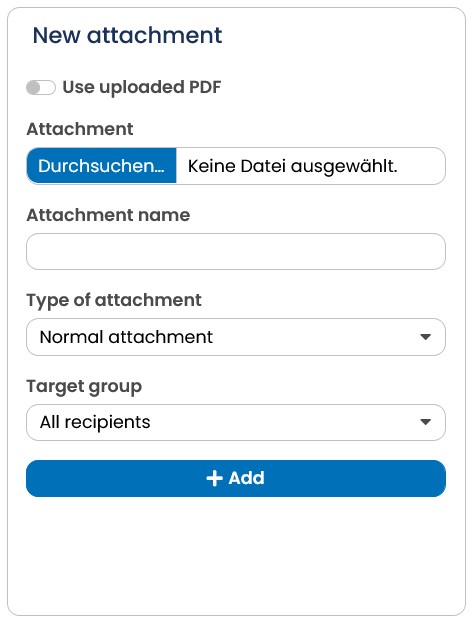
Fig. 16.43: If desired, you can add a file attachment to your mailing.
- In the Links tab you can see all the links found in the mailing. You can now make various settings for the links as required:
The description later appears in the statistics instead of the link. With Link tracking you decide whether clicks are recorded statistically. With Action, something can be triggered by clicking on the link. If you mark a link as administrative, it will be evaluated in the statistics together with form links in order to distinguish between target-oriented, productive links and administrative pages. With Retargeting, you can set whether the click should be tracked on the landing page. The last column shows you whether your link has been extended, e.g. with parameters for your web tracking tool. You can edit the links either in the overview or by clicking on the individual line. Further down you will find the possibility to make changes for several links at once. You can also leave the links unedited.
Fig. 16.44: You can optionally edit your links, for example to activate tracking.
You have now made all the settings for your direct mailing. In the next step we will deal with the test options. Read more about this in the chapter Preview function and testing.
1.4.4 Preview function and testing
E-Marketing Manager offers you several ways to check and test your mailing before sending it. These are presented here in order.
The integrated preview function
To check the mail you have created quickly and conveniently, a preview function for samples is available. This allows you to check the presentation and content of your newsletter and exclude errors in advance.
The preview function has even more advantages: Since E-Marketing Manager can generate individualized newsletters, you can also select email addresses for individual recipients to view. If you have prepared different, personalised content for your recipients, you can use recipients from the respective target group in the preview and check whether the newsletter is really put together correctly for the recipient.
The preview function can be found in several places in the system, but this varies slightly from method to method:
-
With the default method, you will find the preview in the tabs Settings, Content and of course Preview.
-
With the E-Mail Creator method, the preview is displayed in the text modules, styles (limited function) and also offered in the Preview tab.
Here's how you do it:
-
Call up the preview, e.g. via the register of the same name.
-
Once you click the Info icon, you see sender (From), subject and pre-header for the preselected recipient (under To) at the top. You can use the drop-down menu to select all admin and test recipients of the mailing list set in the mailing or you can enter any email address from a target group used. E-Marketing Manager immediately generates a preview for the respective recipient.
-
The preview dialog shows the selection list View in the upper right corner, with which you can select the displayed format in more detail. You can define the display for different end devices (under Size) and for the formats Text and HTML In the HTML view, you also have the option of checking the display without images.
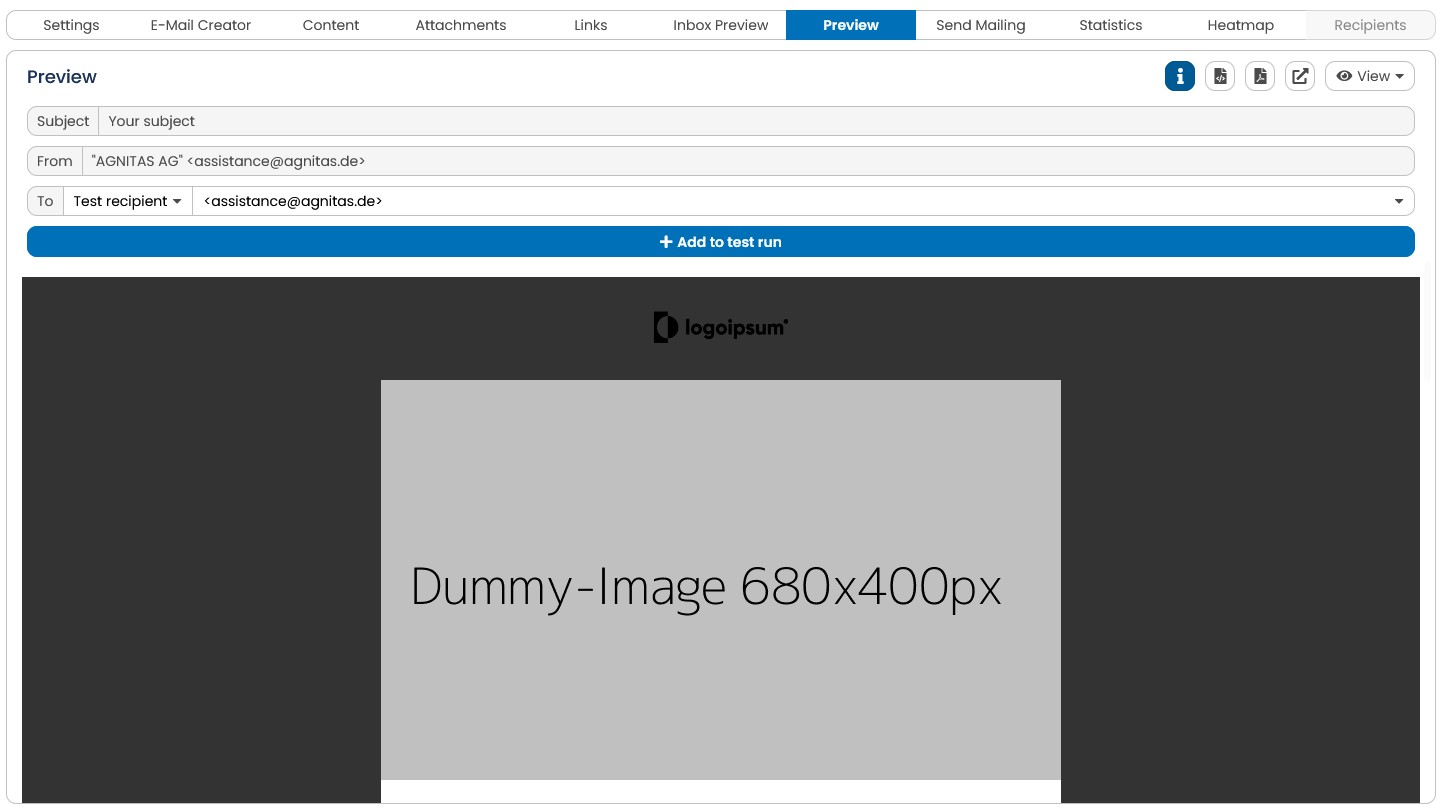
Fig. 16.45: The preview function allows you to check the content for different recipients with different settings.
In addition to the integrated display, you can also open the preview in a new window or save it as PDF. Use the symbols next to the View button to do this.
As the display of the mailing in different sizes cannot take into account the characteristics of specific email clients, browsers, apps or end devices, E-Marketing Manager offers its own preview function for this purpose, the Inbox preview.
Use the inbox preview to check the display for specific devices, clients, browsers, etc.
The inbox preview is a premium feature that is subject to a charge. If you have the right, you can start an inbox preview for each mailing. First select the browsers, mail clients and devices you want to check. Below the selection, you will find the Recipient dropdown with Admin and Test recipients for which you can request a preview. By clicking on Send, the test dispatch to the selected devices etc. is triggered. After approx. 10 minutes you will find small preview images for all checked representations in the Inbox Preview tab. By clicking on them, the view from the respective inbox will be enlarged and you can check the representation.
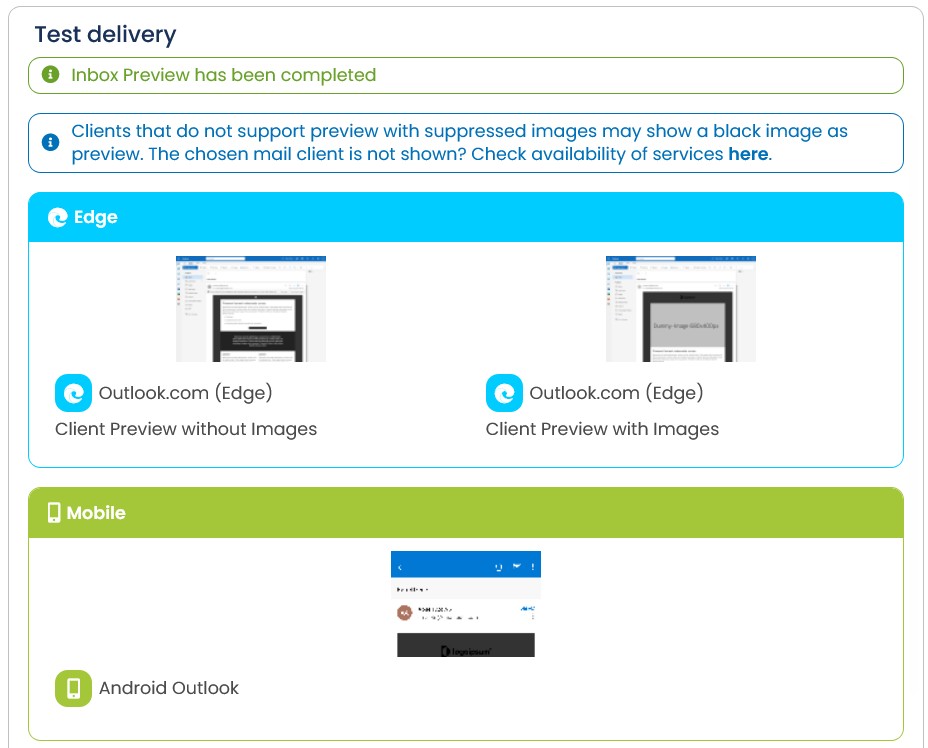
Fig. 16.46: E-Marketing Manager has checked whether the mailing can be delivered properly and how different email clients display it.
If the display in the preview meets your expectations, you can use the next stage, the test dispatch.
Test dispatch to selected recipients
Now switch to the Send mailing tab. In EMM it is regulated that you can carry out a test dispatch to different people (groups). In the box Testing you will see a button Admin mailing. Use this button to trigger a test mailing to all admin recipients on the mailing list. Use this setting to initially deliver to a smaller group of recipients. Usually, the editors of a mailing are created as admin recipients.
If the first check went according to your expectations, you can send the test mailing to the next larger group. Here again, you have several options:
-
If you leave the selection in the dropdown with no limitation, all test recipients on this mailing list are delivered by default.
-
If you select the option single recipient for test mailing, an input field for the email address to be delivered appears. As soon as you have added the address entered with the plus sign, you can add more addresses individually. If the entered address is not part of your database and therefore does not fall into any target group, the variant for All Recipients applies to the content of the test mail.
-
If you have created special target groups for the test run, these also appear in the selection list. The special thing about this variant is that you can further restrict the admin and test recipients with this special target group. If you want to define a test target group, select the For Admin and Test Mailing slider in the input dialog for target groups.
-
You will also find the Send only to me option in the dropdown. If you trigger this test mailing, you will only receive a test mailing to the email address that is stored for your user in EMM.
After clicking on Test Mailing you will receive the test mails within a very short time.
Note: It is possible that test and admin mails are marked in the subject, e.g. [Test] My subject... If you are interested, please contact your account manager.
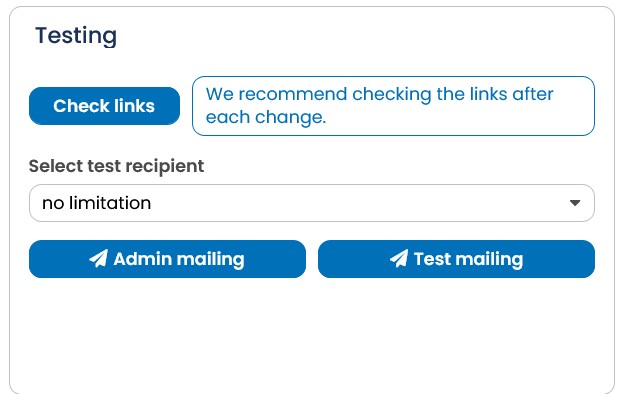
Fig. 16.47: Under send mailing you will find the possibility to initiate different test
1.4.5 Send mailing
The mailing is finished, the contents are available and the test mails have been reviewed several times. Now it can start!
- On the Send mailing page, E-Marketing Manager presents the selected target groups once more in the Delivery information box as well as a calculation of the recipients at the current time. If your mailing does not take place until a few days later, the number of recipients may change in the meantime due to subscriptions and unsubscriptions, as target groups in EMM are dynamic. On top of that, the delivery size is displayed both numerically and visually as a bar chart. In the Delivery settings box you set the date and time for the dispatch. With the premium function Optimize time of delivery, the dispatch is carried out individually for each recipient, but at the set time at the earliest. You can use the selection to control whether recipients who are most likely to respond before the set time should then be delivered the following day at the optimum time or whether all shipments should be completed on the same day.
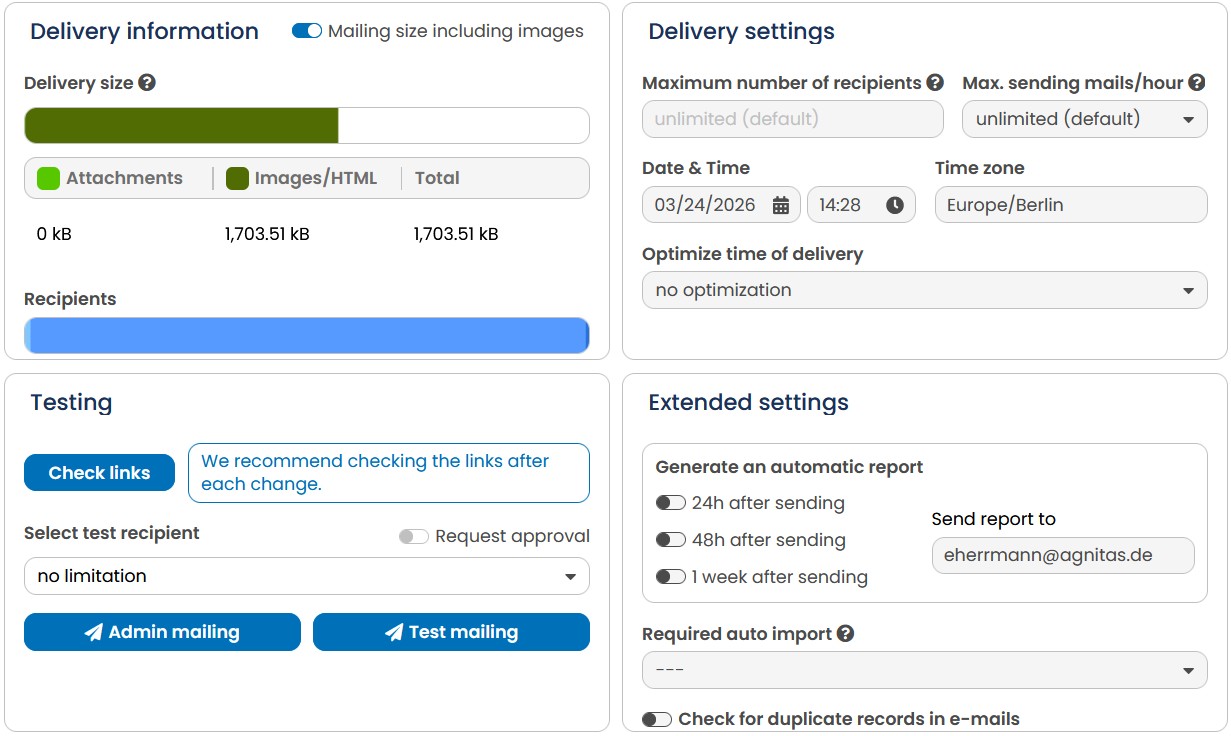
Fig. 16.48: Enter the date and time for shipping in the Delivery Settings. In the Delivery information box, the system displays all recipients at the current time.
-
In the box Generate an automatic report under Extended settings you can choose to generate a report after sending, e.g. after 48 hours a PDF report can be sent by email.
-
You can use the option export recipient data, if you use the automation Package and auto exports have booked. This way, you could further process repository data in an external system, for example. If you activate this option, the recipient data for this direct mailing is automatically exported to the defined server after the specified time period. Of course, only the recipients who have not objected to the tracking are exported, because for the others it cannot even be tracked.
-
The Extended settings box offers further settings for sending. You can exclude email duplicates from sending or exclude mailings that would be completely empty due to various target group regulations.
-
In the Delivery Settings, with the maximum number of mailings, you can define a limit on the maximum number of recipients to be delivered. Using the setting Max. sending Mails/Hour you can throttle the dispatch, e.g. to distribute the load on your servers evenly.
-
When your settings for sending are complete, click on Send in the upper right corner.
-
A security prompt opens, which summarizes the most important information once again.
If the settings are all correct, confirm this query with Send.
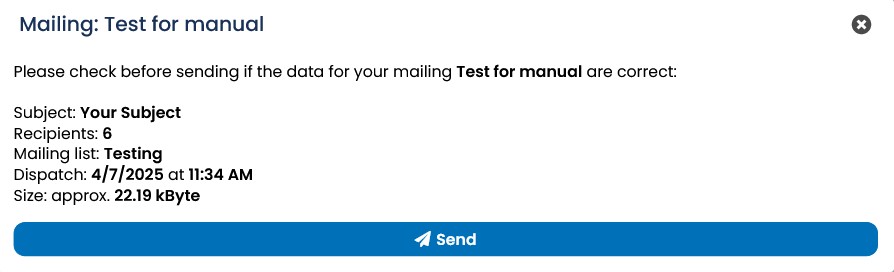
Fig. 16.49: After clicking Send, you will be asked again whether the settings are correct.
- After confirming the settings, you will be redirected to the Send mailing page. In the box Status you can see delivery details such as information on when EMM starts producing the mails and when the dispatch starts. Until shortly before sending, you still have the possibility to stop the delivery.
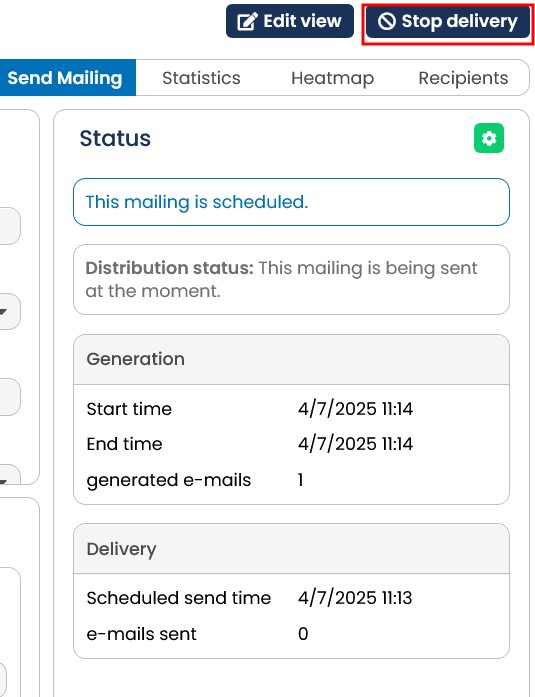
Fig. 16.50: If the dispatch is scheduled, the dispatch status shows the time of production start and dispatch start. In the upper right corner, you can cancel the dispatch.
- After the dispatch is completed, you will see the final values for production and dispatch in the Status box.
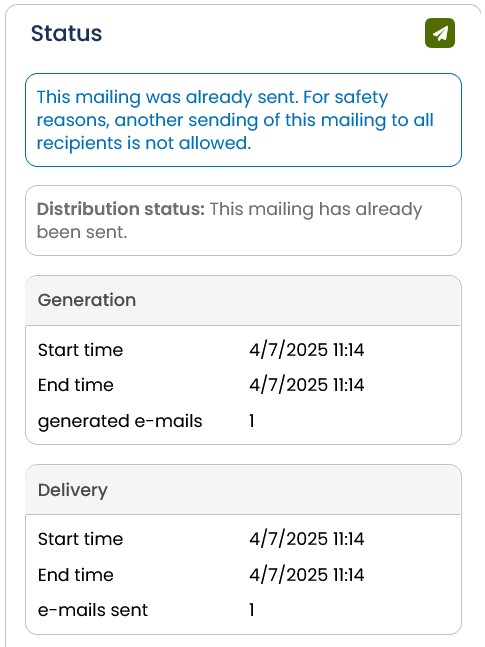
Fig. 16.51: After sending, you will see the final values in this area.
You can stop the generation and the sending, as long as it is not yet completely finished, with the button Stop delivery and also resume it after. However, if changes are required, the mailing must be copied. This can be done directly with the Copy button. The copy of your mailing is then only sent to the recipients who have not yet been delivered. This function requires the Automation Package.