16.11 News-Editor
With the News Editor, you can send important notifications to your employees directly via the E-Marketing Manager. These messages, or news, are then displayed to your employees in the EMM.
Navigate to Administration and click News Editor to open the submenu. The overview shows you a table with already created notifications. Here the columns show information about the Language, Type, Title, Content, CompanyID, Start date and End date of the notification. In the last column of the table you can find the trash can icon, which allows you to delete entries.
Click on New to create a new notification. In the input mask you now have to enter all important information regarding your notification. You can use the CompanyID value to specify which clients should receive the notification. If you set the value to 0, it will be displayed in all your clients. If you want the notification to be displayed only in a certain client, you have to enter the number of this specific client here.To be able to display the notification in more than just one client, you can enter several clients comma-separated. Next, select the type of your notification. You have the following two choices:
-
Message: Is a popup/layer that is displayed to all users (of the selected clients) immediately after logging into the EMM. After the user has seen the popup once, it will not appear again, but it can be seen in the News tile of the dashboard. The message is displayed only within the specified time period (from start date to exclusive end date). This content type can be used for important information to the users (of the selected clients).
-
News: This content must be actively accessed by users. The content will be displayed in the News tile of the dashboard. It will be displayed there for 180 days from the start date and will disappear after that. New content will be displayed at the top of the News tile.
Note: This type is usually used by AGNITAS to introduce new features in the EMM. However, it can also be used for custom news that are not so important that they should be displayed as a popup, if desired.
After that you can set the Start date (and End date). In addition to the Title and Content of your notification, you can select the Language of the users for whom the notification is to be displayed in a dropdown. Here the abbreviation de stands for users with German user interface and en for users with all other language settings. If you want to make the notification available in different languages, click the Plus after you have entered everything relevant in one language. This will open another input mask where you can add another language and appropriate title and content. After completing the notification, click Save.
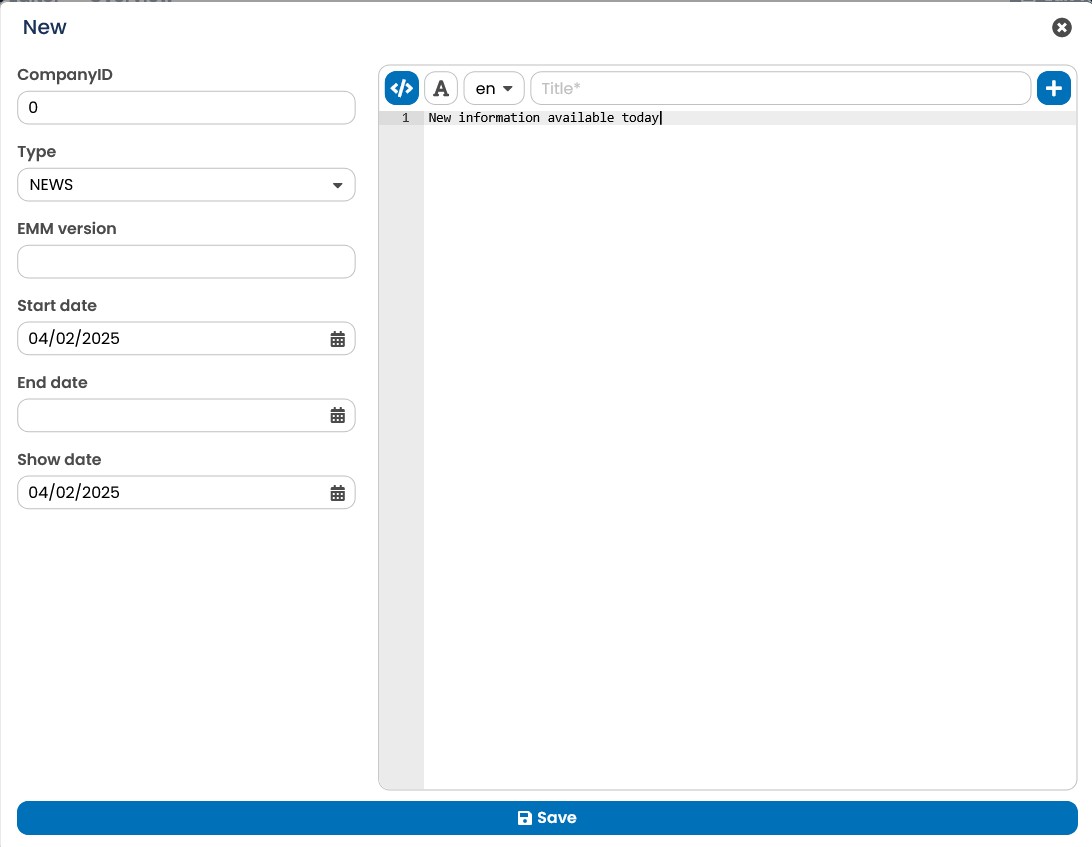
Fig. 15.22: To create a new notification, fill in all the important information.
Please note: In the overview, the notifications are listed separately according to your language. So if you want to edit an entry, you have to select it specifically by its language.
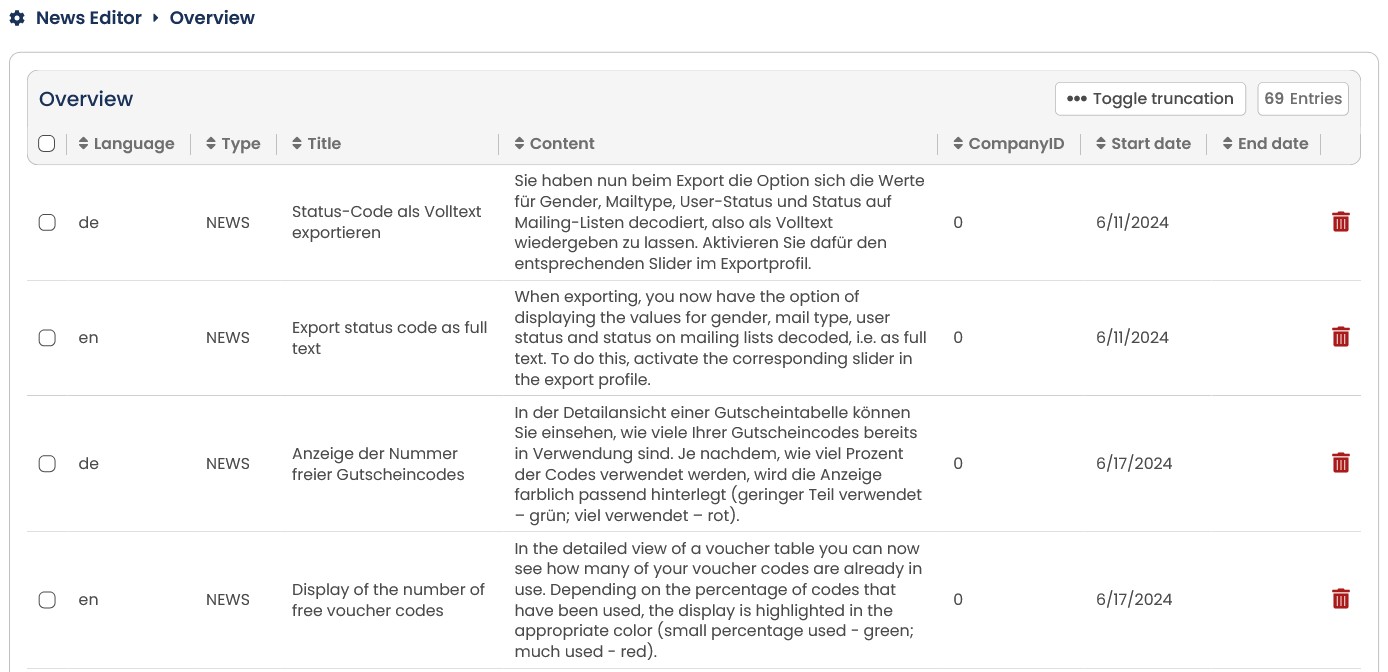
Fig. 15.23: The overview lists the notification for each language individually.