11.3 Creating a new form
You can create a new form by using the Import form button after clicking on Action to upload a template from the AGNITAS download area, for example. Or you can create a new form yourself using the New form button in the top right-hand corner. After clicking on New, the input dialog for forms opens. By default, all new forms are already marked with the status active. However, if you do not want to mark the form as active until it is completed, deactivate the slider in the meantime.
- In the first step, enter a unique Name for the form.
Note that this Name is integrated directly into the URL of the form and for this reason may not contain any special characters or spaces. You should also remember that this URL may be displayed in plain text for your recipients or website visitors and choose the name carefully. Upper and lower case is not important and can be used as desired. If the name has already been used in your client, you must choose another name.
- In the Description field, it is best if you enter a detailed explanation of where this form is used and what function it has. It is important to be particularly clear here because of the restrictions on the form name. You can write anything here, it is only for you to see in the E-Marketing Manager.
Tip: If you use forms to represent a multi-stage process, such as double opt-in registration, it is recommended that you number the forms in the description, e.g. with "1 of 3: Newsletter registration". Also the specification of the validity period (e.g. used from DATE to DATE) can be very advantageous for verification purposes, if adjustments were necessary due to legal changes.
- Depending on which task your form is to perform, you can now select a previously created trigger in the Introductory trigger field. A trigger is always linked to a recipient profile. For example, you can first load data from a profile and then display it in the form. Other triggers include activating the newsletter before the recipient sees the welcome page, or changing the recipient profile before he or she receives the change confirmation form. There are countless ways in which you can work with triggers. You can read more about triggers in the chapter Trigger management (Actions).
Please note: A trigger only works if the form is called with a valid recipient user ID (agnUID). If you want to check the form later to see if everything fits, you must proceed as follows: You can get a valid agnUID by embedding the affected form in any mailing and appending the parameter "&agnUID=##AGNUID##" to the link. Then click on this link in the preview for a test recipient. This way you can also directly check whether the trigger used does exactly what you expect.
However, you can also create forms without an introductory trigger if the form works without retrieving existing recipient data. This is the case, for example, when you subscribe to a newsletter. Here there is not yet a record in the recipient database that could be loaded. In this case, simply select the No action entry.
- In the next step you create the Success form. You can either construct the form using HTML, design it using the WYSIWYG editor, or use the Form generator. Of course, you can also include images and links in addition to form fields. You can find out more about these options in the chapters Integrating images in forms and Integrating measurable links in forms. When designing the form, it is basically important whether it is used standalone or embedded in a website. For a larger working area, you can also enlarge the input area on the right above the editor.
Note: For the standalone version, we recommend that you include at least the imprint and a link to your privacy policy.
Standard information that must be included in the background is automatically prefilled and this should not be removed so that the data can be assigned to the correct client. New elements are simply inserted into the content area by clicking on the appropriate type in the right sidebar. If you want to submit information in the background, use the Hidden field type for this purpose. By default, new forms include the agnCTOKEN (as an ID for your client) and the agnUID (to identify the recipient) as hidden fields. All other types are visible. Then you can edit the settings, e.g. label, display, mandatory field, etc., by clicking on the pencil icon, as well as create the link to a profile field. You can sort the fields in order by dragging and dropping. Of course, you can copy or remove fields using the controls on the right.
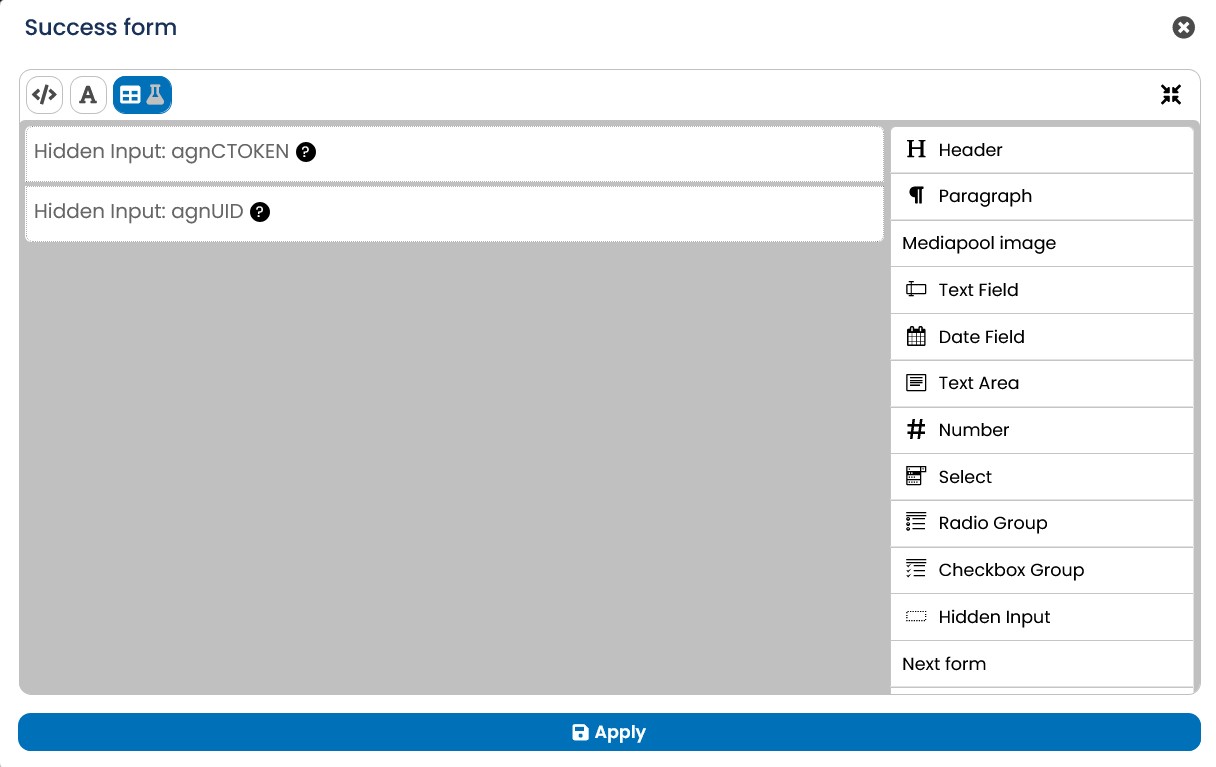
Fig. 10.3: The form generator
-
The form generator already offers templates with the most important settings for particularly common use cases, e.g. unsubscribing, adding recipients, profile modifications.
-
Important: The code for the form is only created by clicking on Apply. The code is based on a neutral and responsive standard design.
-
Please note: This code can also be edited further using the HTML editor, but then it can no longer be displayed in the form generator.
-
Sometimes it can also happen that after a successfully executed introductory trigger, you do not want to display a form from the E-Marketing Manager but a landing page that comes directly from your CMS, for example. This could be a welcome page directly
within your website after the double opt-in registration has been completed. In this case you do not have to enter any content at all in the input field for Success form, but simply activate the selection Success URL. Now enter a link to the corresponding landing page. Optionally you can use the parameter \$!requestParameters.EMAIL. With this parameter, recipient-specific information from E-Marketing Manager forms can be forwarded to external landing pages or queried and used by the landing page.
Note: As explained in the chapter Displaying existing data, forms can be prefilled with recipient data after it has been loaded. We use \$!customerData for this purpose. Once this requirement has been met, the success URL can also be used with the placeholder, e.g. to fill external landing pages with information from the E-Marketing Manager database. For example, first and last name would be possible: https://meineurl.de? vorname=\$!customerData.firstname&lastname=\$!customerData.lastname Please note: Do not transfer any sensitive data during this process.
- If you want the E-Marketing Manager to perform a trigger (again) after submitting the Success form, select the corresponding trigger in the selection menu Final trigger. This could be, for example, the sending of the double opt-in mail. Otherwise, simply leave the selection at No trigger.
-
If the E-Marketing Manager could not load the success form, e.g. because it did not find a valid agnUID although an initial trigger should be performed, it will display the Error form instead. You can design this form with HTML or the WYSIWYG editor just like the success form. You can also work with form fields in the error form and pass data to the E-Marketing Manager. In this case, a new recipient data record is created. Again, you should provide your imprint, possibly contact information and a link to your privacy policy if the form is used standalone. Alternatively, there is also the possibility to link to an external landing page by activating the option Error URL and entering the corresponding link.
-
At the latest when you are finished with your entries, click on the Save button in the upper right corner. Immediately after saving, you will be offered additional tabs for Images, Links and Statistics as well as the Action button. You will learn more about this in the following chapters. You will also find concrete example forms below. The most important change, however, is the URL directly below the name. You also need this to call up the form from a mailing with agnUID. You can learn more in chapter Inserting forms into mailings.
You can find tips on content creation in the chapter Content form design.
Please note: After creating the form, you cannot assign default values anymore.
After you have successfully created the form, the EMM offers you the possibility to test the form. You can choose whether the test runs with or without a recipient.
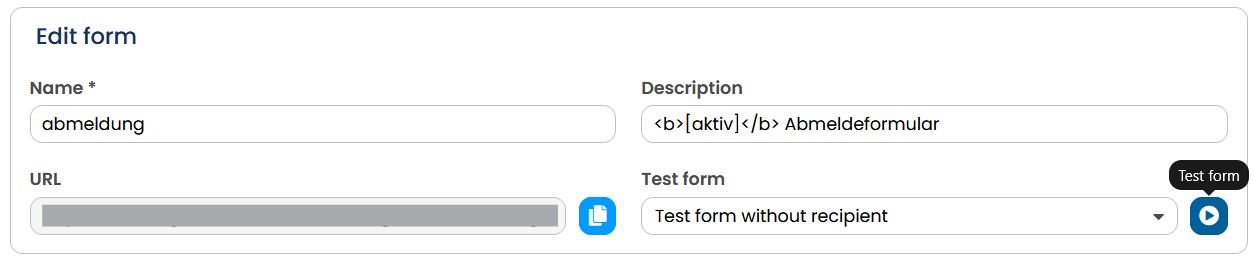
Fig. 10.4: Testing a form