3.4 Dashboard
Directly after logging in, E-Marketing Manager shows you as standard the contents of the menu point Dashboard. The dashboard makes the most important system data visible in a condensed representation. In E-Marketing Manager, this view helps you to immediately gain an overview of current mailing activities. With the dashboard, you therefore remain, for example, up to date even if you have not worked with the system for some time and want to gain a quick overview after your return.
You can customize your own dashboard. To do this, click on Edit view. You now have the option to remove existing tiles from your dashboard or replace them with other elements. The EMM shows you an overview of available elements when you click on Add new tile. Select the desired element and click on Save view. These settings will be saved for your computer, which means the E-Marketing Manager shows you the chosen outlook again when logging in with the same device. To the right of the View button you find the dropdown menu New. This button offers you the opportunity to create new mailings, templates or target groups as well as to add new recipients. You can also use this function to import mailings and templates. This useful shortcut saves you the detour via navigation. At the top right, you will also find a button that takes you from the dashboard to a full-screen calendar view.
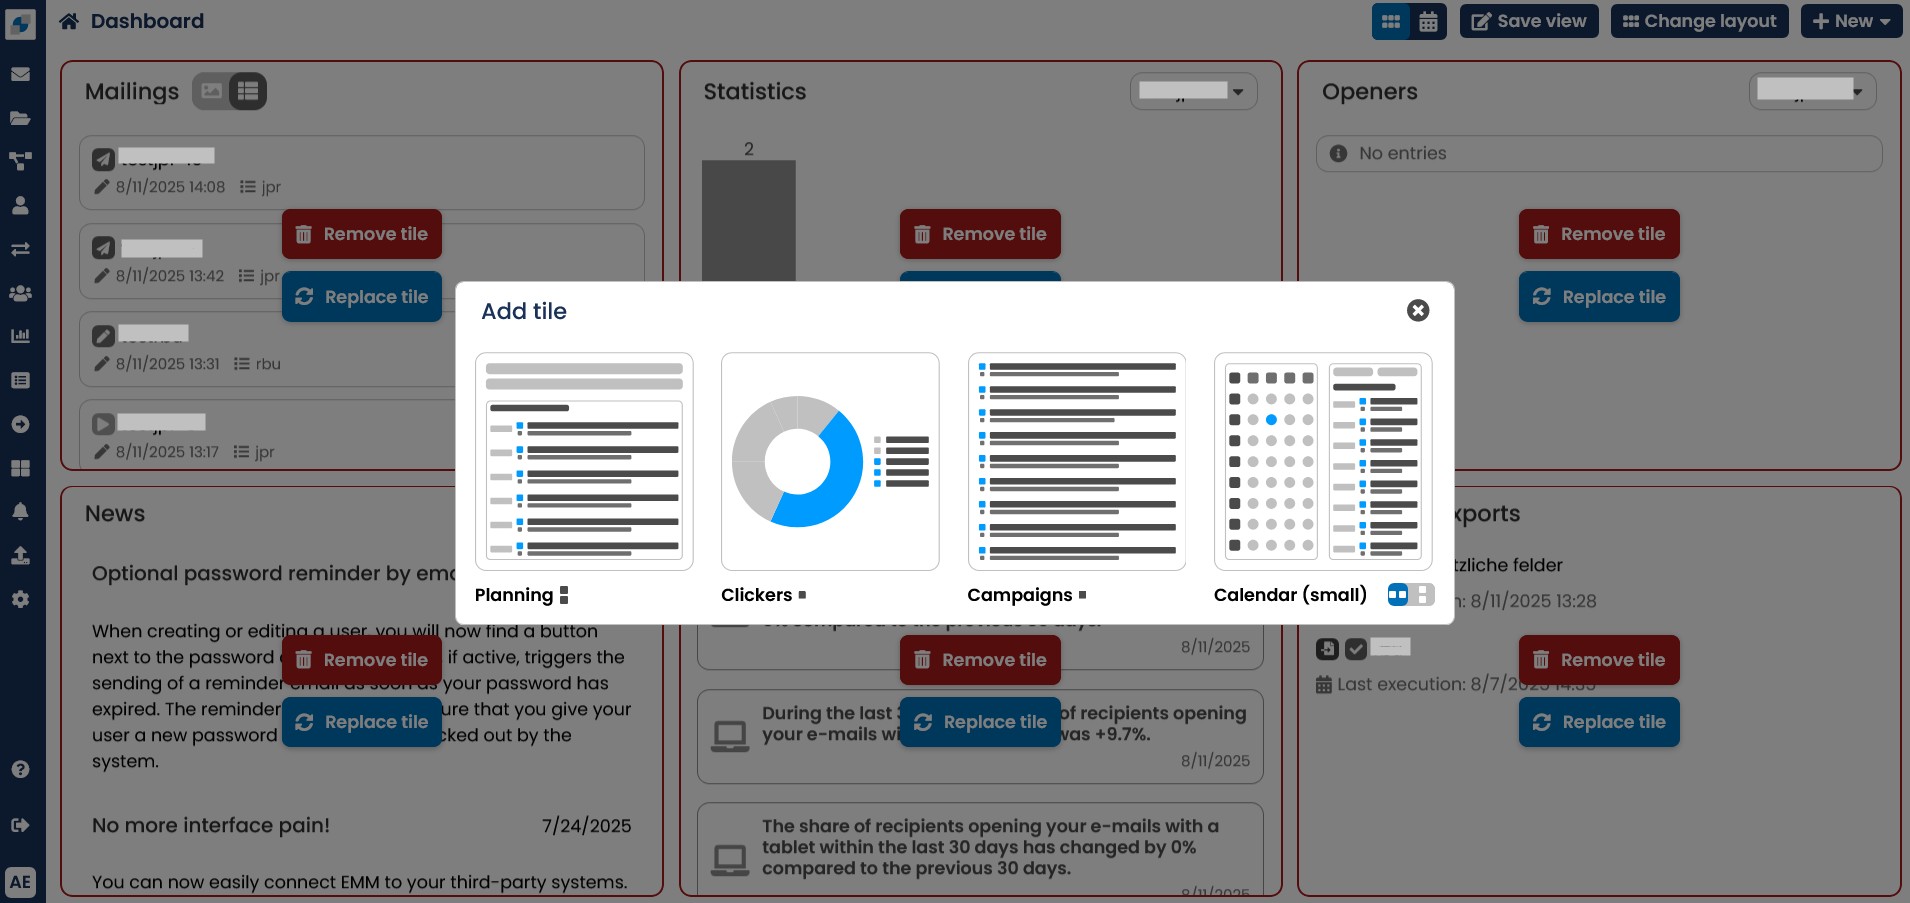
Fig. 2.12: Design your dashboard according to your own wishes.
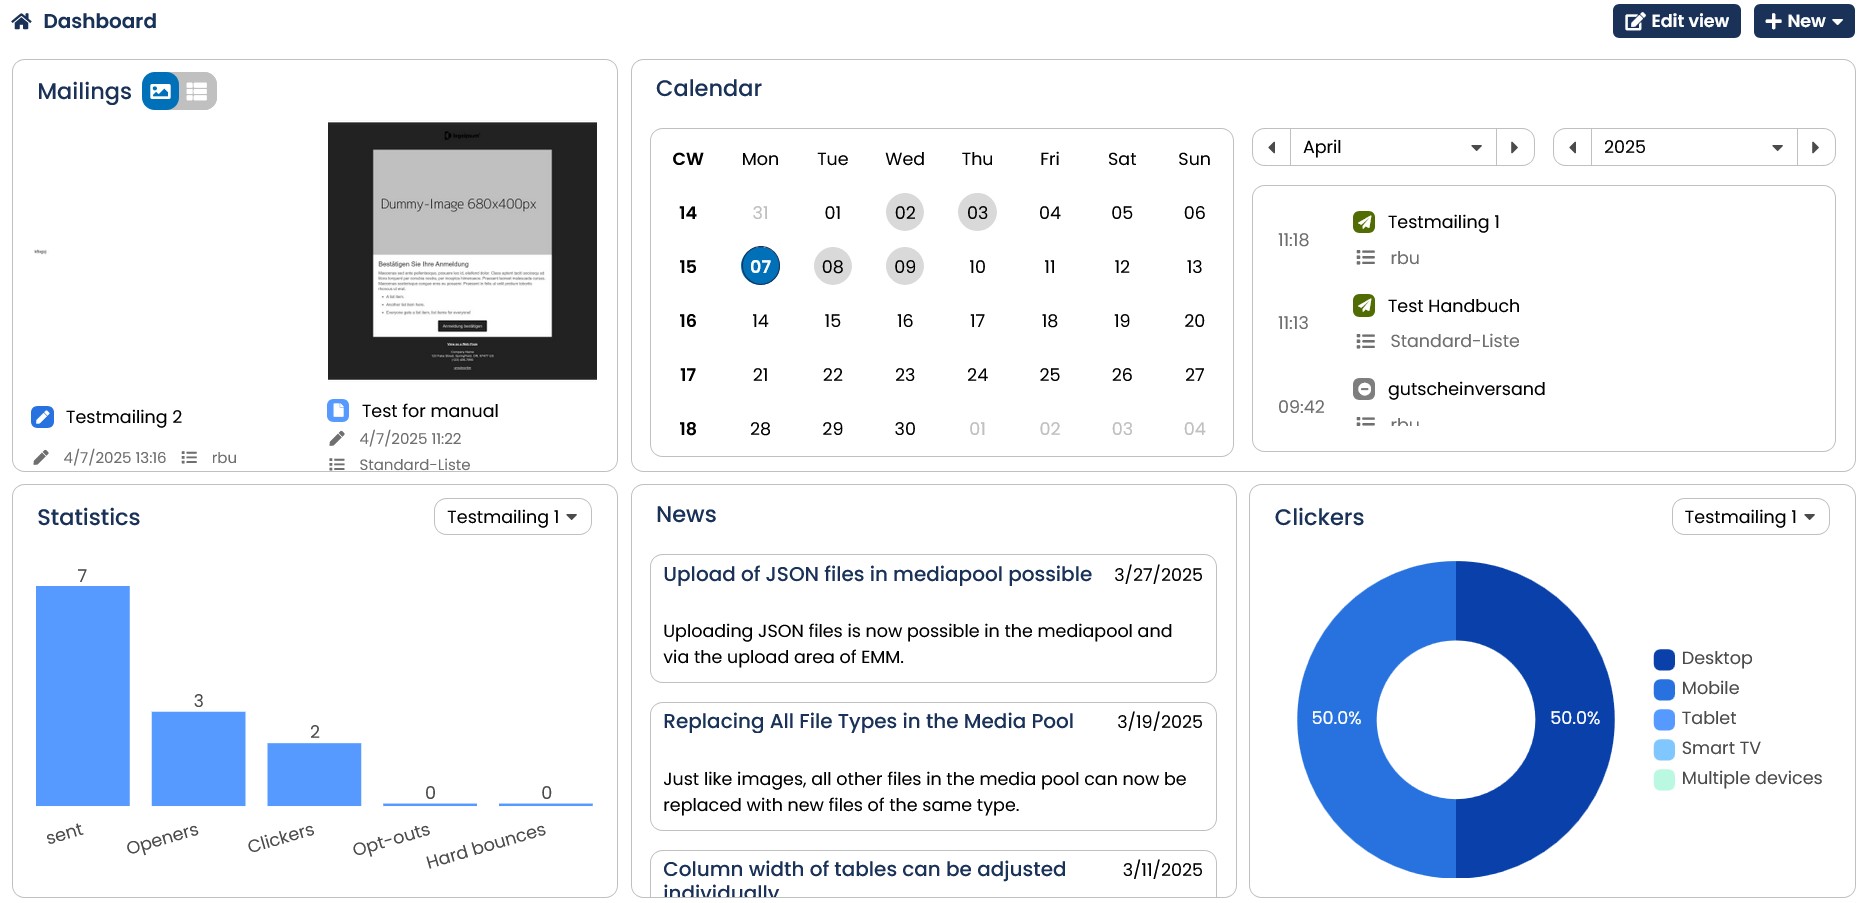
Fig. 2.13: At a glance: The dashboard of E-Marketing Manager informs you about the most recently used mailings, provides you with statistical key figures and gives you an overview of planned and already executed actions.
Contents for the dashboard
- One of the most important components of the dashboard is the Calendar. EMM offers you the option of integrating the calendar into your dashboard in three different formats. This function helps you to plan and perform mailings and shows you at a glance the status of the planned and already performed actions. The integrated comment function allows you to save and schedule tasks and notes and even to assign them to specific employees. Therefore the calendar offers a great usability, a dense overview and
detailed possibilities to plan actions. Find more information about the calendar in the chapter Calendar function.
- The tile Mailings contains all mailings that have been edited recently. These entries are sorted in chronologically descending order, therefore the most recently edited mailing always appears in the uppermost place in the list. Moreover you can switch directly to the corresponding mailings via links. If the mailing hasn’t been sent yet, you will be forwarded to the Mailing tab where you can enter basic information of the mailing. You can find more information on this in the chapter Entering basic mailing data. In case of already sent mailings you will be forwarded to Statistics. If you move the mouse over a row in the list view, you will also be offered the icons for copying and deleting the mailing. Once you click the image-icon at the top of the list, EMM shows you all mailings with a small preview image, which allows you to find a desired mailing more quickly. It also shows you the editing mode of a mailing. The dashboard thus saves you time and speeds up your work process. Mailings assigned to mailing lists for which you don't have permission, will also be displayed, since you can still use the mailings as templates.
For a better overview, the dashboard gives you additional information on each mailing entry. To the left there’s an icon informing about the status of the mailing. E-Marketing Manager presents you your mailings in icons for the statuses new, edit, ready, admin, test, scheduled, sent, canceled and sending. By moving your PC mouse to the icon, you can see this mailing status. There’s more information about the statuses of the mailings in the chapter Overview of existing mailings.
Below the name of the mailings you can find the attached mailing list, as well as the change date. If the mailing has already been sent, you can see the send date to the right of the change date. Mailings, that are being used in a campaign, have the additional label C.
-
The dashboard provides you with even more information in the Statistics tile. By default, you are shown a bar chart with the most important key figures for the last mailing sent. This includes the number of emails sent, openers, clickers, Opt-outs and hard bounces.
-
Two additional selectable tiles with pie charts provide you with figures on which end devices openers and clickers used. A distinction is made between desktop, tablet, mobile, smart TV and multiple devices. Any mailing sent can be selected to display the statistics via the dropdown in the top right corner.
Important note: If you generally do not use personal tracking for your client, some key figures will not be available in the summary. This affects Openers (measured), Openers (invisible), Openers (total), Clickers, and the evaluation of Openers and Clickers by device type. These key figures are directly related to a recipient profile and can therefore not be determined. All responses (opens and clicks) are only recorded anonymously, which means it is unclear from how many people the responses came. This means that it is not possible to extrapolate the invisible openers even for anonymous openings.
-
If you add the Imports & Exports tile to your dashboard, E-Marketing Manager will show you the last ten (auto) imports and (auto) exports you have carried out.
-
The Analysis tab, also referred to as the MIA (Marketing Intelligence Analyzer), provides information on the recipient's development in the account, the response numbers per terminal type, and the range within the distributor. The most recent developments are at the top, accompanied by a red or green icon, depending on whether the values are positive (green) or negative (red. Currently there are ten different icons, according to the individual analysis types.
Note: MIA is available as a standard feature as well as a premium feature. In contrast to the free version, which updates your data only every 30 days, you will receive a daily evaluation and forecast values within the premium feature.
3.4.1 Calendar function
With the help of the calendar, you have all mailing appointments centrally under control. You can use the calendar in three ways:
-
You can use the comment function to be reminded of upcoming mailings or tasks.
-
You can plan and process mailings for a specific date.
-
You can evaluate mailings that have already been sent.
In total, EMM offers you three different calendars for your dashboard. You can select the appropriate calendar for your personal dashboard via Edit view.
Note: For a full-screen view of the calendar, click on the calendar icon in the top right corner of the header bar. EMM will then show you a calendar that utilizes your entire screen size. You can further customize the display in the Settings dropdown at the top.
The calendar function of E-Marketing Manager makes it easier for you to plan and carry out mailings and shows you the status of planned and completed campaigns at a glance. In addition, unplanned mailings can be displayed to the right of the calendar so that they are not forgotten. With the integrated comment function, tasks and notes can also be stored in the calendar, scheduled and assigned to specific employees. As a result, the calendar function offers users greater ease of use, a compact overview and better planning options. As the calendar offers a wide range of options, the individual functions are explained in more detail here.
Select the appropriate view and navigate in the calendar
The calendar function provides various views for quicker orientation. You can switch between the monthly view and the display of calendar weeks with a single click. You can use a drop-down menu or the scroll function to quickly switch to the period you are looking for. The calendar thus provides a structured overview of past and planned emails, comments and tasks.
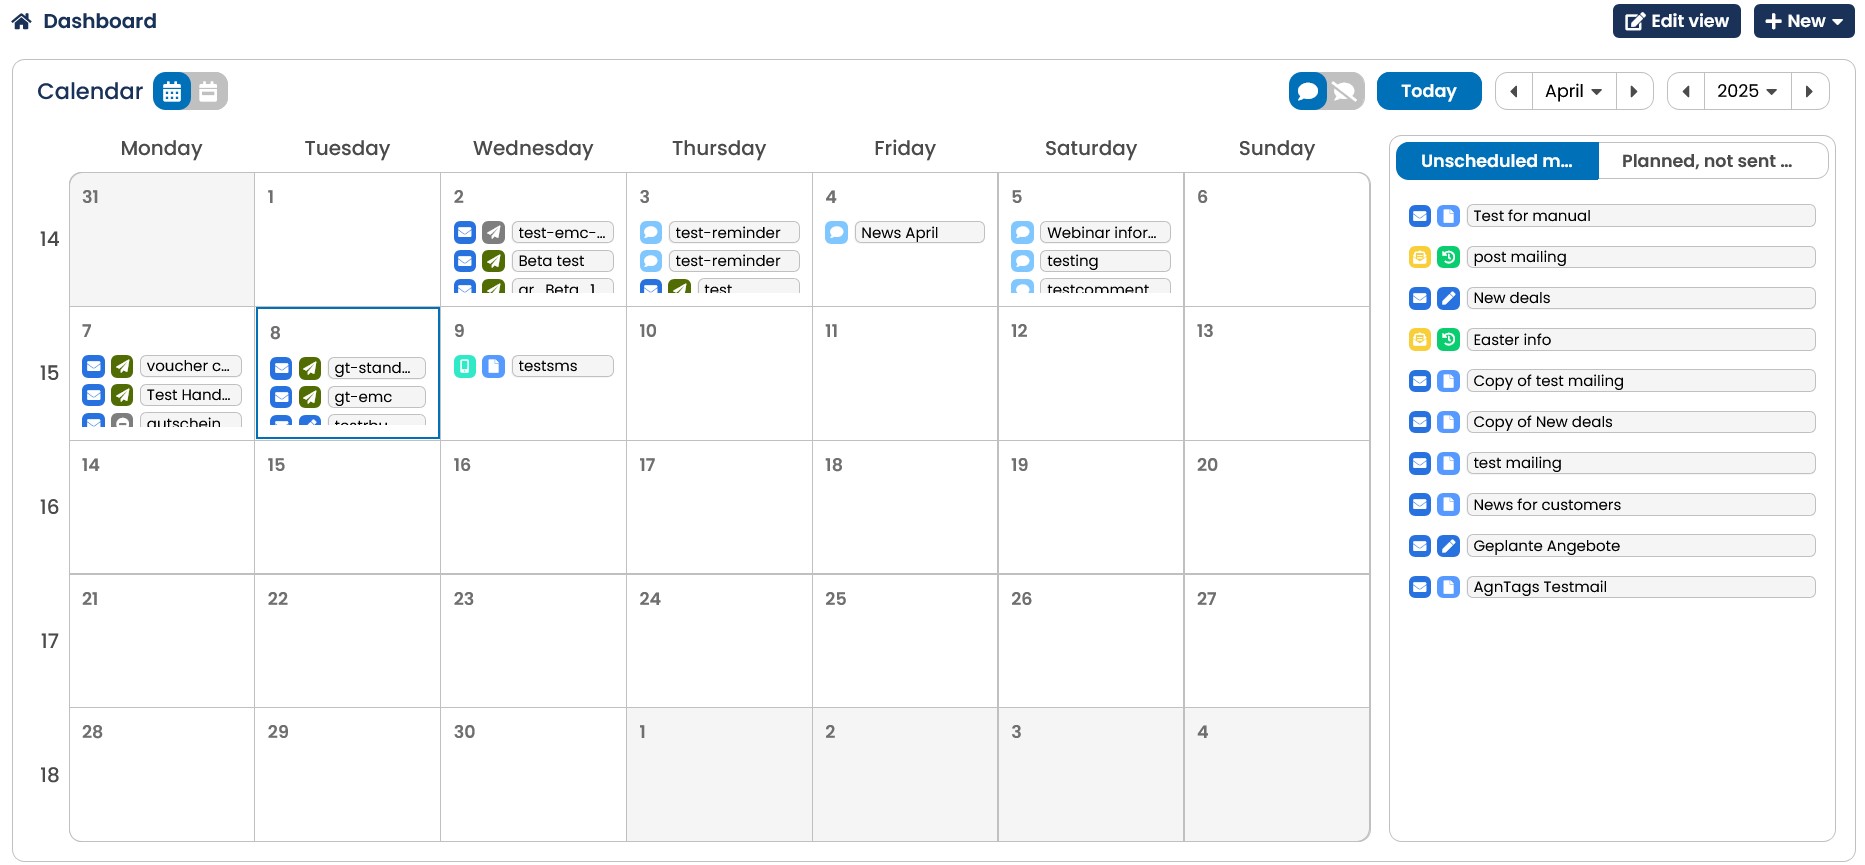
Fig. 2.14: The calendar provides you with an overview of all planned and completed mailings, as well as unplanned mailings. The image shows the large calendar.
You also have the option of adding a smaller monthly version of the calendar or a small weekly calendar to your dashboard. This leaves more space for other elements:
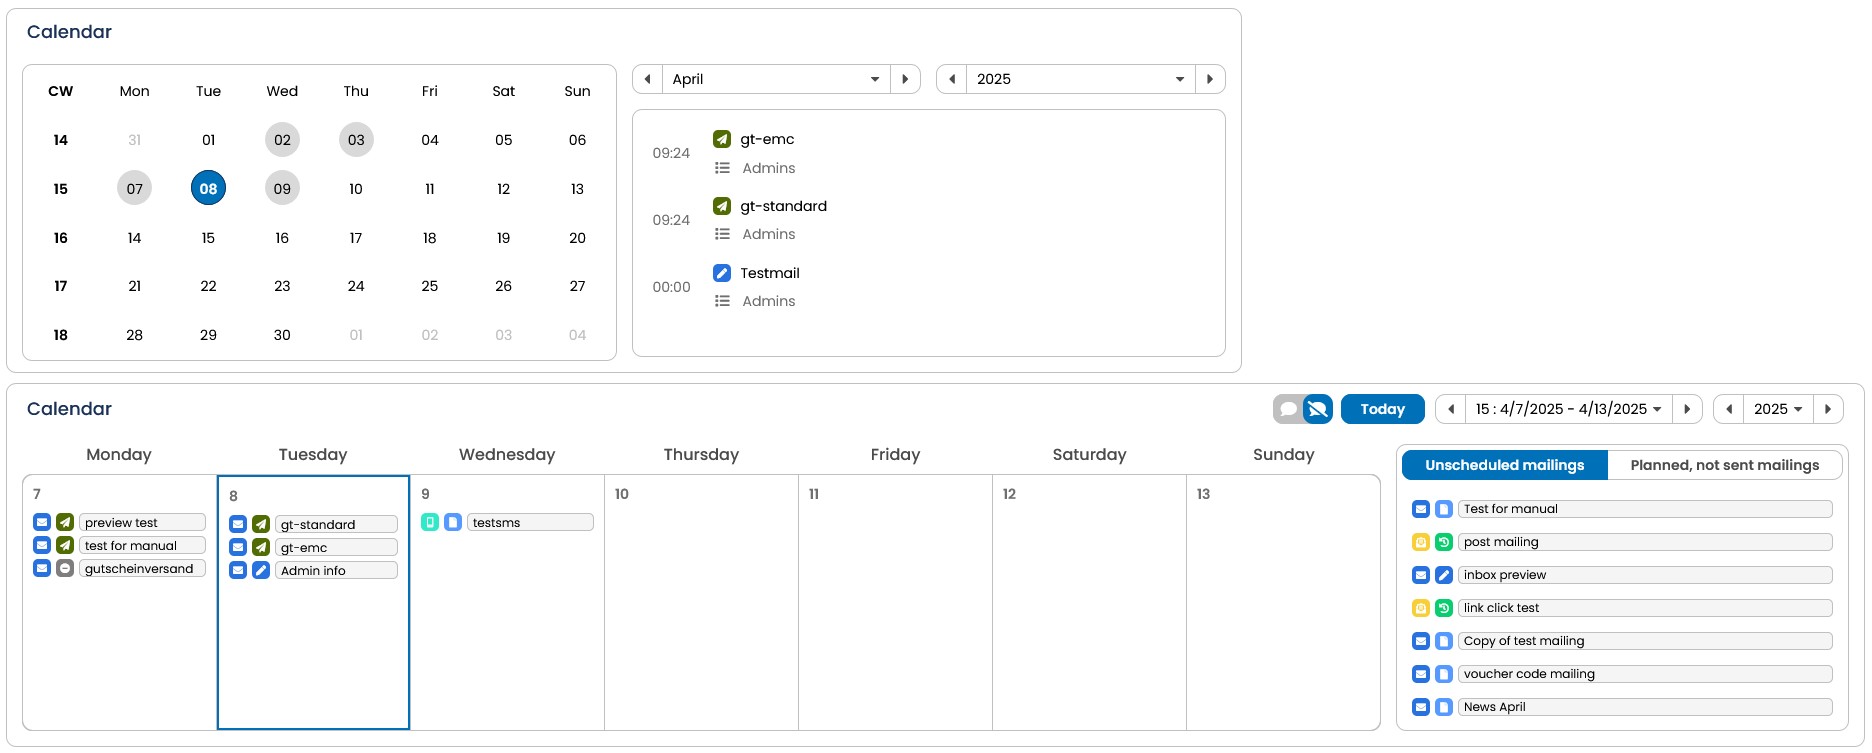
Fig. 2.15: Here you can see the small calendar & the weekly calendar. They are space-saving versions of the large calendar.
There are two ways to navigate in the calendar: You can either use the arrows above the calendar to jump forward or back one month or you can use the selection fields for month and year. Clicking on Today always takes you back to the current date.
Tip: If you plan comments or appointments in the month of December to January and jump to January, don't forget to change the year! Or use the arrows to scroll forward one month the year will then change automatically.
If you are currently working with the weekly view, you can use the arrows on the left-hand side to jump forward or back one week. This allows you to scroll quickly and easily through the calendar weeks. You also have the option of selecting the desired week and year in the drop-down fields on the right.
Reminders and teamwork with the comment function
The comment function helps you to keep track of many upcoming planned mailings. On the one hand, your comment is visible in the calendar (depending on the setting) and on the other hand, the function acts as a reminder. Each comment entered can be sent to a user with a reminder via email. This can be yourself, other users from your client or other recipients. If you would like to temporarily hide the comments in the calendar, click on
Show/hide comments.
To enter a comment in the calendar:
-
Move the mouse pointer over the day on which you would like to enter a comment. It does not matter whether you are currently using the weekly or monthly view.
-
As soon as the mouse pointer is in the correct field, a small blue speech bubble with a plus appears next to the date on the right-hand side. Once you click on it, the comment window will open.
-
Enter a comment of any length in the field.
-
If you would like to be reminded of this date by email, activate the Send reminder slider and choose between EMM users and Other recipients. For EMM users, E-Marketing Manager will give you a selection menu with the available user names. If you have selected Other recipients, you can enter one or more email addresses manually.
-
If the reminder function is activated, you can set the exact sending time. To do this, either instruct E-Marketing Manager to send you a reminder immediately or only on a specific date. With a specific date, the day on which the comment is entered, for example at 8 a.m., is preset as the sending time.
-
Use the Save button to apply the comment.
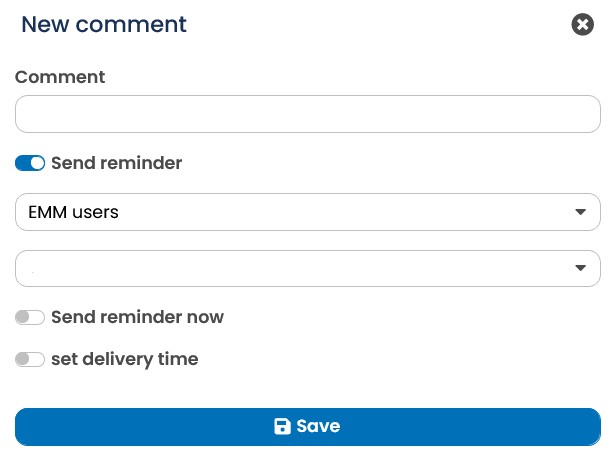
Fig. 2.16: The reminder function can be used for any comment of any length.
Overview of the status of all mailings
You can also use the calendar to check the dispatch of your planned mailings at any time. You can see all mailings that are normally scheduled and set for dispatch in the calendar overview. The E-Marketing Manager shows you the respective mailing statuses via icons and also highlights the mailings in color so that you know which mailings have already been sent and which are still pending. The following colors and icons are used:
| Icon | Color | Status |
|---|---|---|
 |
Dark green | sent |
|
Dark green | sending |
 |
Green | scheduled |
 |
Light green | approved |
 |
Purple | test |
 |
Purple | admin |
 |
Blue | edit |
 |
Light blue | new |
 |
Red | canceled |
If you move the mouse pointer over a sent mailing, the most important information is displayed in a layer: you see a thumbnail preview as well as the subject, status, number of recipients, openers and clickers.
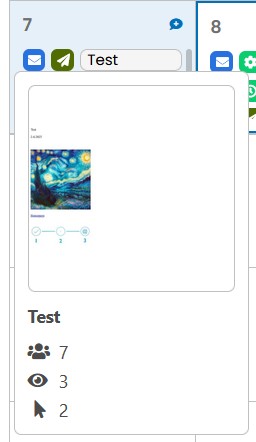
Fig. 2.17: For quick info, simply hold the mouse pointer over the entry.
Plan mailings with the calendar
The calendar not only allows you to keep track of mailings that have already been scheduled or sent, you can also use it to plan new mailings. In the settings of a mailing, you can enter a date for the planned mailing at any time. To do this, select the desired date from the calendar in the Plan date field. This works for all mailings that have not yet been sent. You can also delete the date set in the Plan date input field at any time.
All mailings planned in this way then appear directly as entries in the calendar. Mailings that are not yet ready to be scheduled for dispatch can also be planned in this way. In order for E-Marketing Manager to send them, you must also set the dispatch (menu item Mailings, Send mailing tab).
Quickly editing a mailing using the calendar is also just a click away: as soon as you click on the mailing entry, it opens for direct editing. If, on the other hand, you click on a mailing that has already been sent, you jump directly to the evaluation in the statistics tab.
As soon as you set a dispatch date in the Send mailing tab, the option to set a date in the Plan date input field disappears and the mailing is sent on the set date. If the planned date is reached without the corresponding mailing having a dispatch date, the user who has been set as the statistics user in E-Marketing Manager will receive a reminder by email.
Next to the calendar you will find a table with all unscheduled mailings so that they are not forgotten. You can also use the header (right-hand margin) to set the system to display planned mailings that have not yet been sent instead.
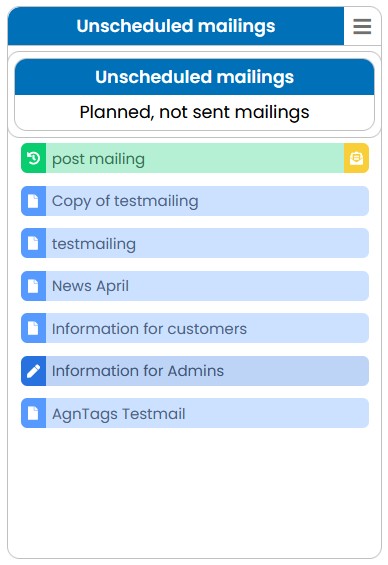
Fig. 2.18: You can use the header to select which mailings are shown in the sidebar (view: calendar in full screen function).