4.4 Create, edit and send mailings
If you want to create a new mailing, the E-Marketing Manager first asks you which method should be used to create your new mailing. So that you know which method is best for you, we briefly introduce the methods here.
-
Standard Mailing: there are two typical use cases for this method:
-
The standard method is especially recommended for users whose mailing design canvary greatly from time to time and who want to remain as flexible as possible by entering
HTML.
-
The standard method is also used if you have a "rigid" framework - i.e. your editorsonly have to enter text, links and images, but the structure is otherwise always the same. HTML is not absolutely necessary for this approach.
-
E-Mail Creator: The E-Mail Creator makes creating your newsletters a breeze. It allows you to arrange content modules by drag & drop. So you can immediately see the visual impact of your newsletter. The size, placement and order of the building blocks can be changed at will. Knowledge of HTML is not essential in this method · SMS: Select this type, if you want to create a new SMS.
-
Import mailing: Import is only indirectly a method. You can take over a finished mailing template from another client or from AGNITAS. It does not matter whether the mailing to be imported was created using the standard method or the Email Creator.
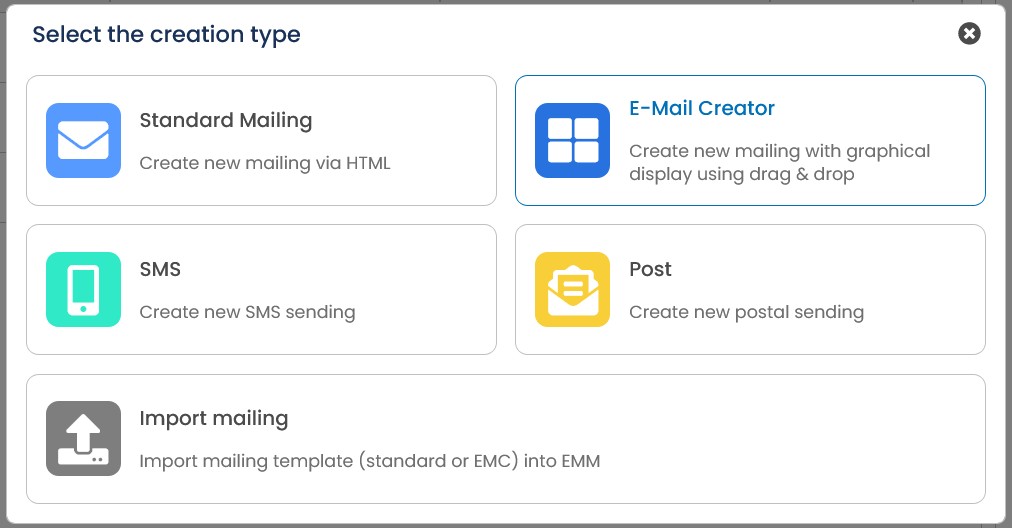
Fig. 16.53: The system offers multiple ways to create a mailing
With all methods, you basically have the option to enter your content in different ways:
-
On the one hand, you can insert and format content in the same way as in a homepage by using HTML.
-
On the other hand, it is also possible to edit texts with the so-called WYSIWYG editor (what you see is what you get) - similar to Word.
Note: If you do not work in the E-Marketing Manager for 30 minutes or do not show it within this time that you are still active, for example by saving operations or loading a new page, a so-called session timeout occurs and you are automatically logged out of the E-Marketing Manager. So that you do not lose in this case already transacted work steps completely, an AutoSave is accomplished every 10 minutes and your work procedures are stored thus automatically temporarily. When you log in for the first time after a session timeout, you will be taken to the last object you worked on and asked whether you want to save the
changes you have made but not yet saved. This function only applies to mailings, templates, content modules and forms.
Note: If the content of a mailing is being edited by a user, then it is locked for other users during this time. This lock is to prevent adjustments made by one person from being accidentally overridden by another. The lock does not take effect if the same user has opened the mailing in two different windows.
4.4.1 Different media types
E-Marketing Manager can do more than just send e-mails: it also sends printed letters or even text or multi-media messages to mobile phones. When selecting the creation type of your mailing, you can also select what type of message the system should send. Please note that in each case, the relevant data must be available in the recipient’s profile, i.e. the database must contain the street address, the mobile phone number etc.
4.4.1.1 Media type: E-mail
After selection the creation type Standard mailing, a pop-up window asks you to choose whether you would like to use a template or not. Moving on, the next page asks you to enter all the relevant data to set up your mailing: the name, Subject, Mailing list, Sender e-mail and Reply-to e-mail.
- The Subject field takes the reference that will appear in the recipient’s e-mail heading. The success of a mailing depends to a large extent on the wording of this subject heading. Most e-mail clients only display the subject, and many recipients decide on the strength of that heading whether to open the e-mail or delete it unread.
Please note: It is possible to create individual subject headings using AGNITAS tags. For details see chapter Creating customized mailings.
- The Sender e-mail is the sender address of your newsletter. You should therefore always enter a meaningful address such as newsroom@yourcompany.com, which exists in reality.
Please note: A DKIM signature must be present for the sender domain. DKIM stands for DomainKeys Identified Mail and helps to ensure the delivery of your mailing. For this purpose a key pair is created that is checked for every sending. As the owner of the domain, you must store one of the keys – we use the other key when sending the mailing. A comparison of the two guarantees that we are lawfully sending in your name. If no signature is present for the domain used, E-Marketing Manager issues an error message. In such a case, please contact AGNITAS Support.
- The Reply-to e-mail is the address for replies when the recipient clicks on reply in his or her e-mail program. You should therefore always enter a meaningful address such as newsletter-editorial@yourcompany.com, which exists in reality.
Once you filled out all the information, you get redirected to the Settings page of your new mailing where you may specify more details such as: Description, Format, Pre-Header, Sender full name, Reply-to full name. To better coordinate the process, the EMM shows four different submenus of the Settings tab: General, Sender, Frame Content and Extended.
-
Enter be Pre-Header the text that is displayed by most email clients directly below the subject in the mailbox. The character counter shows you the length of your text.
-
The Format drop-down list selects the e-mail format. Text, Text and HTML and Text, HTML and Offline-HTML are the possible options. For our example, set Text.
-
It is possible to assign different names to the sender’s real-name address (Sender full name) and the reply-to address (Reply-to full name). The actual e-mail address behind the names remains the same, they are just differentiated by the name displayed. The different names may be entered into the two fields If you enter only one name, e.g. into the Sender full name field, it will be used as the Reply-to full name as well.
-
If you have selected Date-based as the mailing type, you will also be offered an input field called BCC recipient, in which you can enter an e-mail address for archiving purposes.
In the category Advanced you can additionally make the settings for Character set and Measure opening rate.
-
The Character set drop-down list sets the character encoding within the e-mail. The default value Unicode (UTF-8) is suitable for all Western European languages. You only need to select a different character set if you want to use other languages, like Greek or Japanese.
-
The Measure opening rate: In order to be able to track how many HTML mailings were actually opened and read, a so-called “tracking pixel” is inserted into the e-mail. Whenever the newsletter is opened, the server loads the pixel and thereby registers a click.
In order to make absolutely sure that this important detail will not be forgotten, the software allows for automatic pixel insertion. You select whether page clicks should be counted and how. The tracking pixel will then be integrated automatically, either at the beginning or at the end of the e-mail message according to your selection.
Insert at top of e-mail: The server registers a click as soon as the e-mail is opened. Even when the recipient closes or deletes the message immediately after having opened it and before all images were completely downloaded, a click would have been registered.
Insert at bottom of e-mail: The server registers a click as soon as the e-mail including all images was completely downloaded. This is the conservative method. It returns slightly lower figures than a click track at the beginning of the e-mail.
It is also possible to insert a tracking pixel by hand using AGNITAS tags which you can find here Appendix A: AGNITAS tags.
4.4.1.2 Media type: Text message (SMS)
Sending text messages (SMS) is offered only as an optional service. If you are interested in this option, please contact the AGNITAS Support. A text message does not need many parameters:
- The Sender address shows the recipient who has sent him the message (just like in emails). You will need to enter a phone number here.
Please note: One SMS can contain a maximum of 160 characters. If your text is longer, the content will be split among several SMS messages. If you personalize the content with AGN tags, the number of characters may vary from recipient to recipient and may cause the content to be split even if the message contains less than 160 characters at the moment. Also note that smartphones usually display longer SMS messages as a single message, even if multiple messages are accounted for due to the number of characters.
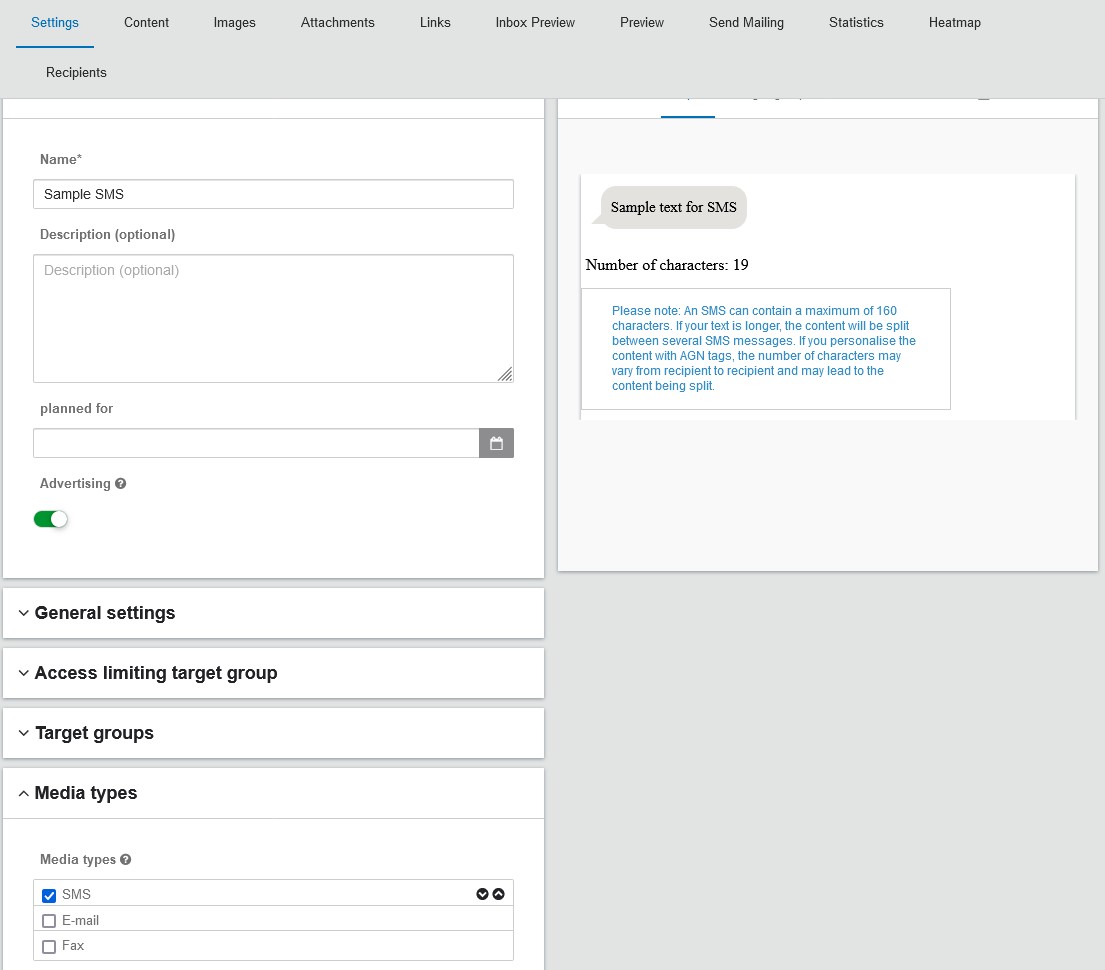
Fig. 3.3: For the media type SMS you have additional input fields for your phone number and the content.
Note: If you want to register a new recipient for the media type, you have to check SMS in the recipient profile in the respective mailing list. A registration is only possible if a phone number has been entered in the SMSNUMBER field beforehand.
4.4.2 Mailing types and when to use them
In the Settings tab of a mailing, you will find the Mailing type drop-down menu in the
General settings section. In the previous chapter, we left the Type setting at Normal Mailing and did not go into more detail about the individual types. The functionality, special features and areas of application for the respective types are presented in the following chapters.
4.4.2.1 Normal mailings
The majority of your mailings will probably have the mailing type Normal Mailing. This type is a direct mailing that is sent to the entire target group defined at a fixed time. Newsletters are a typical application. If you want to send the same content a second time, for example, to a different target group or mailing list, you must copy the first direct mailing and enter a new send date. Sending date and target group restrictions are the only rules that are applied here.
4.4.2.2 Followup mailing (Premium)
Sometimes it is useful to write to certain recipients of a particular mailing again, for example to those who did not open the original mailing in order to motivate them to read it. Or to those who have displayed interest in a certain topic in order to encourage them to undertake further action. If, for example, a recipient uses a link to look at a collection of the latest ladies’ shoes, the followup action could be to send the person the best offers available. Followup mailing permits this and other possibilities.
The method is the same as for a normal mailing, but as the name suggests, this is a mailing subsequent to the first one. Recipients who have displayed a particular behavior pattern are written to again. In this way, based on the activities of the subscribers, you can address specific recipient groups in an active and targeted fashion.
Followup mailings can be created for the following groups:
-
Non-openers: recipients who have not opened the mailing.
-
Openers: recipients who have opened the mailing.
-
Non-clickers: recipients, who have not clicked a link in the mailing.
-
Clickers: recipients who have opened the mailing and have undertaken further action in the form of clicks.
Measuring whether a recipient has opened a mailing or not, is done by an opening pixel. It is therefore necessary that you measure the open rate of your basic mailing.
For the measurement of the opening rate there are two limitations:
-
For text recipients a measurement of the opening rate is technically impossible because no opening pixels can be incorporated in the e-mail.
-
Many e-mail programs of today use picture blockers, which also block the loading of the opening pixel. If picture blockers are used, the opening of the e-mail will not be measured, even if the recipient has opened his newsletter - without the pictures.
In the above two cases, the followup mailing is nevertheless sent to the recipient. To blur as few mails to both openers and non-openers as possible, we recommend the use of followup mailings, especially when the proportion of text recipients is low.
There are two ways of setting up a followup mailing: Either by creating a new mailing with the mailing type Followup mailing, or by clicking on Create followup mailing in a mailing that has already been sent.
Setting up a followup mailing based on an existing mailing.
Open the mailing for which you would like to create a followup. Call the drop-down menu Actions in the upper right and click on Create followup mailing. By doing so you create a copy of the current mailing as a followup mailing. The E-Marketing Manager will automatically put Followup mailing in front of the new mailing's name. You can still modify all the contents of the mailing and the subject line.
If you wish to change an already existing mailing to a followup mailing, you can simply change the Mailing type in the General Settings area. In the following drop-down menus you can further specify the recipient's group as well as the parent mailing.
Please note: In the standard selection for previous mailings, E-Marketing Manager shows those mailings that have been sent in the last 90 days. AGNITAS can, however, modify this period as desired. To do so, please contact the AGNITAS Support.
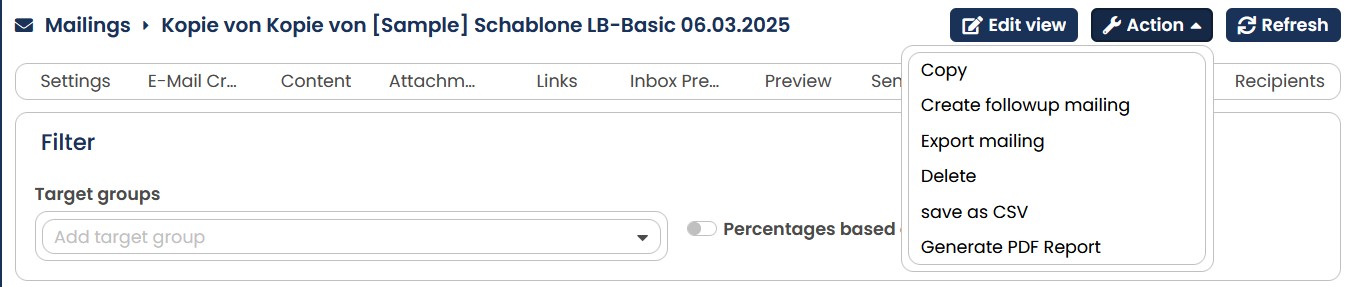
Fig. 3.4: The option to create a followup mailing can be found in the drop-down menu Action in the upper right.
Creating a new mailing with the mailing type Followup Mailing.
To set up a followup mailing click, as with any other mailing, on Mailings, then on New
Mailing. Once you created a mailing, you can select its mailing type in the Settings tab.
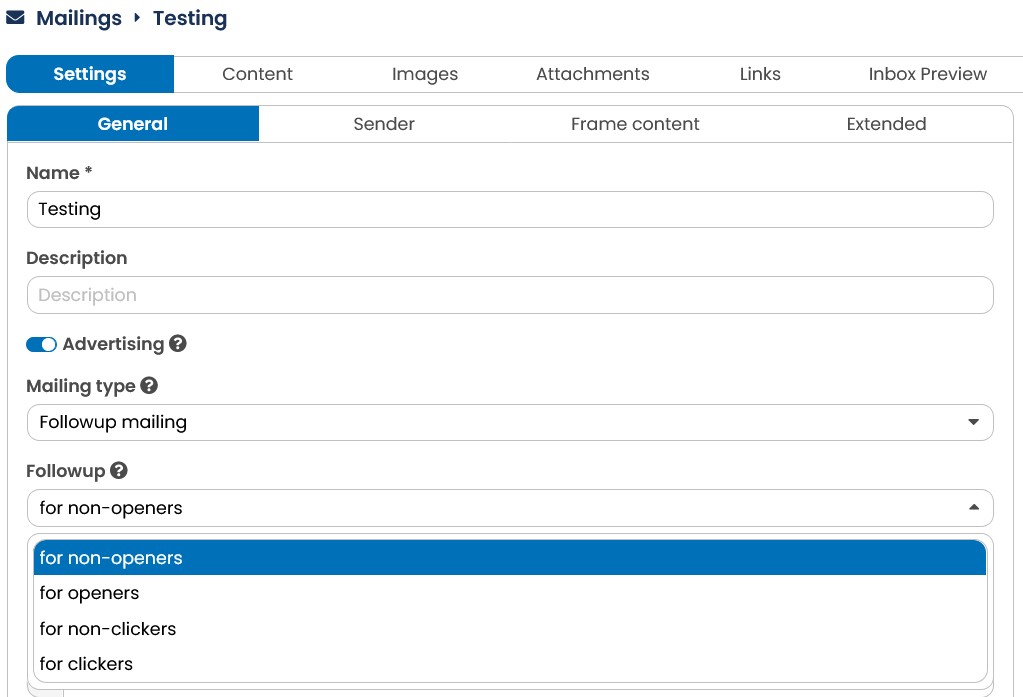
Fig. 3.5: The available possibilities
For all entries and the content of the mailings you are totally free as in the setup of any new mailings. As Mailing Type select Followup mailing and then determine the recipient group in the Followup drop-down menu below. The screenshot shows the available options.
Now you can determine the link to a previous mailing. When all entries have been made, save them and move on to the Send mailing tab. You can select a date and time at which you would like to send the mailing. At the selected point in time, each recipient who belongs to the defined recipient group receives the followup mailing that has just been created. The delivery of the previous mailing must have happened at least 24 hours ago to be able to use the followup mail function.
Please note: Followup Mailings are a premium feature. If you are interested in this option, please contact your Key Account Manager.
4.4.2.3 Automatic date-based mailings - an example
E-Marketing Manager provides you with the automatic date-based mailing function as a way of sending out automatic e-mails to coincide with special occasions. You define the rules (dates) and the E-Marketing Manager sends the mailings on the basis of these rules. By way of example, you can send mailings congratulating customers on their birthday, or even mailings to remind customers of special dates. E-Marketing Manager checks every day at the chosen delivery time whether the rules fit a recipient; if they do, it sends out the corresponding e-mail.
A date-based mailing is defined in three steps:
-
Extend your database so as to be able to store data meant to trigger a mailing. If you want to send out a mailing on the occasion of a customer’s birthday, you need to be able to store that date in a database field.
-
Define a target group setting the required rules. In words, this could be current date equals birthday, for instance.
-
Create a new date-based mailing triggered by the above-mentioned target group.
The following example explains how to create a date-based mailing which automatically sends out birthday greetings when triggered.
-
You need, of course, a field storing recipients’ birthdays in user profiles. Create a new Date field in the user profile (see chapter Managing profile fields). Now either enter birthdays by hand (which is tedious and time-consuming) or import existing data using a CSV file (see chapter Import function for recipient data). In the course of our example, we will assume that the user profile comprises a BIRTHDAY field containing the required date.
-
Now you will define a target group containing all recipients whose birthday is on the current date. In the navigation bar, select Target groups, then New target group in the upper right. Enter a meaningful Name in the corresponding field, for instance Rule: Birthday. The name makes it clear that the target group will be used for a date-based mailing. Do not forget a unique description for your target group.
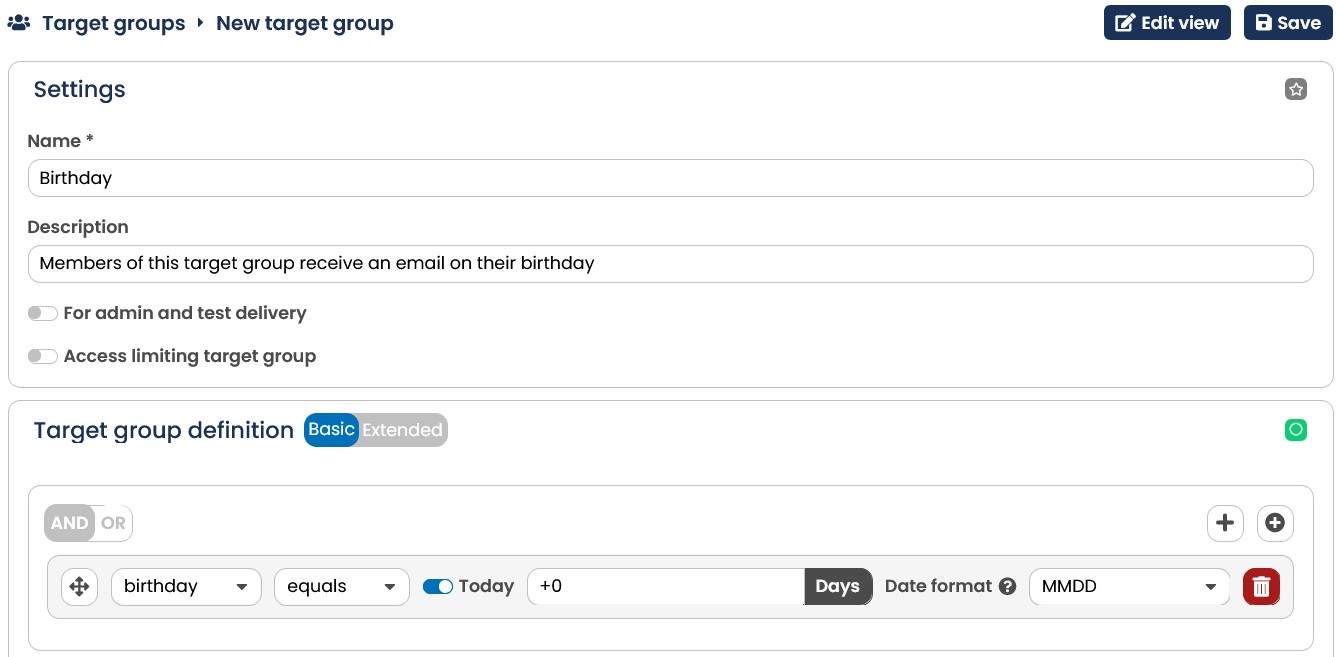
Fig. 3.6: You start by creating a target group with rules describing who should receive an e-mail.
-
In the first drop-down list, select the BIRTHDAY field. The relational operator is the (default) equals. Check the today box or enter sysdate into the reference value box. This is an internal variable by which E-Marketing Manager defines the current date. The variable sysdate can also be used for calculation purposes. sysdate-14 gives the date 14 days ago. Through creation_date = sysdate-14, for example, new recipients can be written to two weeks after registration. Further information on target groups is contained in chapter Target groups - Dynamic filters. To get more information on operators and how to use them, go to chapters Searching for fields and Search rule setup.
-
In the right-hand drop-down list, select MMDD as the date format. This makes sure only the month and day are checked. After all, you want to send birthday greetings to subscribers of any age.
-
If you want to describe your target group even more, enter additional values. Once you have finished entering the rules, click on the Save button.
-
Once you have finished creating the target group, click on the Mailings button in the navigation bar, then create a new mailing. All functions available for normal mailings (see chapter Mailings - Sending out newsletter) are at your disposal.
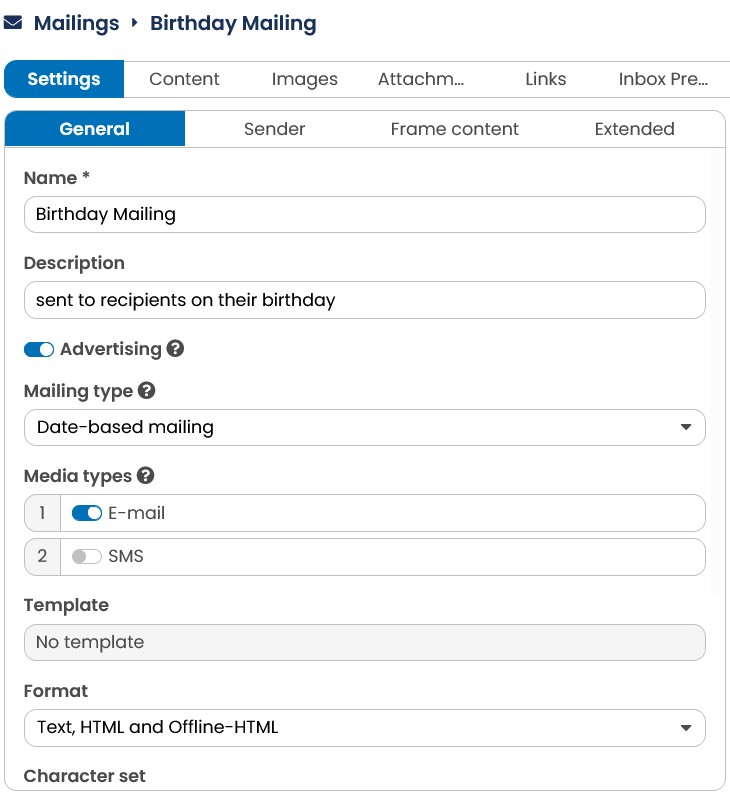
Fig. 3.7: Specify Date-based mailing as the mailing type
-
There is only one difference, and that concerns the Mailing type drop-down list. Select the Date-based mailing setting. Now select the previously defined target group in the Target group drop-down list (Sender tab). Now click on the Save button.
-
To activate the date-based mailing, click on the Send mailing tab. Click on the Activate button in the upper right corner to send the date-based mailing. From now on, the system will check the rules every day and send out an e-mail to all recipients of that particular target group. In our example, this will be a mailing with birthday greetings.
Note: If you subsequently adjust the target group of your date-controlled mailing, you can decide whether the mailing is to be resent on the same day or on the following day.
- It is possible to select any time for sending out a date-based mailing by specifying the exact hour and minute of the day for sending the mailing. The date for sending out the mailing will be generated automatically as soon as the conditions set in the rule are fulfilled.
Please note: When clicking on a mailing which has already been activated to see its settings, you will notice that gray colored information / content may no longer be changed. They are the drop-down lists Mailing list, Target group and Mailing type. These disabled elements are greyed out by E-Marketing Manager. A date-based mailing must be de-activated first before you can make any further changes. Open the Send mailing tab and click on the Deactivate button. You may now make any changes you want. Don’t forget to activate the mailing again once you have finished. This is done in the Send mailing tab as well.
Subsequently, the E-Marketing Manager offers you the possibility to define Security and notifications. Here you can define that the mailing is automatically stopped and a user defined by you receives a notification if the target group of the newsletter exceeds the threshold you have defined. For Threshold, enter the maximum number of recipients who may receive your mailing. If this value is exceeded, the mailing is automatically deactivated and you receive a notification mail to the addresses stored under Recipients. In addition, you can also use Send status mail only for 0 e-mails to receive a notification if the mailing wasn't sent, contrary to expectation.
If a previous import is required for sending your date-based mailing, you can have the sending automatically cancelled if the import has not taken place for various reasons. Open Security and notifications in the Send Mailing tab. Then, in the Required auto import field, you can select the profile that performs the corresponding import.
Note: This function requires the Premium Package for Auto-Import & Auto-Export.
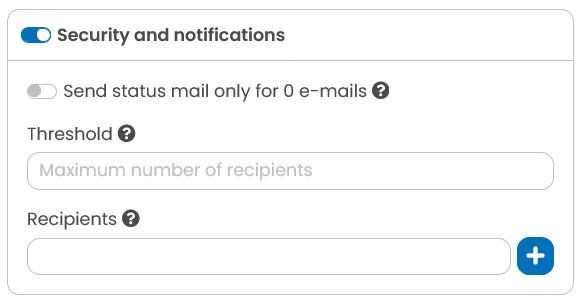
Fig. 3.8: Security settings for datebased mailings.
4.4.2.4 Action-based mailing
Action-based mailing is a type of mailing which allows you to carry out a series of widely varying mailing scenarios. These scenarios have one thing in common: the action-based mailing is only triggered and sent by a particular action (also called triggermailing, autoresponder, transactionsmailing or servicemailing). Exactly what action that is, and what content you send by virtue of it, is something which you can decide individually.
While you can set the actions which trigger the mailing in the menu item Forms & Actions, you can select the type of mailing when setting up a new mailing as usual.
You will find a detailed overview of all actions in chapter Managing actions. The following paragraphs will merely show in brief which actions exist: In the E-Marketing Manager you are able to select between the following types of action: Unsubscribe, Send actionbased mailing, Subscribe, Show mailing in browser, Double-opt-in confirmation, Recipient-login, Load recipient-data, Mailing-archive list, Modify profile, Send service e-mail, Script-action, Show specific contentblock and Tell-a-friend. Using the action type Script-action, you can generate your own HTML script and thus design any type of action you need.
Example 1
A few examples will best clarify the use of action-based mailing: You would like to send a double opt-in mailing to new recipients first, so that you can legally prove your consent to the newsletter. With the E-Marketing Manager you can quite conveniently launch a process that runs automatically via forms and actions: The interested party, for example, registers for the newsletter for your website, upon which he or she receives an e-mail, requesting him or her to confirm through a link-click. The interested party clicks on this link, which in turn triggers a welcome mailing with a confirmation of inclusion in the newsletter. In this scenario you set up two mailings: A first one that is sent following the registration for the newsletter and contains the request to confirm, and a second, which confirms the registration after a link-click and welcomes the new recipient in a friendly way. In this case you will work best with forms that allow you to use introductory and concluding actions, thus making more ramified campaigns possible. In this chapter This is how forms work you will find a good overview of the way forms and actions function, plus some examples of application in the chapters Example form: Amend a profile, Example form: Opt-in, Example form: Subscribing with double opt-in , Sending the last newsletter just after subscription and Example form: Unsubscribe.
Tip: The E-Marketing Manager allows you to handle complex campaigns in a simple and easily manageable way. You will find further information about this in chapter What is a campaign?.
Example 2
Another scenario is the sending of a newsletter with two (or more) themes as content. In this way you could place in your weekly newsletter a short paragraph on the subject of travel with a corresponding link to your offer, and also insert a second paragraph about the various aspects of motor cars, which also contains a content-specific link. Depending on which link the recipient clicks on, he or she will then receive an action-based mailing, with either further information about travel, or about motor cars.
Moreover, you can utilize this process so effectively that, using profile fields on interest in cars or travel, you can record over a lengthy period the subjects in which a recipient is interested and then, for example, send an individualized offer. You will find a suitable example of this in chapter Action: Changing recipient profile.
If we are now to apply this example in detail, we must first set up three mailings and two actions. The first mailing corresponds to the normal mailing type and contains information about travel and cars. Each of the two subjects contains a link with which the action Send action-based mailing is connected. The other two mailings are then action-based and contain further information on travel or on cars.
How to set up a normal mailing is something you will learn in detail in chapter Create, edit and send mailings.
-
For this example, simply set up a new mailing and fill in the compulsory fields. In the content section we give a short introduction with following reference to the latest offers for travel and cars in your online shop, each with its own link.
-
Now set up the two action-based mailings. Almost all potential settings are identical with the normal mailing. But naturally you must select the mailing type Action-based mailing. Now design two different contents matching the topic blocks in the normal mailing. First save the mailing and then go to the Send Mailing tab. There you will find the Activate button on the right.
Please note: If you do not activate the action-based mailing, it will not be available to you later in the selection list for setting actions.
-
In a third step you now set up two actions, which you would do best to designate already in the name with Travel and Cars, so that later you will know immediately which action you must combine with which link. For this purpose go first to the menu Forms & Actions and then to Actions. Click on the New Action button on the top right. A new section now opens. Specify a meaningful name. When selecting for use, in this case you can set Only for links. After you have specified a meaningful description, you can now select the action Type in the lower window. For our example please choose Send action-based mailing and then click on Add. Now you can select the mailing which is to be sent as a response to the action, and also set a possible delay period. You could, for example, send the action-based mailing only 7 days after the link-click and as a reminder. Finally, save the action with the button of the same name on the top right. Repeat these steps a second time to set up the second action.
-
Now go back to the outgoing mailing that you have set up, in which the two links are located. Under the side tab Links you will find a list of all links used in the mailing. The drop-down menu Action in the overview enables you to set an action to a link.
Alternatively, you can first click on the link and make the settings in a new window. Don't forget to save the changes by clicking on the button of the same name in the top right.
- Your mailing is now ready for dispatch. As soon as you send it and a recipient clicks on one of the links, the automated process is launched!
Note: You can also set a BCC E-Mail-Adress for Archiving or verification purposes (e.g. for double opt-in mailings). By setting a BCC Adress, an identical version of the triggered mailing will be sent to it, without the recipient noticing anything.
Please note: Action-based mailings are only triggered by an external impulse (trigger). For the mailing to take place, it must be activated on the one hand, and on the other hand, it must be linked in at least one action or campaign, as this is where the trigger is defined. If the mailing is deactivated, the action or campaign cannot be executed. The Used in area shows you in which actions or campaigns the mailing is linked.
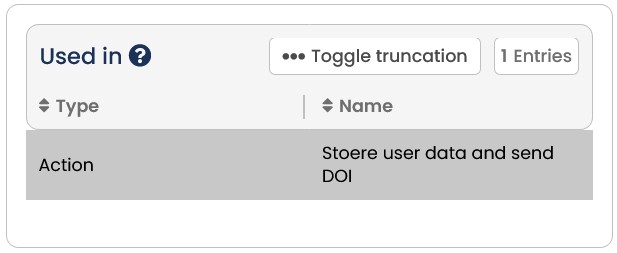
Fig. 3.9: The submenu "Used in"
4.4.2.5 Interval-based mailing
As well as the mailing types Normal mailing, Action-based mailing, Date-based mailing and Followup mailing, you can also use E-Marketing Manager to send an interval-based mailing. For such a mailing, E-Marketing Manager automatically sends emails according to a specific time interval depending on the setting in the mailing interval menu.
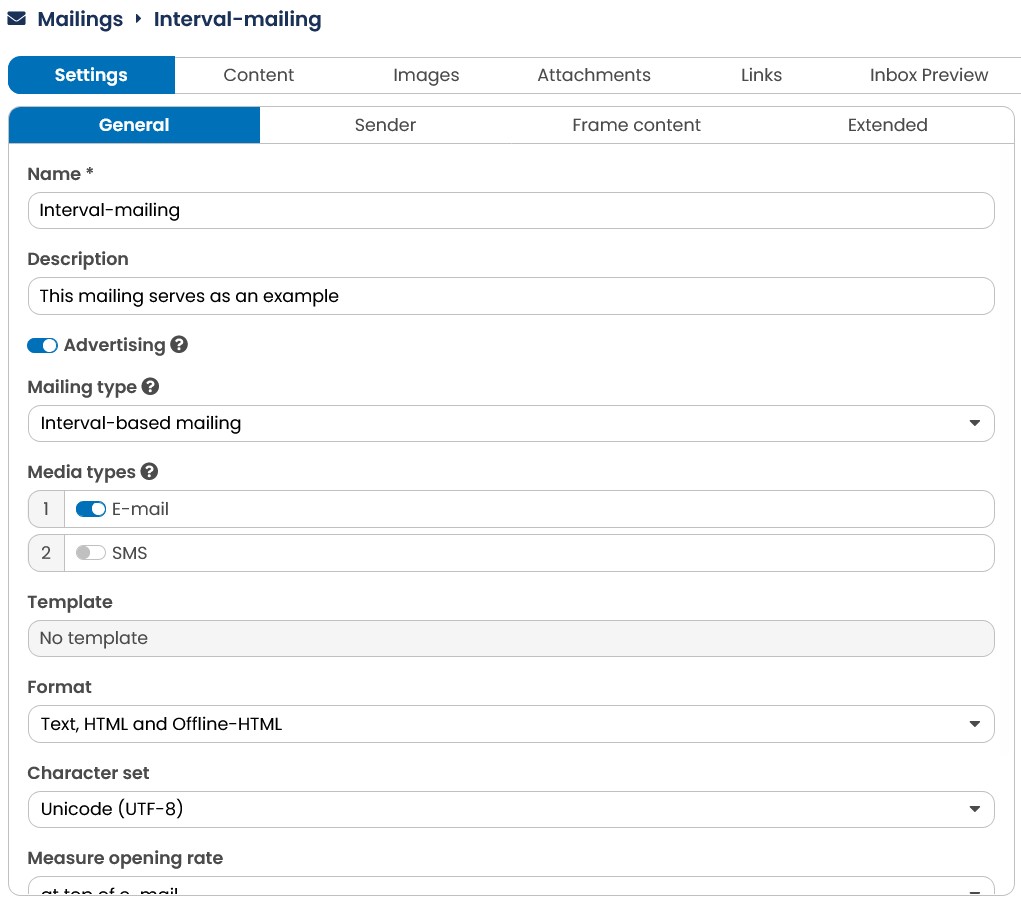
Fig. 3.10: E-Marketing Manager automatically sends an interval-based mailing according to a set time interval.
To generate an interval-based mailing, you start by creating a new mail the way you are already used to. In the following menu General Settings you choose the Mailing type drop-down menu, then select Interval-based mailing. Now create the content of your mailing as usual.
When your mailing is ready, go to the Send mailing tab. There you will find a section Interval. In the mailing interval you can define the interval after which the intervalcontrolled mailing will be sent again and again. You can choose between none, Every 10 minutes, weekly, 2-weekly, monthly and weekdays. The setting none causes the
mailing not to be sent according to a fixed rhythm, but to be initiated by a trigger. If you are interested in this, contact our support team. The setting Every 10 minutes is a premium feature that is only activated on request. If you are interested in this, contact our support team as well. For the weekly and 2-weekly intervals, you can then define the days as well as the time at which the mailing is sent. If the interval is set to monthly, for fine-tuning month (Every month, Every second month, Every third month, etc.) day (first of the month, 2nd, 3rd, 4th, etc.) and time, with an interval of 60 minutes, are available for selection. With the selection Weekdays you get an additional selection at the time within a month, for example the first Monday of a month.
For a fortnightly interval, the interval-based mailing is sent as soon as the set day has been reached and then again at fortnightly intervals. Store your interval-based mailing settings with the Save button. In order for the mailing to be sent, you must click the Activate button.
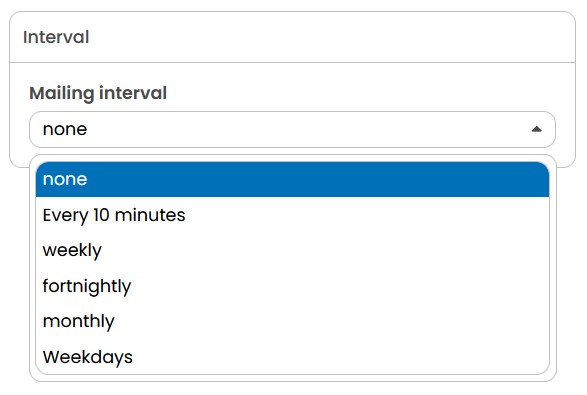
Fig. 3.11: An interval-based mailing can be sent on a weekly, fortnightly, monthly basis or based on weekdays.
An example scenario shows more clearly how an interval-based mailing can be used: All new newsletter subscribers should receive a welcome mailing at noon every Sunday. First create the welcome mailing as a new mailing but change the mailing type to Intervalbased mailing. Under Mailing interval give the sending parameters to E-Marketing Manager: Click on weekly, define Sunday as the sending day and set the time to noon (12 AM). With a click on Save the interval is defined. Now you can create the content for the welcome mailing.
Then create a new target group. This should contain all recipients who have not yet received the welcome mailing. Click on Target Groups, New Target Group and under Name enter a meaningful designation for the target group. Then click Received mailing as a New rule and set a no as operator. Then click on Save so that E-Marketing Manager is aware of the new target group.
Now switch to the mailings and select the welcome mailing from the list. Paste in the new target group under Target groups. Save again to have an interval-based mailing with a target group focused welcome mailing.
To activate the interval-based mailing, click on the Send mailing tab. Click on the Activate button to send the interval-based mailing. From now on, the system will send out an email to all recipients of that particular target group. In our example, this will be a welcome mailing.
Please note: When clicking on a mailing which has already been activated to see its details, you will notice that certain data may no longer be changed. These disabled elements are greyed out by E-Marketing Manager. A date-based mailing must be deactivated first before you can make any further changes. Open the Send mailing tab and click on the Deactivate button. You may now make any changes you want. Don’t forget to activate the mailing again once you have finished. This is done in the Send mailing tab as well.
4.4.2.6 On-demand mailing
Additionally the E-Marketing Manager provides you with the possibility of sending a very specific kind of mailing: By sending an On-demand mailing, you set an external trigger for a regular mailing which will be sent to several recipients (e.g. a target group) at once. You therefore have a mailing being sent repeatedly - just like an interval-based mailing - but in contrast to that mailing type it isn't sent according to a cycle but on demand. This demand is triggered by an external process: For instance, you may send an On-demand mailing with invoices as soon as the necessary data is available and ready.
If you wish to set an On-demand mailing, you need no extra mailing type – just choose Normal mailing and enter your content there. For the delivery is – as already mentioned – an external process responsible, which has to be connected with the E-Marketing Manager by AGNITAS. If you are interested in this option, please contact the AGNITAS support.
4.4.3 Creating a new mailing
Open the Mailings menu and click New to generate a new mailing. There are three options for creating a new mailing:
E-Mail-Creator: The E-Mail-Creator makes creating your newsletter even easier. It allows you to drag and drop content modules so you can immediately see what visual impact your newsletter has.
Standard: This method is particularly recommended for users whose mailing design can vary greatly from time to time and who want to remain as flexible as possible by entering
HTML.
Import: By choosing import, you get to upload an already existing email.
The upper two methods are explained in chapter Entering basic mailing data and E-mail Creator.
In addition to these three methods, you can also choose the media types Post or SMS.
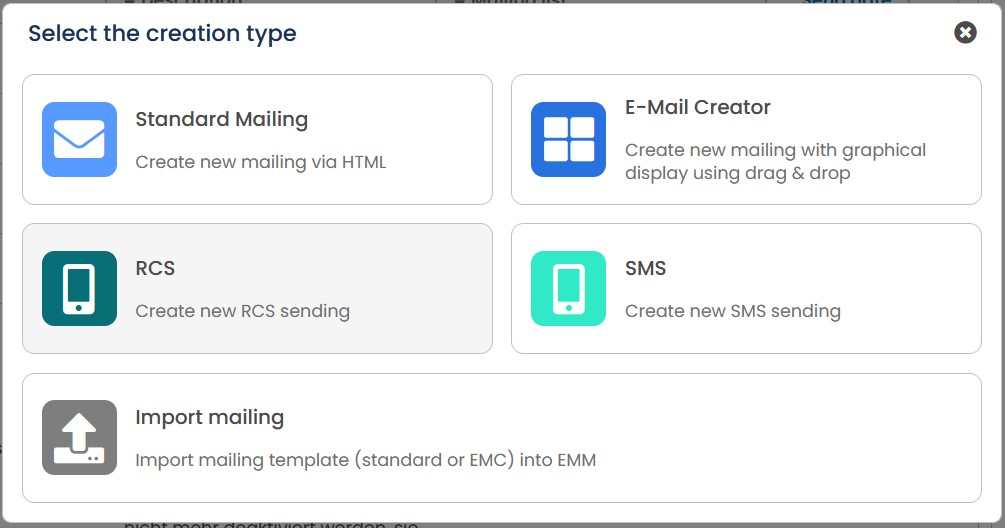
Fig. 3.12: The options for creating a new mailing.
Tip: If you are not working in the E-Marketing Manager for 30 minutes or you are not showing the E-Marketing Manager that you are still active during that time for example by storing or reloading a page, a so-called session time-out occurs and you become automatically logged out from the E-Marketing Manager. To ensure that you do not lose all the work steps you have already completed, an AutoSave is performed every 10 minutes and your work processes are automatically saved. The first login after session time-out takes you to the last item that was edited. You will be asked if you would like the unsaved changes to be displayed.
This function applies only for mailings, templates and forms.
4.4.3.1 Creating a mailing by using the standard method
The standard method is particularly suitable if your mailing design can be very different and the content is always created completely in HTML. However, this method also makes sense if your mailing content always has the same structure and content modules are always used in the same order, as an easy-to-use basic structure can be employed by using a template.
4.4.3.1.1 Selecting a template
If you have decided on the method selection for Standard you will get the option of selecting a previously defined template for your mailing. If you do not need a template click the Continue without template button. If you decide to use a template, select it by clicking on the corresponding template.
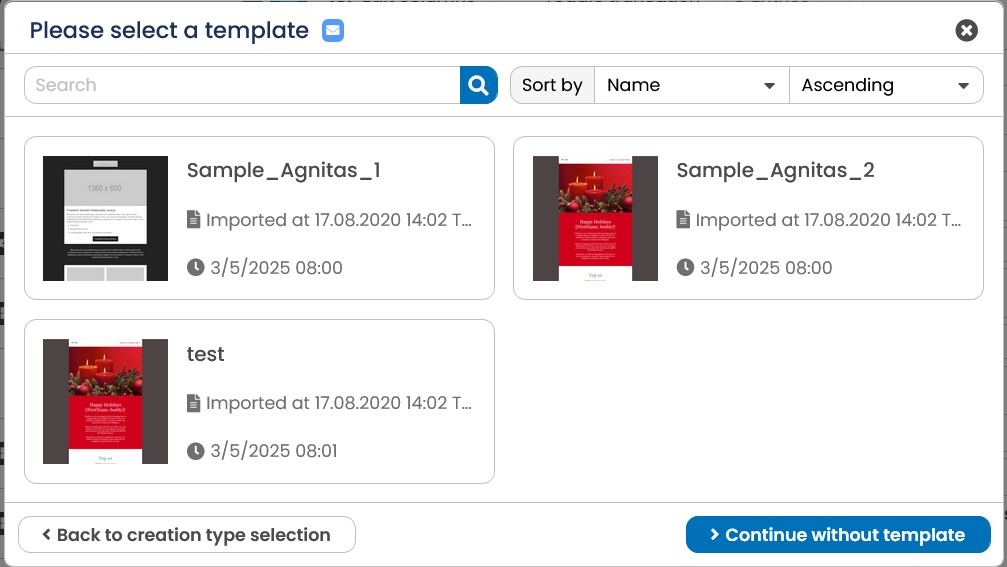
Fig. 3.13: With a click you can select a template for your mailing.
4.4.3.1.2 Entering basic mailing data
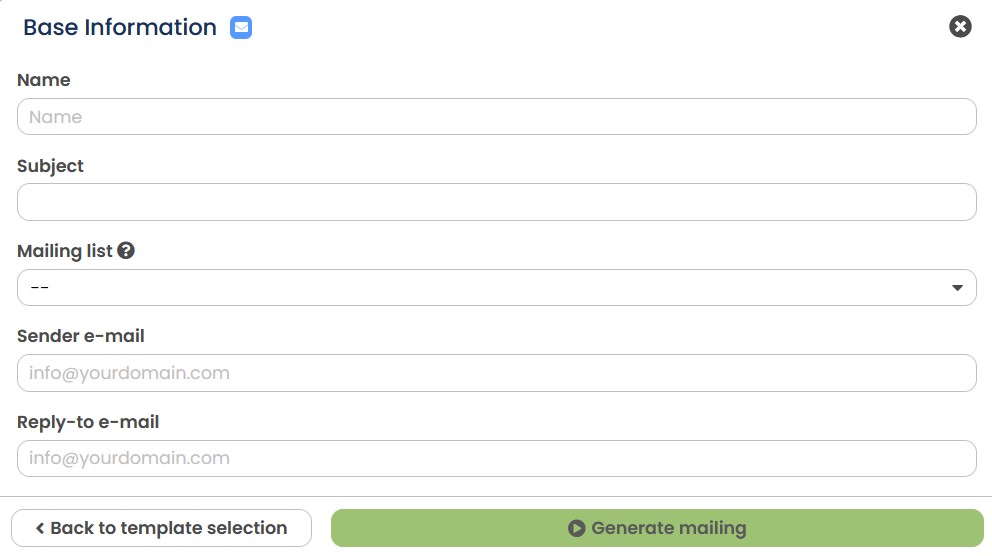
Fig. 3.14: Configuring a new mailing in a few easy steps.
Before your new mailing can be created, you have to enter some base information, as shown above. Once you entered all the relevant information, click Generate mailing. EMarketing Manager redirects you to the Settings tab of your new mailing, where you can change your base information or define additional settings:
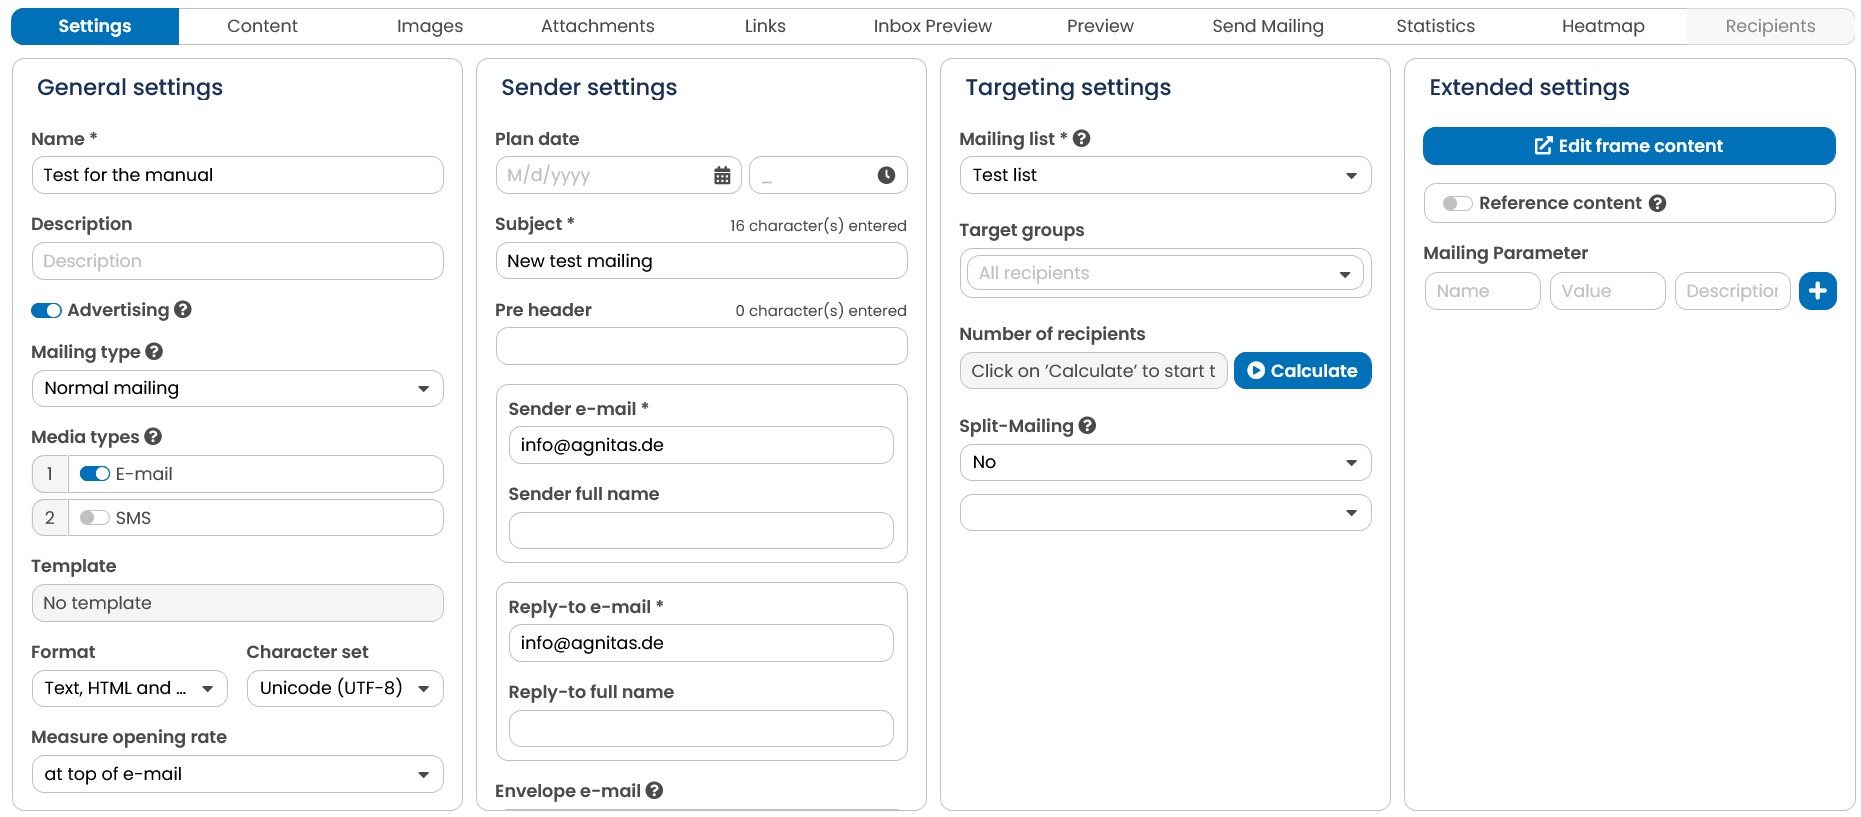
Fig. 3.15: The Settings tab allows you to define your mailing in detail. The four sections General
Settings, Sender Settings, Targeting Settings and Extended Settings help you keep an overview. In addition to further details, you can specify the following things in the Settings tab:
- If you wish, you can change the name of your mailing in the General Settings. On top of that, you can use the Description field to add further information, helping you to distinguish your mailing according to internal procedures.
In the drop-down list Mailing type, select Normal mailing. This creates a simple newsletter. The other mailing types are described in chapter Action-based mailing, Followup mailing (Premium) and Automatic date-based mailings. Additionally you can define the format of your mailing.
By selecting an Archive, you assign the mailing to a specific archive. This makes mailing updates easier if you have to manage a large number of mailings. Moreover, it gives you another option for statistical evaluation. All previously defined archives are displayed in that drop-down list. Further information on archives and how to create them is contained in chapter Archives - Grouping mailings. You do not have to assign the mailing to an archive. The mailing will also work as a stand-alone action. You can always select an archive or change the archive assignment for your mailing later. The slider in Show in online archive additionally ensures that the mailing is listed in the overview of personalized archives (see chapter Fullview: Always display HTML mails correctly, Paragraph "Creating customized archive for recipients").
-
In the Sender settings, you specify the subject, the pre-header, the sender e-mail and Sender full name as well as the reply-to e-mail and Reply-to full name.
-
In the Targeting settings section, you use the mailing list to specify the mailing list to which the mailing should be sent. In other words, you select the recipients in whose profile this mailing list is marked. In the Target Groups section, you can optionally add to further restrict the recipients of your mailing list. The dropdown will show you all target groups that are available to you. If necessary, you can further subdivide the recipients using the Split Mailing function, for example, to test two mailings against each other.
-
If you have decided against a self-defined template and clicked on Continue without template earlier, you can use edit the frame content in the Extended Settings to create your own template via HTML editor. Further information on templates can be found in chapter Templates - Re-usable text modules.
All the settings you can configure here are described in detail under Media type: E-mail. The advanced settings options are described in chapter Mailing settings.
Please note: With transaction mailings, e.g. double opt-in, order confirmation, payment reminder, etc., it may be necessary for you to prove that the recipient has opened or clicked on the mail, even if the recipient has generally objected to tracking. For this reason, you can specify in the mailing whether it is advertising or not. For advertising mailings, the tracking objection will of course be taken into account.
Note: The BCC field is only available for date-based mailings.
4.4.3.1.3 Selecting target groups
It does not always makes sense to send a mailing to all recipients on a mailing list. The Target groups functional area contains various options for narrowing down your list of mailing recipients further. In order to be able to work with target groups, you have to define your target groups. Further information can be found in chapter Target groups - Dynamic filters.
- The default setting is All subscribers. In order to limit the mailing to a certain target group, select the required target group from the drop-down list and click on them. Now, E-Marketing Manager will show that target group below the relevant drop-down list.
Using the Delete symbol infront of the selection will remove the selected target group.
- If you would like to send the mailing to more than one target group, select the required target groups from the drop-down list and click on them. All selected target groups are shown in a list in the Target groups section.
Note: The number in brackets right behind the target group description, is the targetgroup ID and not the number of recipients contained.
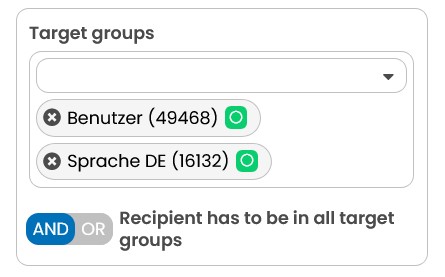
Fig. 3.16: The mailing will be sent to several target groups.
In the Mailing tab, the entry Number of recipients can be found in the Target groups section. By clicking on Calculate, you can calculate the size of the distribution list immediately after selecting the target groups. In this way you can directly check the composition of the distribution list without having to switch to the Send Mailing tab.
Clicking on the name of the added target group opens its edit dialog. You can set the conditions for the target group and change these as desired here.
If you delete a target group after selecting it in a mailing, one warning message per targetgroup will be displayed in yellow in the Send mailing tab. As long as you have not deleted this target group selection from the mailing, it cannot be sent out.
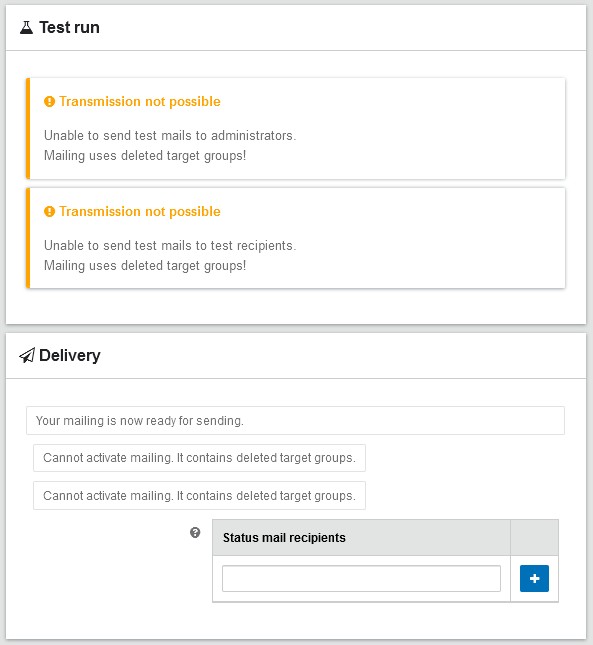
Fig. 3.17: It is not possible to send a mailing with deleted target groups
Linking targetgroups
It is, of course, also possible to combine several target groups.
The user can choose from two or more selected target groups whether the recipients must be in one target group (logical OR) or in all target groups (logical AND).
Using a list split
It is sometimes practical not to send a mailing immediately to all recipients who subscribe to a particular mailing list. You may want to test the feedback for different mailings on a small number of recipients only and then send the more successful version to the remaining subscribers. This may be effected automatically or selected individually as described in chapter Testing and sending a mailing. Or you may want to spread sending a mailing over several days in order to spread customer feedback over a few days or even weeks. EMarketing Manager lets you do this by using list splits. Several drop-down lists are available for you to select into how many mailings you would like to split the list, and how many subscribers to send the mailing to each time.
-
The first drop-down list next to List-split is used to select the list split in per cent. EMarketing Manager offers several default settings for frequently used list splits like for instance 15% / 15% /70%. In this example, the first mailing tranche will be sent to 15 per cent of subscribers registered, as will the second mailing. In a third mailing, the remaining 70 per cent will receive the mailing.
-
The second drop-down list, which is just below the first one, is used to select which tranche to start the mailing with. The figures shown here depend on the selection made in the left-hand drop-down list. In our example, 15% / 15% /70%, each tranche has three values to choose from. Select 1. 15% for the first tranche. For the next tranches, copy your mailing, make the necessary changes and select 2. 15%. in the drop-down list. Make your selections for the third mailing 3. 70% accordingly.
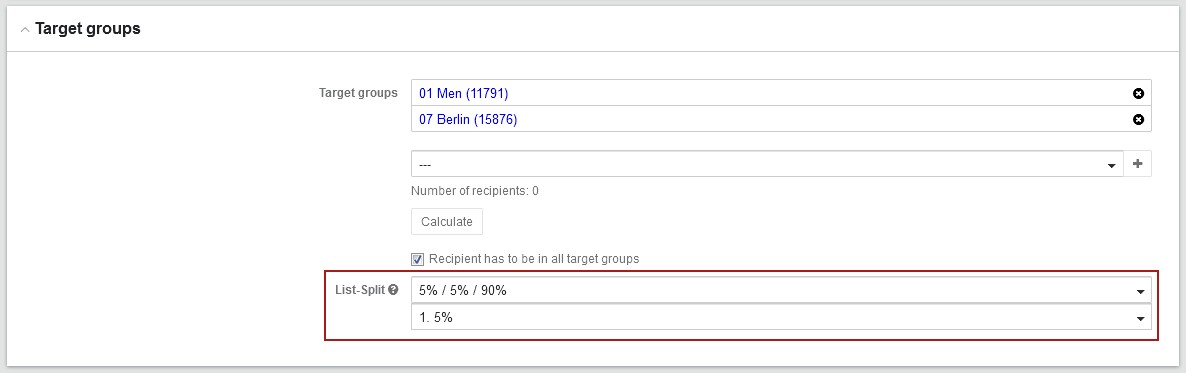
Fig. 3.18: Using a list split you may send a mailing to a specified portion of a target group only.
Selecting recipients for a tranche is done according to a set procedure which may not be changed. Each new recipient created receives a random number. This ID is saved in the recipient’s profile. As long as the recipient remains in the database, his or her ID is never changed. The ID does not depend on the mailing lists the recipient subscribes to. This ID controls how the recipients are assigned to a tranche.
E-Marketing Manager uses the modulo function to control tranche assignment (see chapter List split using MOD). This is to make sure that recipients are always assigned to the same tranche when using a list split more than once. If you always split your mailings into three tranches, the tranche composition will always be the same, i.e. it will always be the same recipients who receive the first mailing and no recipient will receive a mailing twice.
Please note: If you need a list split which E-Marketing Manager does not offer as a default in the drop-down list, there is the possibility of setting the parameters for the modulo function via the target groups section. This way, any mathematically allowable split is possible. It is best to create one target group per tranche. For further information see chapter List split using MOD.
4.4.3.1.4 Select media type
EMM can send not only emails but also text messages (SMS). Use the sliders under Media types to specify the types of messages the system should send. Please note that the profile database containing the recipients must, of course, include the necessary information, such as mobile phone numbers.
Assuming you are using the E-mail media type, you can now fill in the following fields: Subject, Format, Sender e-mail, Sender full name, Reply-to e-mail, and Reply-to full name. For more information on media types, see the chapter Different media types.
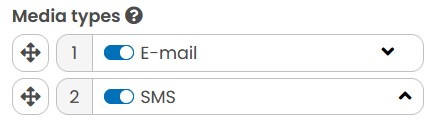
Fig. 3.19: For each enabled media type, specific input parameters appear.
If you enable multiple media types, E-Marketing Manager will still send only one message to each recipient. The order in which the media types are listed determines which channel a recipient receives the message through. By default, email is at the top of the list. You can change the order using the small arrow icons on the right.
In the Settings tab, EMM displays the parameters for the selected media types. For SMS, for example, the SMS Sender address field appears in the Sender settings.
Attention: Once you have selected a media type, we recommend that you do not change it again. You should therefore carefully consider which media types you need. However, the parameters for each media type can be changed at any time.
4.4.3.1.5 Deleting images collectively
To delete several images of a mailing, first navigate to the Images tab. Now select the pictures to be deleted by clicking the checkboxes. Afterwards click the trash can icon to delete them collectively.
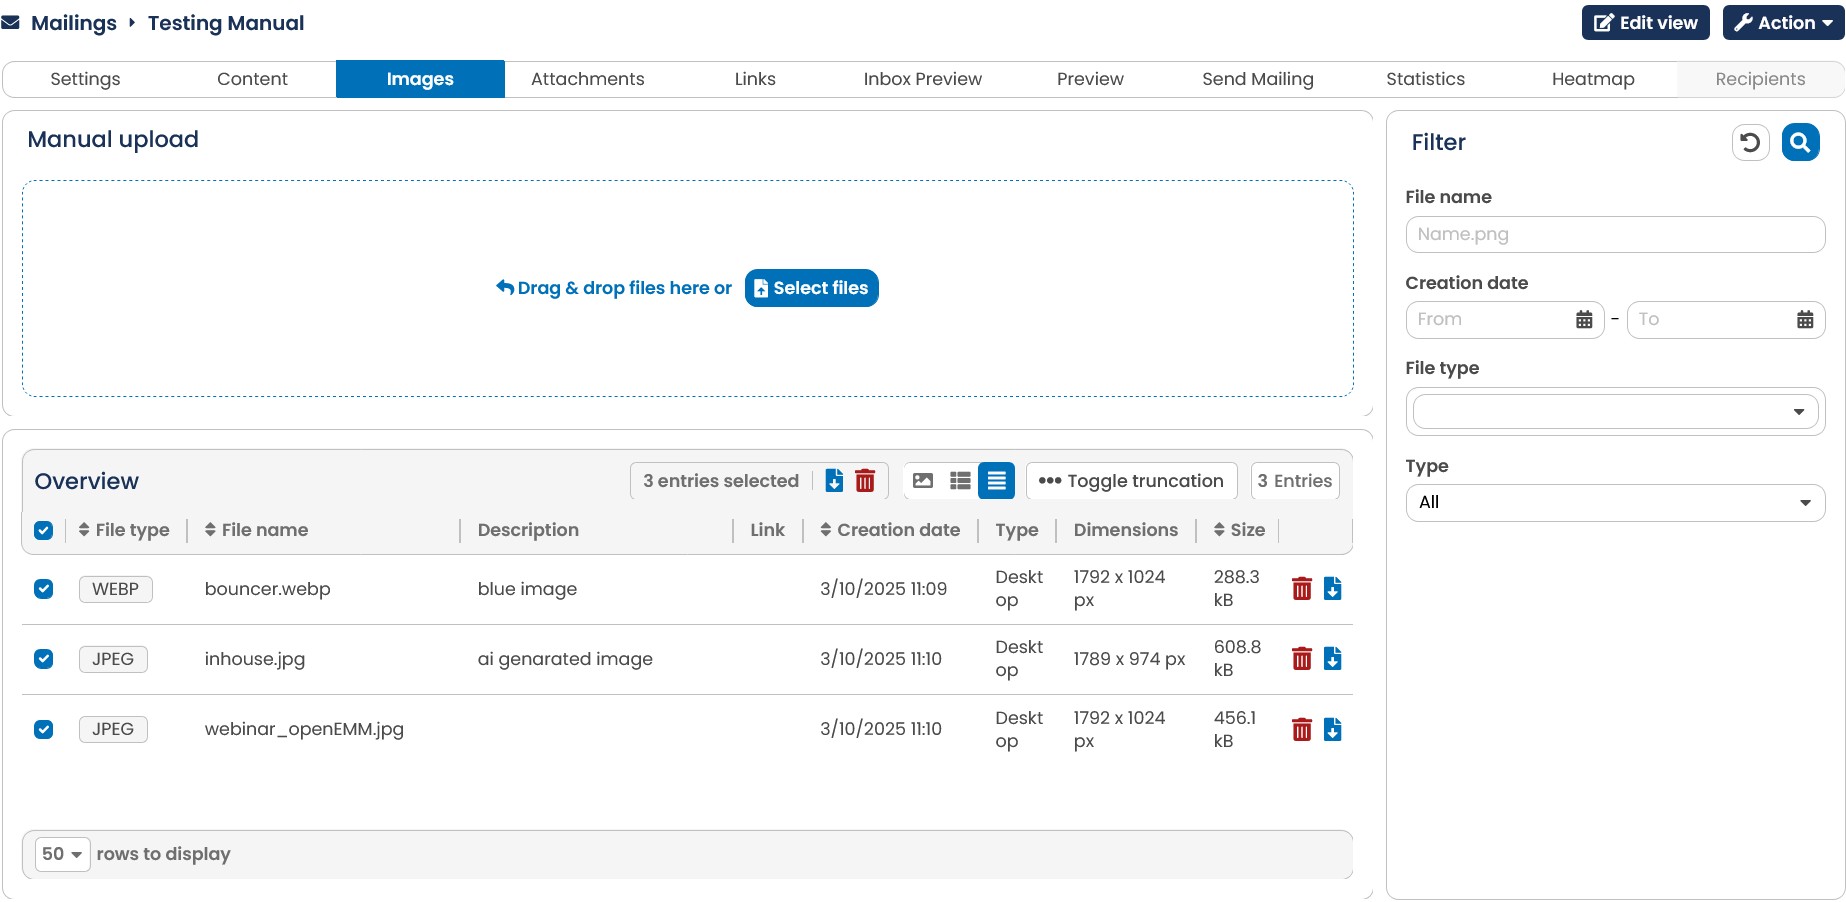
Fig. 3.20: Deleting images collectivley
4.4.3.1.6 Saving a new mailing
-
To conclude your entries, click on the Save button in the upper right of the screen. After saving, you will see the additional tabs Action and Edit view in the upper half of the screen as well as the tabs below.
-
In addition you can now call the drop-down list Actions and choose between the steps Delete, Copy, Create followup mailing (this option will only appear when you have set Normal Mailing in the beginning) and Undo. If the mailing is part of a campaign you will additionally have the option to Campaign
By clicking this option you will be leaded to the assigned campaign in the Campaign Manager. The View drop-down menu allows you to view the screen in one or two columns, and to hide the preview of the mailing.
The tabs give you access to the other settings. Here you can, among other things, enter content or test y
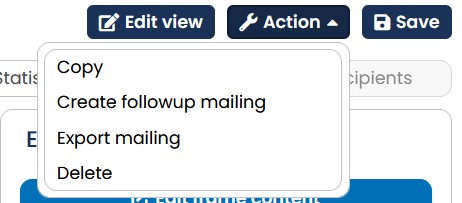
Fig. 3.21: After saving, new tabs are displayed.
After saving you will also see a Preview of the mailing. It appears on the right to the edit field and enables you to check the settings while creating the mailing. As our example does not contain any content yet, the preview is empty. Calling the button View you may choose between seeing the preview without images, with various device types as well as formats. In order to do so you simply tick the correspondent field and click on Refresh. By clicking on the small icon left to the View button you can also open the preview in a new window. Find more information to the preview function in the chapter Preview - For in-depth checking.
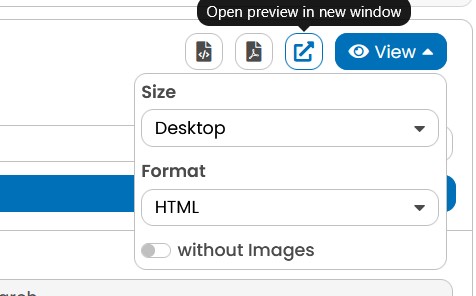
Fig. 3.22: By calling the View button you have several additional options for a mailing preview which you can also open in a new window.
4.4.3.2 Creating a Mail with the E-mail Creator
The Email Creator is a method that makes newsletter creation via a building block system even easier and HTML knowledge is only optionally required. The E-Marketing Manager now shows you a template with placeholder building blocks, which you can conveniently drag and drop on a grid and adjust. You apply your changes by clicking Save. If you want to automatically generate text mails from your HTML building blocks, you can simply activate the right for your user. If you have activated the right, the E-Marketing Manager will now ask you if you want to automatically generate the text version from the HTML. If you confirm this with Yes, you will also find the texts of your modules in the Text modules tab. Here you can still make corrections to the content afterwards.
Please note: For a complex structure of your HTML mailing or if you have stored a selfdefined frame content, we recommend that you answer the question with No, as the automatically generated text version may not meet your requirements.
Many setting possibilities such as attachments, edit links, preview, inbox preview, sending or statistic align with those of a standard created mailing, but the E-Mail Creator differs because here different content modules can be arranged on the predefined grid by drag & drop as desired. On top of that, you have the tabs content and styles.
Please note: With the premium feature Layout Builder you are able to create any layout and define them to your requirements. If you require assistance with this or you want an individually layout creation, please contact your Account Manager or the AGNITAS support.
Note: When saving the HTML version of an Email Creator mailing, you have the option to update the text version as well. To do this, simply activate the checkbox next to the Save button. This function is linked to a user right, if you do not see this option, we can unlock it for you.
4.4.3.2.1 Choose a template
To create a mailing with the E-Mail Creator you have to call up as usual the mailing menu and click afterwards on New mailing. Now chose the E-Mail Creator.
Fig. 3.23: Creating a mailing with the E-Mail Creator.
At the overview, you can now chose a template. Under the tab Preview you receive a graphical preview of the available templates. Alternative, you can chose the tab List and you receive a register of details of the available template. Plenty of standard templates are available by default in the E-Marketing Manager. When you made a choice, click on the appropriate template to continue.
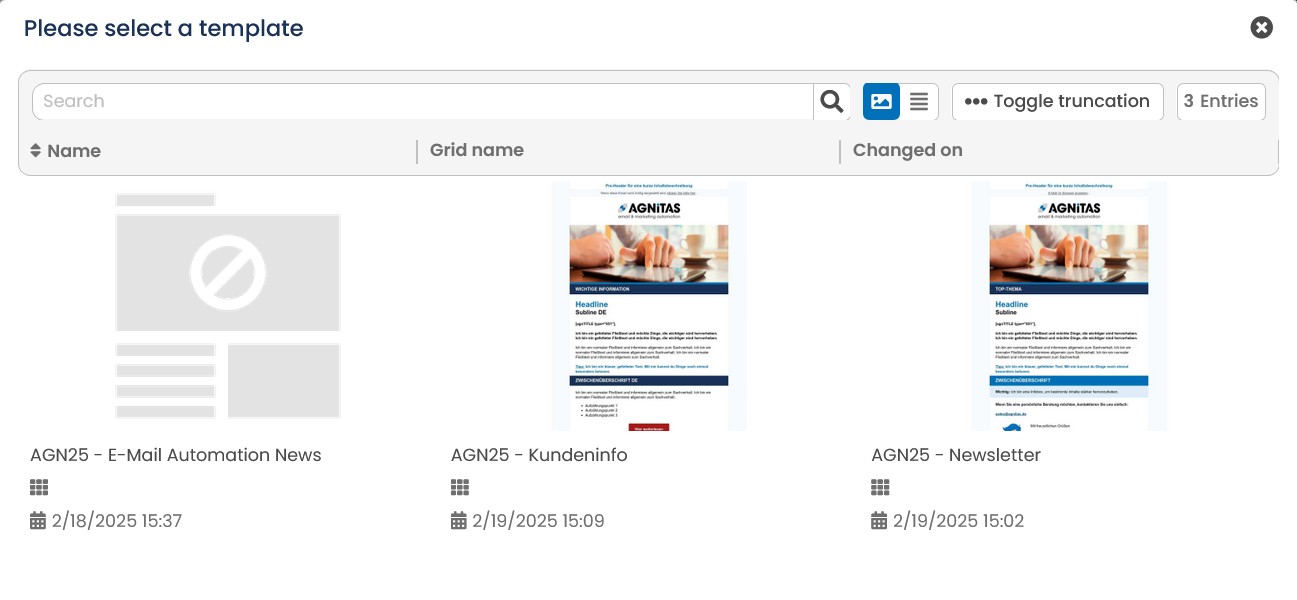
Fig. 3.24: Choose a template for your EMC-Mailing.
Please note: In the case you don't own the premium feature Layout Builder (part of the layout package)you get prefabricated templates provided by AGNITAS. If you are interested in an individual designed template please contact your Account Manager or the AGNITAS support.
4.4.3.2.2 Base settings
You will now be taken to the base settings. Once you have confirmed the base settings by clicking Save & Next, the basic mailing framework is created and further input options for the framework content appear, which are described in detail in the Mailing Settings chapter. In addition to the active tab, you will now also see further tabs as well as the Action button at the top of the screen.
Note: Once you have confirmed the base settings with Save & Continue, the template can no longer be changed. Of course, you can still edit the settings you made when creating a new mailing at any time before it is sent, and in some cases even afterwards.
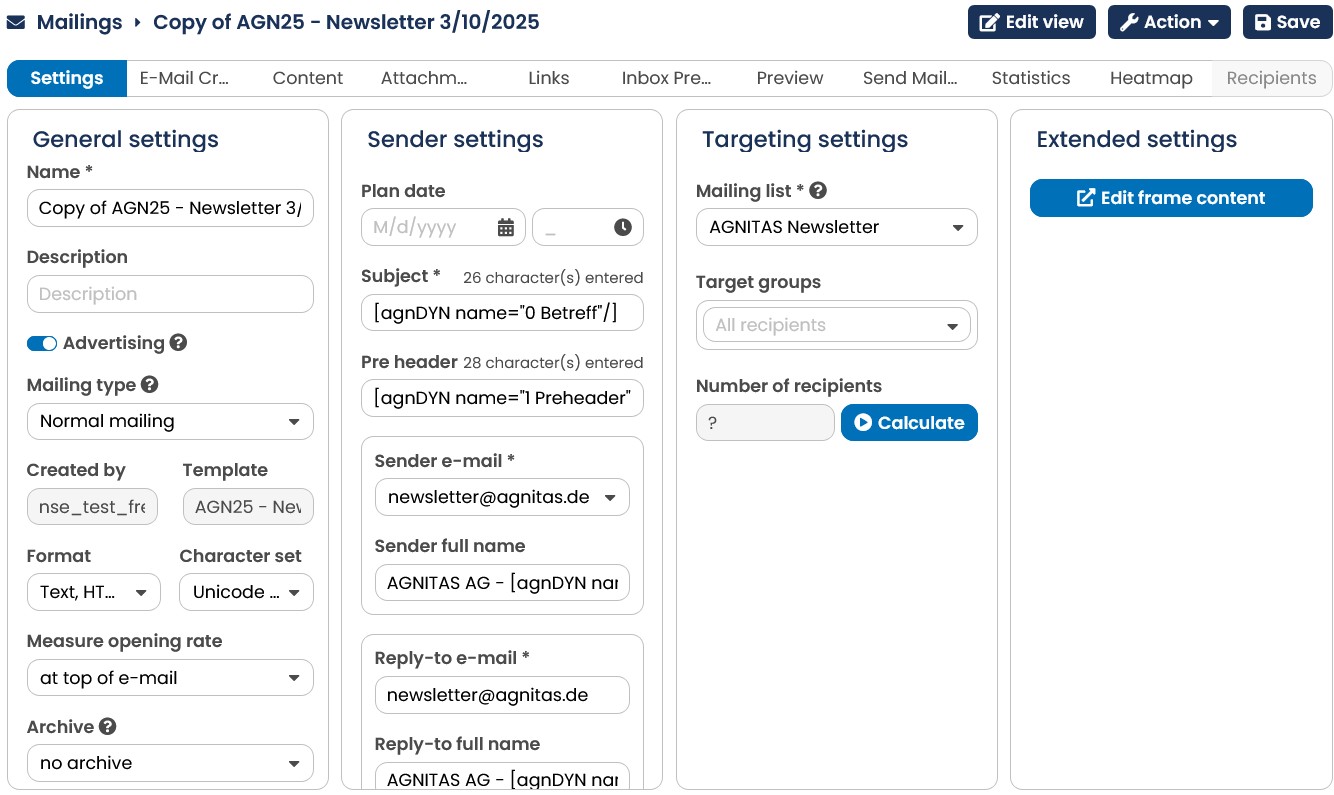
Fig. 3.25: In the settings you define basic information, additional settings and email data.
-
In the General Settings, you should give the mailing a meaningful and, above all, distinguishable name. In addition, you have space in the Description field to insert further information about your mailing, which will give you an overview in your internal processes.
-
In the Archive selection list, you can assign an archive to the mailing. With the slider Show in online archive you determine whether the mailing will be displayed there for the recipient. For Mailing type you will usually need Normal mailing for one-time sending. The other mailing types are described in chapter Automatic date-based mailings - an example , Followup mailing (Premium) and Action-based mailing.
-
In the Sender settings you define the subject, the pre-header, the format(s) of your mailing, the sender email address and name as well as the reply email address and name. The advanced settings options are described in chapter Mailing Settings.
-
In the Targeting settings section, you use the mailing list to specify the mailing list to which the mailing should be sent. In other words, you select the recipients in whose profile this mailing list is marked. In the Target Groups section, you can optionally add to further restrict the recipients of your mailing list. The dropdown will show you all target groups that are available to you. If necessary, you can further subdivide the recipients using the Split Mailing function, for example, to test two mailings against each other.
-
Edit frame content helps you store the content for the text version in the Extended tab and, if desired, you can use agnDYN tags to specify text modules for dynamic content.
-
If an ALTG area is displayed, it means that so-called internal clients are used in your client. This area specifies for which inner client(s) the mailing is intended. Inner clients work like additional filters that further restrict the recipient group besides the mailing list and regular target groups. Internal clients on target group basis are a premium feature (learn more in chapter Internal clients on access limiting target group basis (Premium)).
Please note: In the case of transactional mailings, e.g. double opt-in, order confirmation, payment reminder, etc., it may be necessary for you to prove the recipient's opening or click here, even if the recipient has generally objected to tracking. For this reason, you can set in the mailing whether it is advertising or not. For advertising mailings, the tracking objection is of course taken into account.
Using the Action drop-down menu, you can Copy the mailing, Create a Followup mailing, Export the mailing, Undo the last step or Delete the mailing. If the mailing is part of a campaign, you have the additional option to select the campaign at this point. This will take you directly to the linked campaign in the Campaign Manager.
4.4.3.3 Copying a mailing
It may be useful to copy all data from a particular mailing to a new mailing. You may, for instance, wish to send a similar mailing with only slight changes a few weeks later, or you may want to use a list split (see chapter Selecting target groups) to send out the second part of your mailing. You do not have to enter all data again: E-Marketing Manager can create a copy of an existing mailing for you to use.
-
Open the detailed view for the mailing you wish to copy. Call the drop-down list Action in the upper right and choose Copy. Clicking on it will call up the entry dialog for a new mailing in E-Marketing Manager.
-
All settings are identical – from content to attachments, not to forget the trackable links. The words Copy of have been added to the mailing Name. Now give your new mailing a meaningful name and description and click on the Save button.
-
The various tabs will now be called up for you to enter settings and make any changes you may wish to make. Only the Send mailing and Statistics tabs do not show anything yet since this is a brand-new mailing.
Note: By using the action button, you can export an entire mailing and import it to an other client.
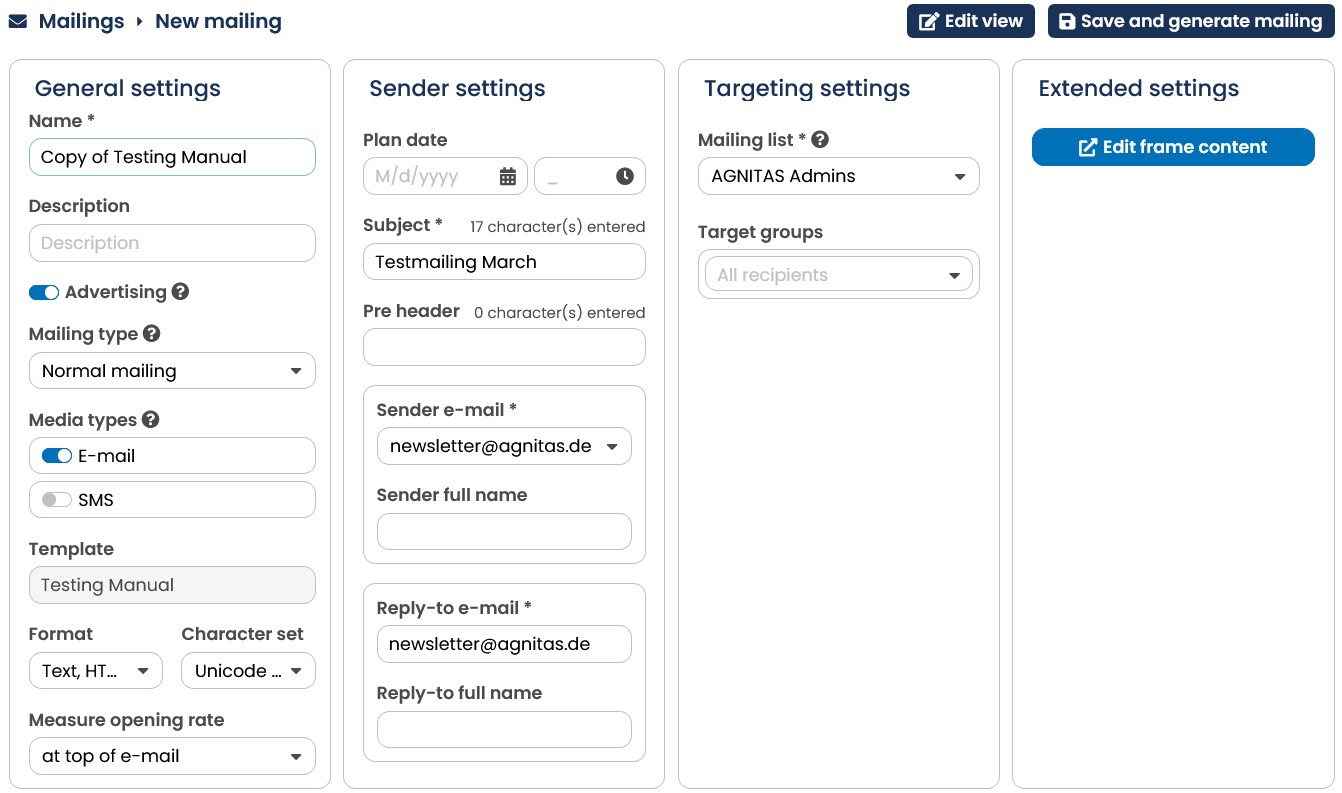
Fig. 3.26: A mailing copy has a slightly different name, all other data is copied by the system from the original mailing.
4.4.4 Mailing Settings
Of course, you can edit the settings you have made when creating a new mailing at any time before it is sent, and in some cases even afterwards. The majority of the settings are optional, as a rule you can adopt the default setting of E-Marketing Manager. Only a few details have to be entered before each shipment, the \<%PRODUCTNAME%> also informs you if these are still incomplete.
| Field |
|
|---|---|
| Name |
|
| Description |
|
| Template |
|
Slider - Advertisement |
|
| Mailing list |
|
| Archive |
|
| Mailing type |
|
| Field |
|
| Target group |
|
| Media type |
|
| Optional parameters according to media type: | |
| Sender address |
|
| Sender email |
|
| Sender full name/Reply-to full name |
|
| Reply-to e-mail |
|
| Subject |
|
| Pre-Header |
|
| Format |
|
Measure open rate |
|
| Paper size |
|
| Envelope Email |
|
| Character set |
|
4.4.4.1 Edit frame content
The General settings tab provides information about the template on which your mailing is based. A template cannot be exchanged after a mailing has been created. It is, so to say, the DNA that was given to the mailing at birth. In the Extended settings tab, you can directly store the content of the text version of your mailing, a character counter shows you the current number of characters for orientation. Optionally, the E-Marketing Manager also offers to automatically create a text version from the content modules.
However, if the structure of your content is somewhat more complex, it is advisable to edit and optimize the content manually. Alternatively, you can work with dynamic text modules in the frame content, such as [agnDYN name="Text-Version"/]. This approach offers the advantage that you can also vary the content of a module for different target groups. You can learn more about the use of dynamic text modules in the chapter Creating customized mailings. You can then insert and edit the content of the dynamic text modules in the text modules tab.
4.4.4.2 Extended email configuration
-
The Envelope email field in the Sender settings is used to specify the email address, that is shown when a server sends back a softbounce mailing.
-
The Character set drop-down list in the General Settings sets the character encoding within the email. The default value Unicode (UTF-8) is suitable for all Western European languages. You only need to select a different character set if you want to use other languages, like Greek or Japanese.
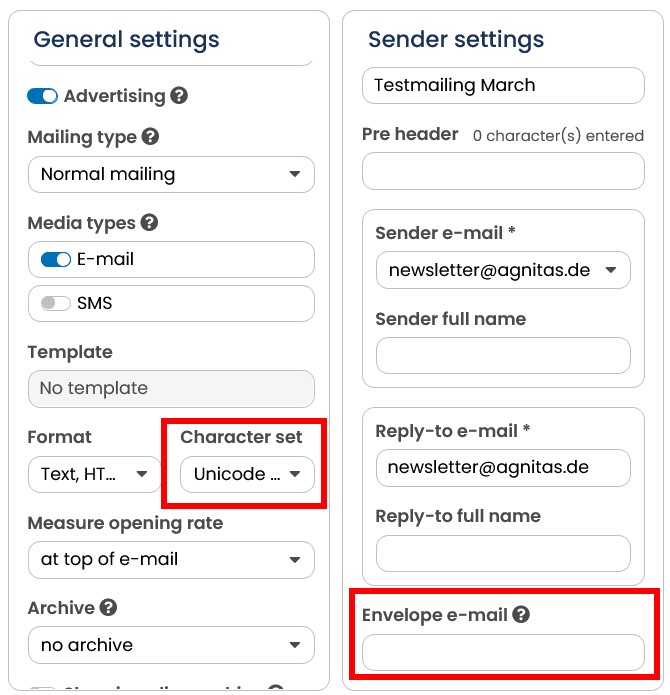
Fig. 3.27: Advanced email configuration
- The Measure opening rate: In order to be able to track how many HTML mailings were actually opened and read, a so-called “tracking pixel” is inserted into the e-mail. Whenever the newsletter is opened, the server loads the pixel and thereby registers a click.
In order to make absolutely sure that this important detail will not be forgotten, the software allows for automatic pixel insertion. You select whether page clicks should be counted and how. The tracking pixel will then be integrated automatically, either at the beginning or at the end of the e-mail message according to your selection.
Insert at top of e-mail: The server registers a click as soon as the e-mail is opened. Even when the recipient closes or deletes the message immediately after having opened it and before all images were completely downloaded, a click would have been registered.
Insert at bottom of e-mail: The server registers a click as soon as the e-mail including all images was completely downloaded. This is the conservative method. It returns slightly lower figures than a click track at the beginning of the e-mail.
It is also possible to insert a tracking pixel by hand using AGNITAS tags which you can find here Appendix A: AGNITAS tags.
4.4.4.3 Selecting target groups
It does not always make sense to send a mailing to all recipients on a mailing list. The Target groups functional area contains various options for narrowing down your list of mailing recipients further. In order to be able to work with target groups, you have to define your target groups. Further information can be found in chapter Target groups - Dynamic filters.
- The default setting is All subscribers. In order to limit the mailing to a certain target group, select the required target group from the drop-down list and click on them. Now, E-Marketing Manager will show that target group below the relevant drop-down list.
Using the Delete symbol in front of the selection will remove the selected target group.
- If you would like to send the mailing to more than one target group, select the required target groups from the drop-down list and click on them. All selected target groups are shown in a list in the Target groups section. As soon as you have selected more than one target group, a button appears below the selection area with which you can specify whether the recipients of the mailing must be included in all target groups (AND link) or in at least one of the target groups (OR link). The AND link causes all target group filters to be applied at once, which reduces the number of recipients. The OR operation increases the number of recipients, because it is sufficient if the criteria of one target group are fulfilled. Example: You have a target group
"Women" and a target group "Bavaria". With the AND link, only women from Bavaria are written to. With the OR link, all women, regardless of region, and additionally all recipients from Bavaria, regardless of gender, are written to.
Note: The number in brackets right behind the target group description, is the target group ID and not the number of recipients contained.
The colors green, yellow and red after the target group name are indicators of how long it will take to produce your mailing and statistics.
-
Green: Should be handled quickly
-
Yellow: Production will take longer than usual
-
Red: The number of records is so large that AGNITAS AG must support you
Fig. 3.28: The mailing will be sent to several target groups.
In the Mailing tab, the entry Number of recipients can be found in the Target groups section. By clicking on Calculate, you can calculate the size of the distribution list immediately after selecting the target groups. In this way you can directly check the composition of the distribution list without having to switch to the Send Mailing tab.
Clicking on the name of the added target group opens its edit dialog. You can set the conditions for the target group and change these as desired here.
If you delete a target group after selecting it in a mailing, one warning message per targetgroup will be displayed in yellow in the Send mailing tab. As long as you have not deleted this target group selection from the mailing, it cannot be sent out.
Fig. 3.29: It is not possible to send a mailing with deleted target groups
4.4.4.3.1 Linking target groups
It is, of course, also possible to combine several target groups.
The user can choose from two or more selected target groups whether the recipients must be in one target group (logical OR) or in all target groups (logical AND).
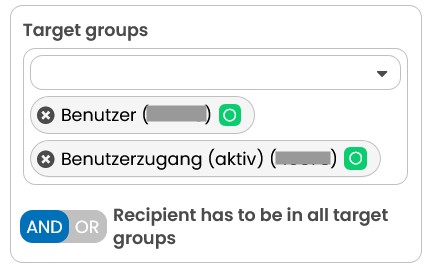
Fig. 3.30: Two target groups have been linked for a mailing by the AND operator.
4.4.4.3.2 Using list splits
It is sometimes practical not to send a mailing immediately to all recipients who subscribe to a particular mailing list. You may want to test the feedback for different mailings on a small number of recipients only and then send the more successful version to the remaining subscribers. This may be effected automatically or selected individually as described in chapter Testing and sending a mailing. Or you may want to spread sending a mailing over several days in order to spread customer feedback over a few days or even weeks. EMarketing Manager lets you do this by using list splits. Several drop-down lists are available for you to select into how many mailings you would like to split the list, and how many subscribers to send the mailing to each time.
-
The first drop-down list next to List-split is used to select the list split in per cent. EMarketing Manager offers several default settings for frequently used list splits like for instance 15% / 15% /70%. In this example, the first mailing tranche will be sent to 15 per cent of subscribers registered, as will the second mailing. In a third mailing, the remaining 70 per cent will receive the mailing.
-
The second drop-down list, which is just below the first one, is used to select which tranche to start the mailing with. The figures shown here depend on the selection made in the left-hand drop-down list. In our example, 15% / 15% /70%, each tranche has three values to choose from. Select 1. 15% for the first tranche. For the next tranches, copy your mailing, make the necessary changes and select 2. 15%. in the drop-down list. Make your selections for the third mailing 3. 70% accordingly.
Fig. 3.31: Using a list split you may send a mailing to a specified portion of a target group only.
Selecting recipients for a tranche is done according to a set procedure which may not be changed. Each new recipient created receives a random number. This ID is saved in the recipient’s profile. As long as the recipient remains in the database, his or her ID is never changed. The ID does not depend on the mailing lists the recipient subscribes to. This ID controls how the recipients are assigned to a tranche.
E-Marketing Manager uses the modulo function to control tranche assignment (see chapter List split using MOD). This is to make sure that recipients are always assigned to the same tranche when using a list split more than once. If you always split your mailings into three tranches, the tranche composition will always be the same, i.e. it will always be the same recipients who receive the first mailing and no recipient will receive a mailing twice.
Please note: If you need a list split which E-Marketing Manager does not offer as a default in the drop-down list, there is the possibility of setting the parameters for the modulo function via the target groups section. This way, any mathematically allowable split is possible. It is best to create one target group per tranche. For further information see chapter List split using MOD.
4.4.5 Inserting content
Mailings without a content make no sense. In this chapter you will learn how to add content to your mailing. This means creating the mailing text, inserting pictures and links for evaluation purposes and attaching files.
Tip: E-Marketing Manager helps you with the integrated preview function when you are creating mailings. When you edit the content of your mailings, a preview, which is updated at every save, simultaneously appears that shows you the current status. Therefore you can save yourself time in creation and editing that was previously needed for switching between the preview and edit functions. By calling the View drop-down list in the preview window you can choose whether the preview is supposed to show images and for which device type and in which format it is to be shown.
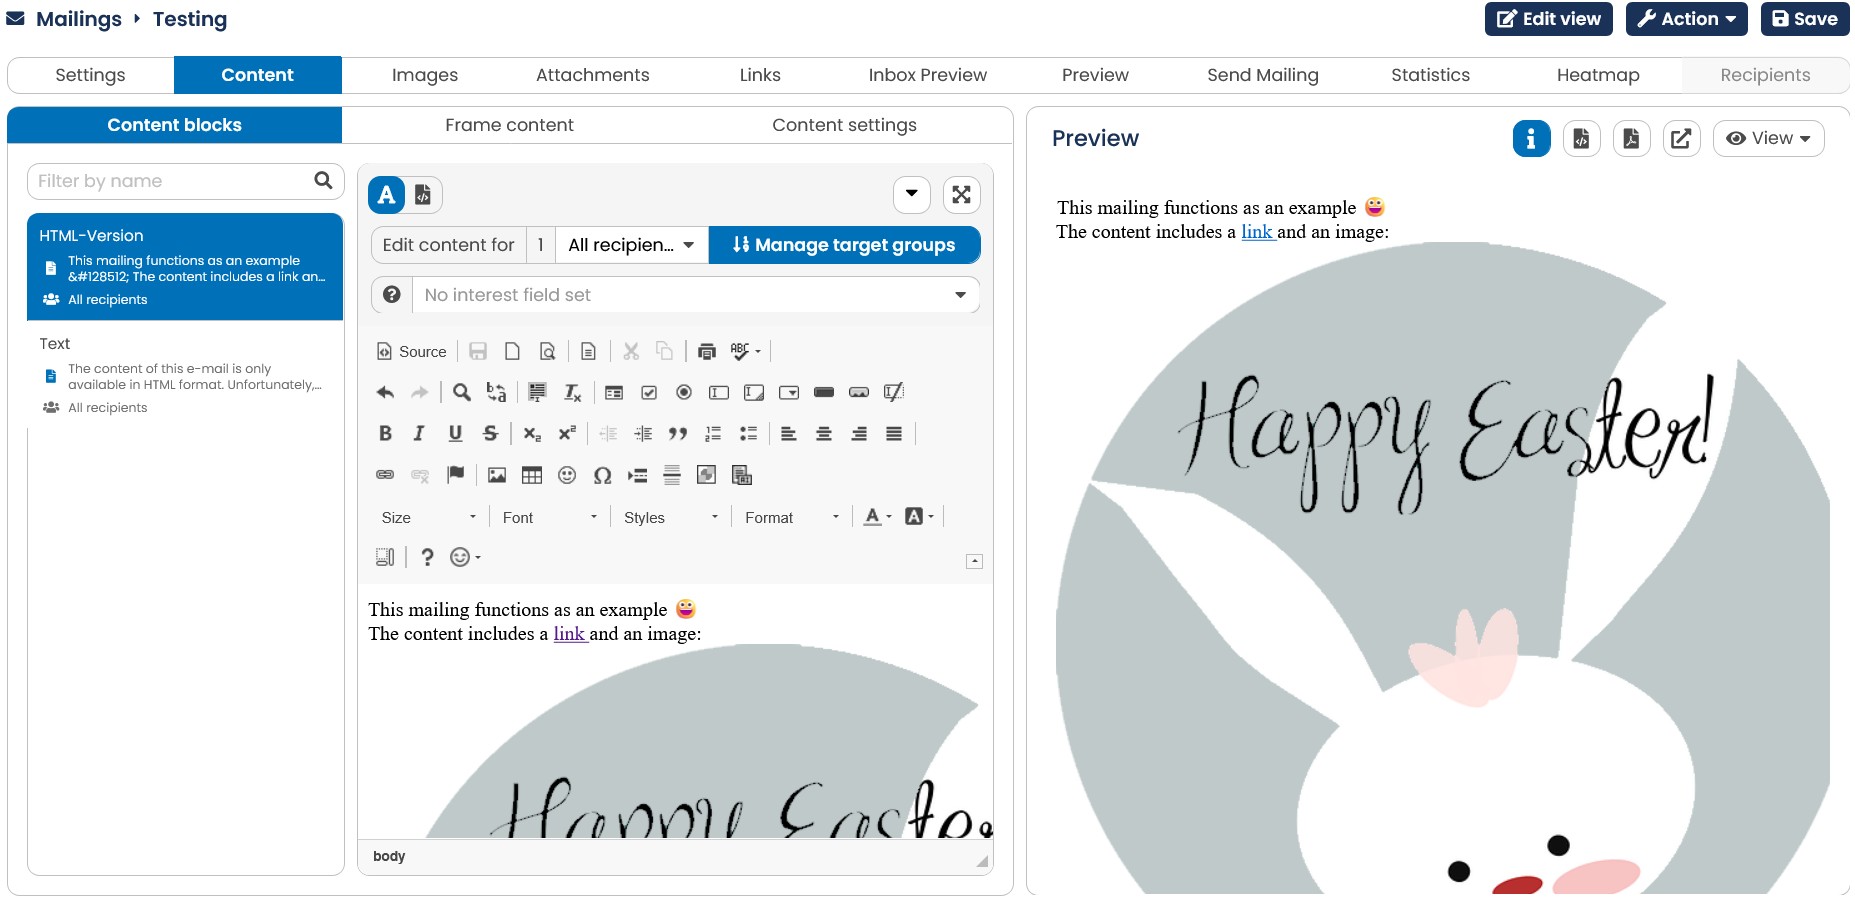
Fig. 3.32: The live-preview of the E-Marketing Manager helps you by editing your mailing.
4.4.5.1 Creating content by using the e-mail creator
After you created the mailing, enter the newsletter-content in the tab E-Mail Creator. The E-Marketing Manager now shows you the building block, which can be filled simply with content by using drag & drop. You can adapt the position on the grid like you want. You accept your changes with clicking on Save. A different number of columns and rows as a basic structure are available according to which layout you have chosen. In the E-Mail Creator are different building blocks available. These placeholders you can fill to your requirements.
In the following you are learning how you can add, move around or edit different elements. For detailed information about changing the CSS-settings of the layout, please take a look at the chapter Styles.
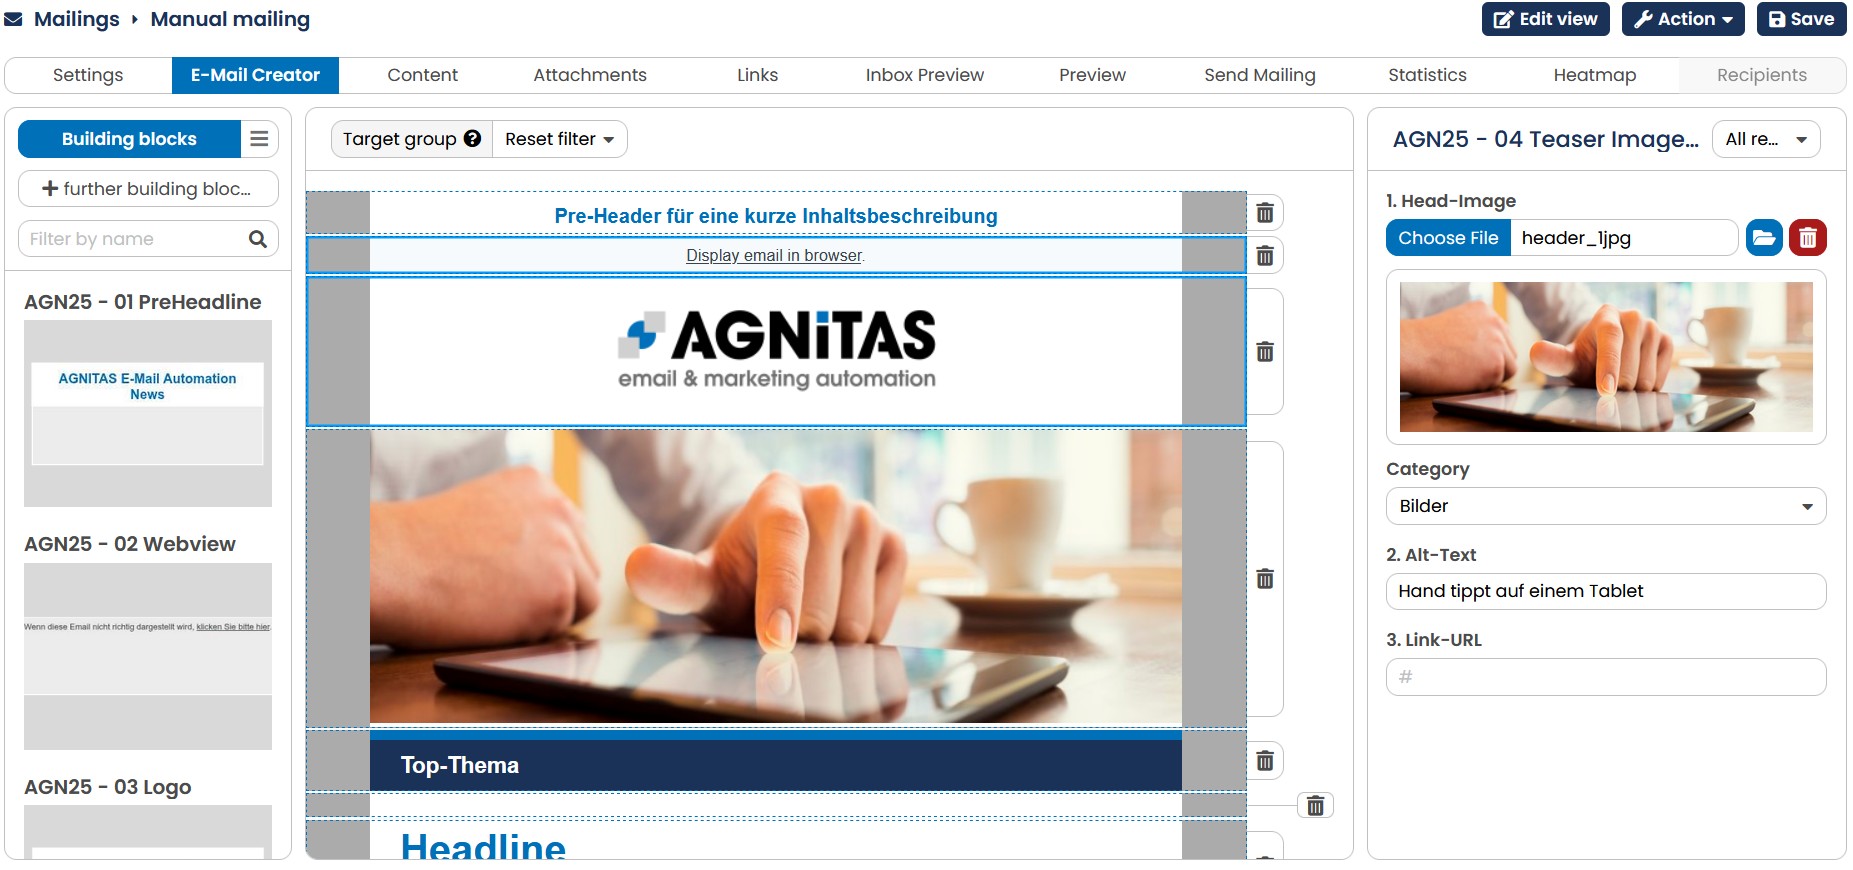
Fig. 3.33 In the E-Mail Creator you are able to insert, move around an edit building blocks directly.
You can relocate the single building blocks per drag & drop and place them at the required spot in the layout. For the design of your newsletter there are many different buttons available.
-
With the Delete icon you can remove the already existing building block from your template. After you delete a module it ends up in the Trash tab, located to the right of the Modules tab. From there, you can always drag the modules back into the mailing if you need it again. After that, however, it disappears from the trash. The trash empties as soon as you log out of E-Marketing Manager.
-
Clicking on a single building block allows you to edit its content on the right hand side. The content can be created with the html-editor or with the WYSIWYG-editor. Here you can also determine the picture, which should be present in the building block. You can insert the picture from the Mediapool or from your hard drive. The first image is displayed by default if the screen size or resolution is large enough. Additionally, you can optionally specify an alternative image for display on mobile devices. Furthermore you can determine the settings title, body, headline, image alt, image url, image category, link target for image, link text, link url, target group, category and post validity. Define your desired target group here as well; this designs the individual newsletter. In order to better understand which module you are currently working on, the name of the module is displayed above the editing view.
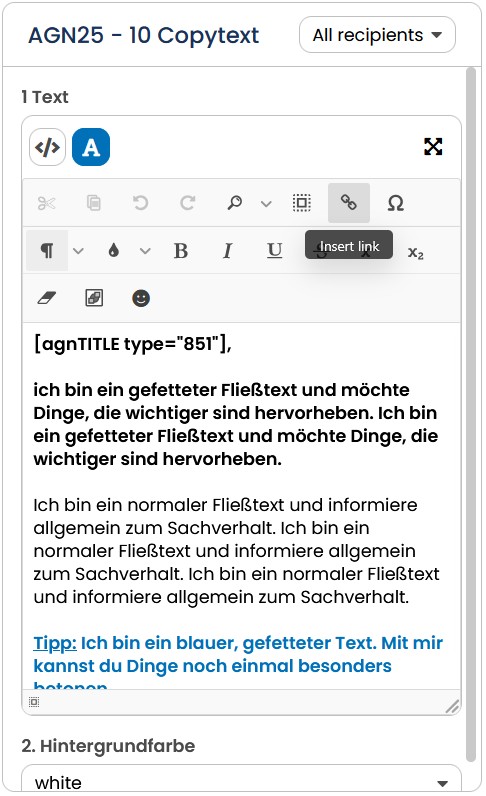
Fig. 3.34: Click on a single building block to edit its content.
-
When hovering over the boarder of the building block you have the option to re-size the element.
-
With the copy icon you can copy an already existing building block within your layout. Based on its size it will be pasted either on the left side of the original or ont the right.
-
The add icon at the ending of your layout allows you to expand your template with more lines. To add or delete lines between existing building blocks use the plus or the delete sicon in the green edge strips. Alternatively, you can drag a new building block into the design area and place it exactly on the dividing line between two lines, this will also insert a new line. You can hide the gap between the building blocks with the arrow icon.
With the target group drop down menu you can display the building blocks, which you assigned, under the edit icon, to intended target groups. So you can create building blocks dependent on gender or interests.
Note: You can define the priority of the building blocks in the E-Mail Creator via the dropdown field "Target group" in the content tab above. Use drag & drop to place the target groups in the desired order. In this way, you can determine who receives which building block, even if it might fall into several target group selections.
The activated building blocks are listed on the left side. With clicking on the button Further building blocks you have access to all available master building blocks and you can activate or deactivate them. If you click on the three stripes directly next to the Building blocks button, you can access the Recycle bin and the Contentpool. In the Contentpool tab, you can access other mailings via the search and select modules contained there. In this way, you can transfer existing content to your current mailing without any further effort.
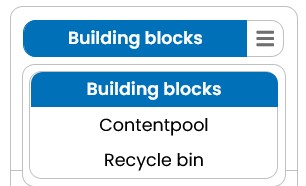
Fig. 3.35: Use the navigation on the left to find the building block you're looking for.
Please note: Building blocks, which you already had integrated, can deactivated when they are activated in your layout. On the other hand, the building blocks will disappear from the layout. In case you already generated a mailing from this very layout, the building block will persist.
You can have the structure of an Email Creator mailing determined by a recipient's interest profile. To do this, you create several modules, each of which you link to a profile field in which you have activated the "Value defines degree of interest" option (only possible for numeric fields). During generation, the EMM sorts the order of the building blocks for each recipient based on the values in the linked profile fields - regardless of the order you chose in the mailing. The highest value is placed first, the lowest last.
4.4.5.1.1 Fill in text modules by using the e-mail creator
In the Content tab, you have the option of filling your EMC mailing with dynamic content. You can find more detailed information in the chapter Inserting content.
The Content area displays all dynamic modules that you have added to your mailing with the [agnDYN] tag. A typical use case is that you want to use different subject lines for different target groups or you want to adapt the text variant of your mailing for different target groups. For information on how to insert different content for different target groups at the same place, see Create dynamic content by using the standard method.
You can also enter an interest profile field for recipients in the Interest field in the Text modules tab in the editing view of a module. Find out more about this topic in the chapter Sorting content by interest.
4.4.5.1.2 Styles
Important: The Styles tab is only available if you create your mailing templates using Layout Builder Classic. If you use Layout Builder Basic, this section is not available.
In this tab you can customize the color settings of you newsletter.
The E-Marketing Manager gives you the opportunity to make following color settings: background, grid color, background of building blocks and font color. You can change the color values with the hexadecimal-code or with the color field at the right edge of the respective field.
The hexadecimal-code has to begin with a hashtag and has to contain a sequence of six numbers. When you just want to try something, or a precise color code is not necessary, you can use the color field. To do this click on the box on the right edge of the respective field. Now you can use a controller in the right column to determine a color then you can determine with the cursor an exact color pixel. The among bar as well as the box adopt your chosen color.
With the button refresh preview in the top right you can see which effect the colors have on your mailing.
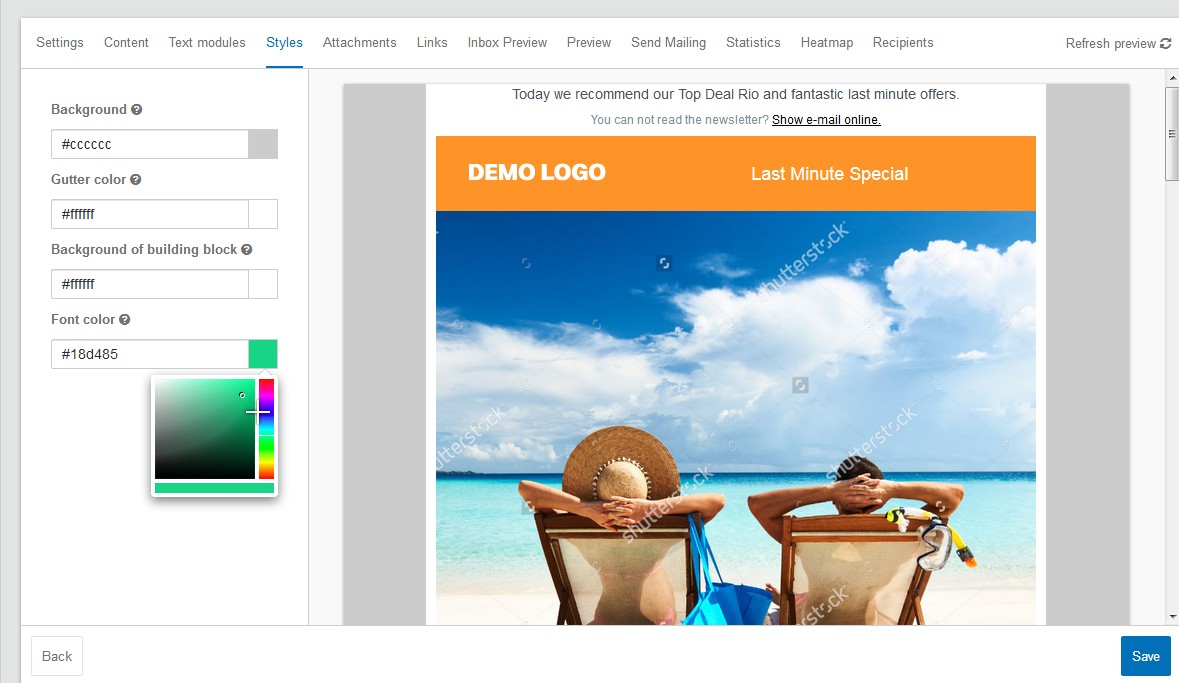
Fig. 3.36: With the color field you are able to design the single areas of your mailing to your preference
Note: Later changes to the styles can optionally be transferred to mailings that have not yet been sent by saving them.
4.4.5.2 Creating content by using the standard method
- In the Mailing, click on the Content tab at the top. The content area has the column headings Content blocks, Content Settings and Preview. The following table explains functions in the Content blocks and the preview. The drop-down list Import content from source in the Content Settings section is used to import ready-made texts or modules which must first be defined in the Settings under Content sources.
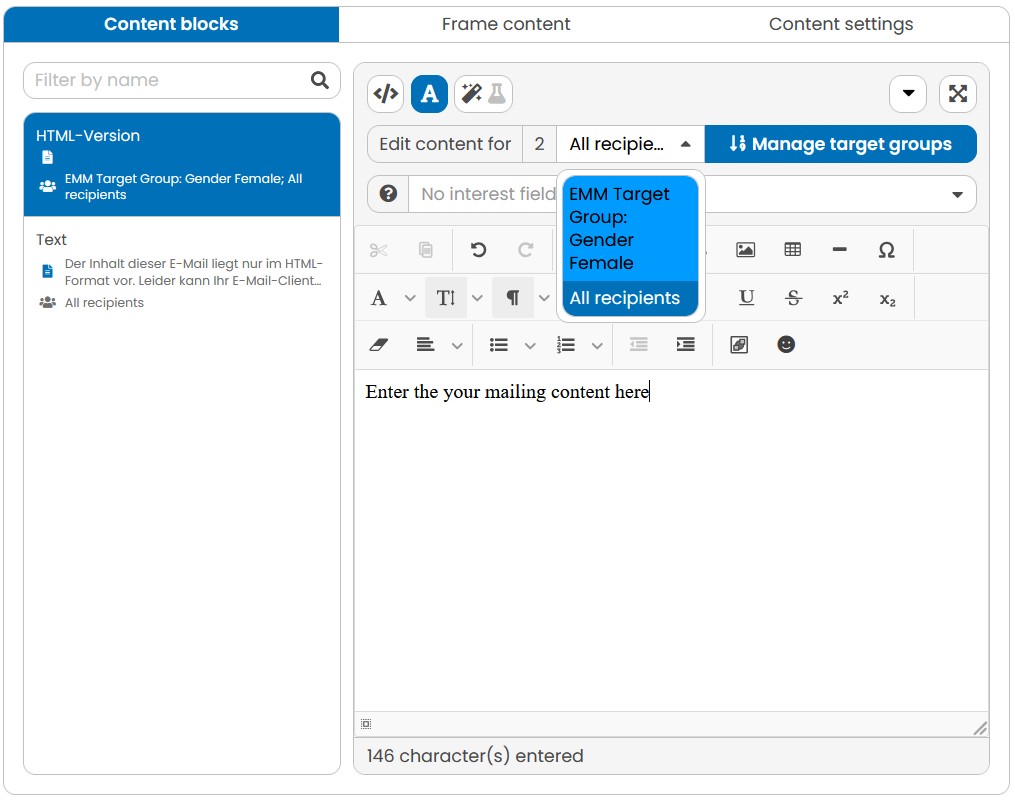
Fig. 3.37: Fill your mailing with content.
| Heading | Contents displayed |
|---|---|
| HTML-Version / Text | By clicking the HTML-Version or text box on the left hand side, you can choose which version of your mailing you want to create content for. The displayed editing panel belongs to the selected version. |
| Manage target groups | You may define different texts for your various target groups. Clicking on Manage target groups calls up the entry dialog for new text modules. To edit a text module, select the desired target group from the drop-down menu. The corresponding text module will then be displayed in the editor. |
| Preview | E-Marketing Manager displays a small preview of your mailing content right next to the editing panel. This guarantees you a quicker overview in order to see which details you might have to readjust. The preview is updated each time you save your changes. |
- The large editing field displayed in the Content blocks section can be used to enter content for the text-version of your mailing. You can type directly into that field or copy text from another software using the Windows copy function.
Please note: You should use an editor capable of producing ASCII text, like Notepad, instead of Microsoft Word. Most word processing software like Word use special formatting for special characters (symbols, double characters, punctuation marks etc.). This can cause problems when transferring the text into a newsletter mailing. If, however, you create a .txt file with an ASCII editor like Notepad, you will not have such problems.
If you copy a text from a text editing program such as Microsoft Word or OpenOffice.org directly into the content area of your mailing, E-Marketing Manager automatically replaces the special characters below with characters appropriate for a text e-mail. The program thus ensures that the mailing contains no undesired characters and that the mailing is displayed without errors. In spite of this protection function, we however recommend that you do not copy the meaning texts from Word or similar, but from a pure text program such as the Windows text editor Notepad.
| – |
|---|
| © |
| ® |
| ™ |
| ` |
| ´ |
| „ |
| “ |
| € |
| ' |
| x |
| y |
2. The same applies to HTML modules, with the only exception that you enter HTML source code instead of normal text. With the icons above the content field you can easily switch between the HTML and the WYSIWYG editor to control your entries.
Please note: Information on how to create customized mailings, for instance inserting the recipient’s name into the header, can be found in chapter Creating customized mailings.
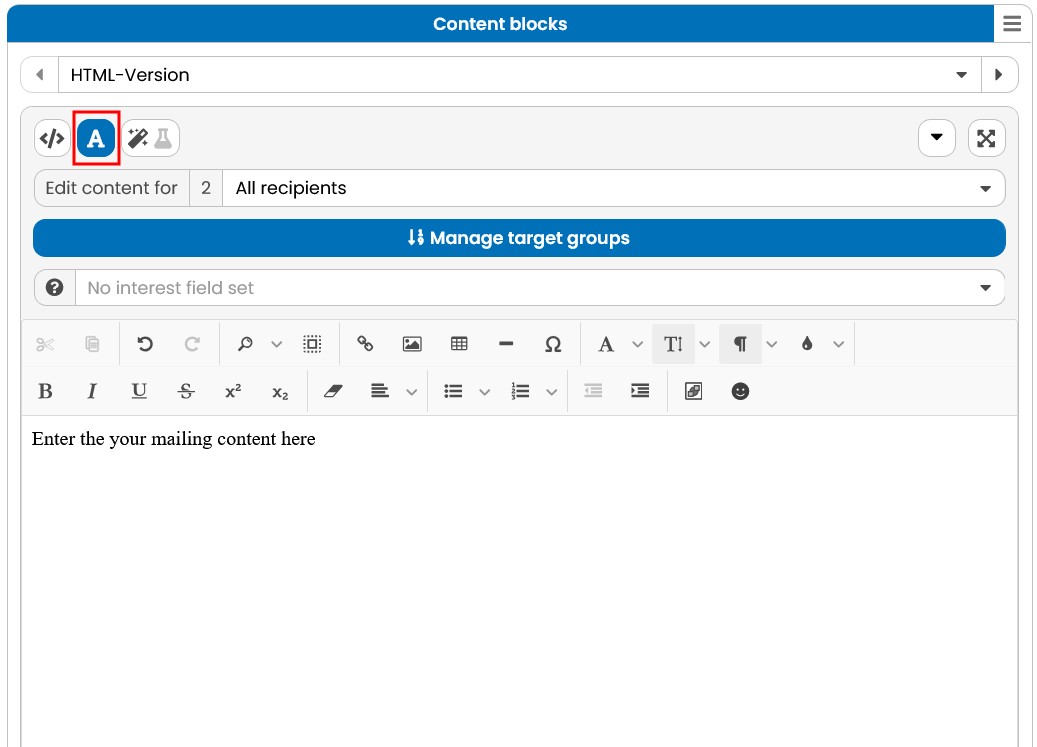
Fig. 3.38: By clicking on the icon above the content field you open the integrated WYSIWYG editor.
Above the text field of the WYSIWYG editor you will find the picture editor and AGNITAS tags, two more powerful tools that are available to you.
With AGNITAS tags you can personalize mailings and, for example, address the recipient directly by name or modify the reference line as desired. AGNITAS tags offer even more possibilities. You can find out more in the chapter Inserting AGNITAS tags. Appendix A: AGNITAS tags shows you a list of all available AGNITAS tags.
With the HTML command \<img src=""> a picture can always be inserted into a text building block. With the WYSIWYG editor, this works much more conveniently and, moreover, saves you troublesome typing. To insert a picture, click on the picture icon located in the HTML bar.
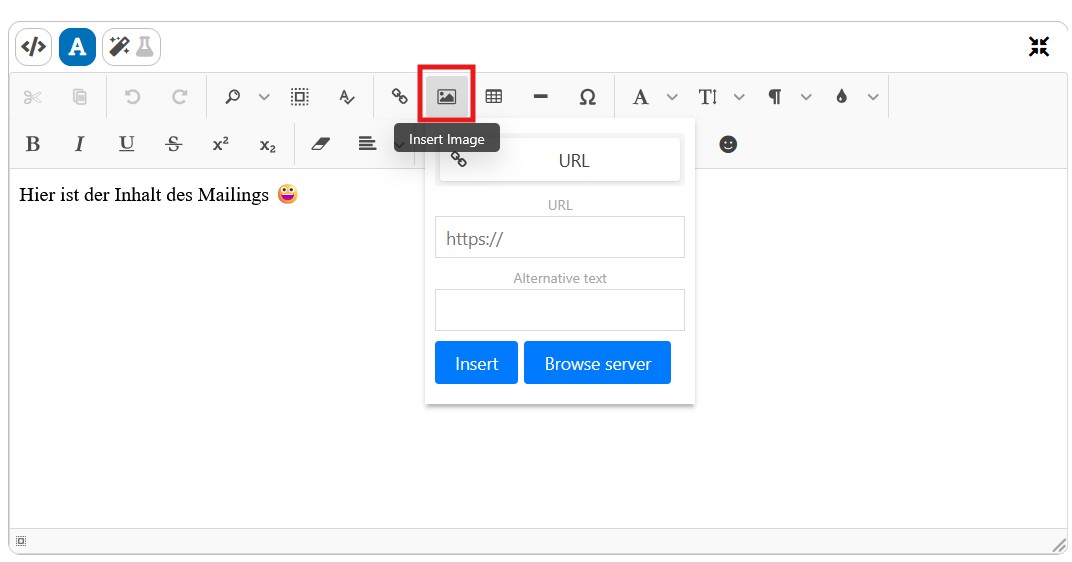
Fig. 3.39: With the WYSIWYG editor you can add pictures to your mailings without having to know the underlying HTML structures.
With the WYSIWYG editor, you can insert images into a text building block with a few mouse clicks. First of all select the desired picture with the button Browse Server. In this operation, E-Marketing Manager only considers picture material that has already been uploaded to the server. The suggested images are split up in the categories Mediapool and Others. Images listed under Others can be uploaded in the Images tab of your mailing. In the chapter Using image elements you can find out how to upload pictures to the AGNITAS server.
After you have selected the desired picture, click Insert to add the to the mailing textbuilding block.
Alternatively, you can upload pictures from the mediapool using a tag. To do this, use the agnIMGAGE tag described in Appendix A: AGNITAS tags. How to upload images to the media pool is explained in the chapter Uploading and managing images.
The WYSIWYG Editor automatically replaces special characters with suitable HTML notation. If you, for example, enter the letter ä, E-Marketing Manager replaces this with ä after saving or switching into the source text mode.
Please note: If you use the WYSIWYG editor for mailings that use templates containing multiple HTML building blocks, the program no longer pastes in the HTML structure \<html dir="ltr">\<head>\<title>\</title>\</head>\<body>[…]\</body>\</html> when saving or switching into the source text mode. This source text has in the past led to faulty representation for mailings with many individual building blocks.
-
In the example, leave the target group selection list in the All recipients setting. After creating the content for all recipients, select a new target group you want to create content for. By selecting a target group, only recipients of this target group can see this content. You can create additional target group-specific content in this text module by clicking the Plus icon. For more information on target group-specific content, see Dynamic content generation.
-
If you are satisfied with your new text, confirm it with the Save button.
-
The new entry is listed beneath the target group heading. When switching to the text version on the left side of your screen, you can see the entries made for this version of your mailing. If you didn't manually customize them, they will differ from the ones you made for the HTML-version. If you select Text in the preview using the View button, you can examine your text modules immediately.
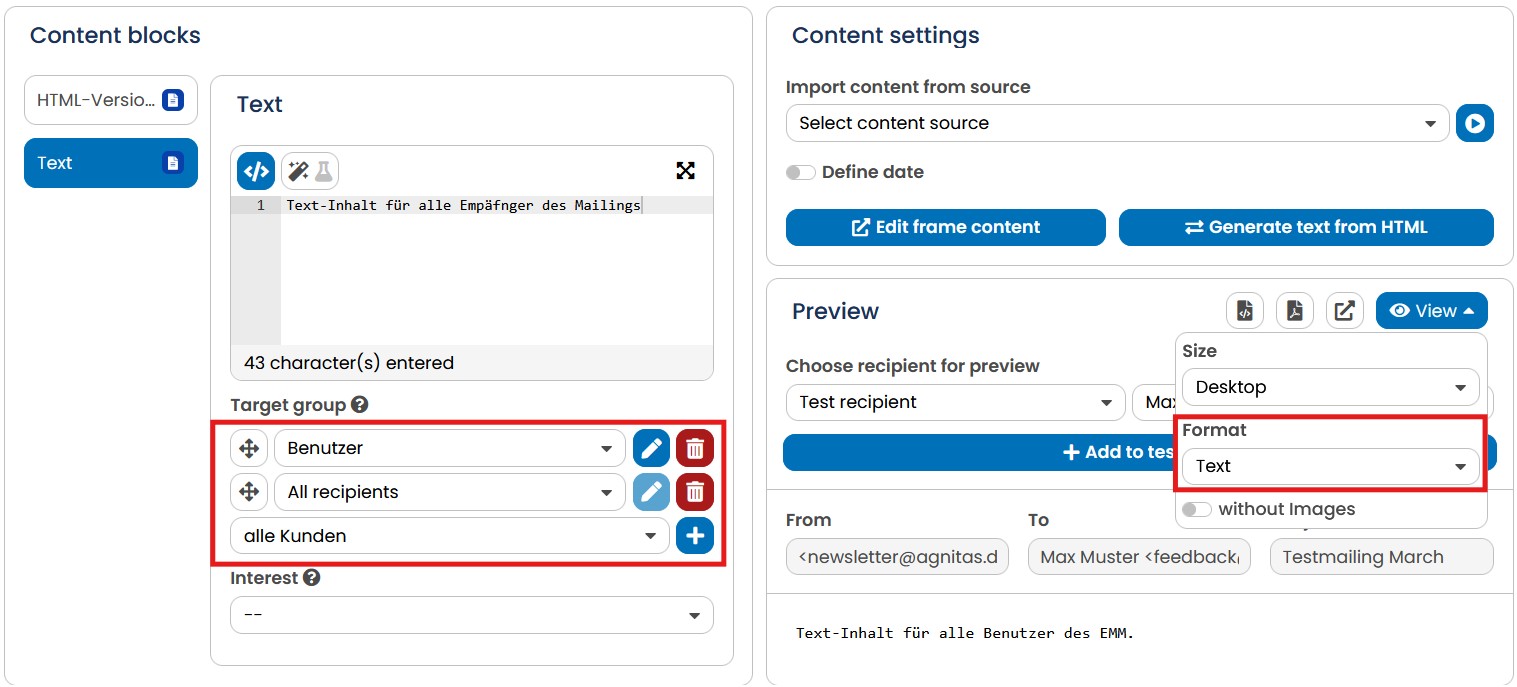
Fig. 3.40: New target group specific content is listed in the overview. You can use the View button to call up the text version of your mailing in the preview.
If you want to input a text for the text version of the mailing, you can utilize an already existing HTML version at the press of a button. To do so, click on the button Generate text from HTML that can be found in the Content settings.
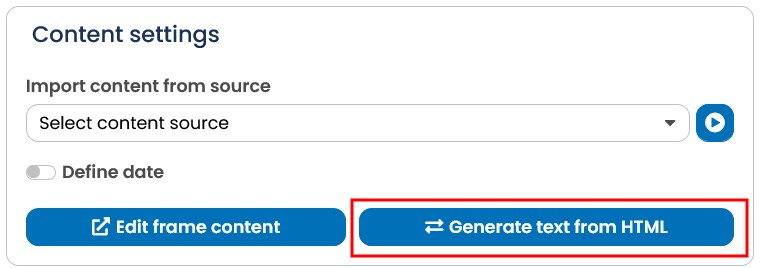
Fig. 3.41: E-Marketing Manager converts HTML building blocks into text building blocks at the press of a button.
Please note: The button Generate text from HTML is only available when the standard building blocks text and HTML version are used, since E-Marketing Manager cannot otherwise determine which HTML building block should be copied. This means that the AGN tag in theframe content has to be [agnDYN name="Text"/].
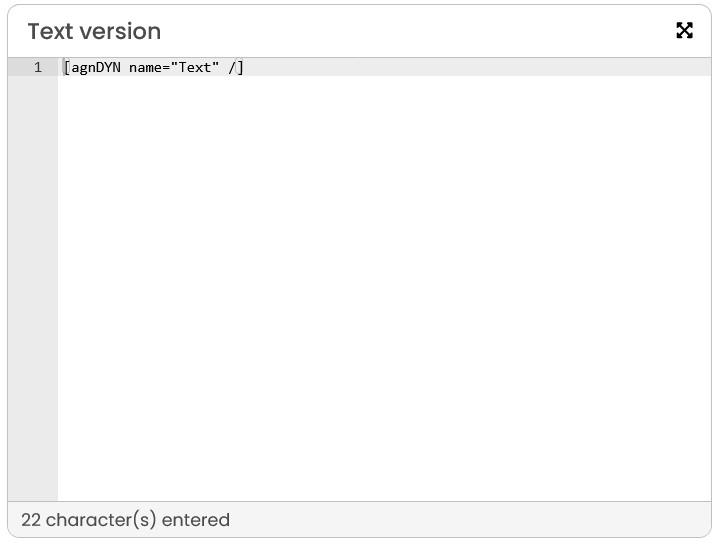
Fig. 3.42: Please note that the AGN tag in the frame content has to contain the formula [agnDYN name="Text"/] in order to see the Generate text from HTML button.
Activating the Import content from source drop-down list must be requested from AGNITAS. It allows importing mailing contents from an XML file in order to automate mailing creation. First, you must define the source under Administration in the navigation bar, then Content Source. If you are interested, please contact AGNITAS AG Support. Further information on content sources is contained in chapter Content sources.
Tip: If you have created several target group-specific contents in one module, you can easily adjust the priority of the contents. You can use the arrows to the left of the Enlarge icon of the editor to increase or decrease the priority with which this content is delivered, or to move it to the beginning or end. The E-Marketing Manager processes the content from top to bottom during mailing generation. If a recipient falls into the target groups of several contents, he or she is displayed the first content whose target group criteria he or she fulfills. It is therefore important that you sort the target group content so that the content that you consider to be most important/appropriate is delivered.
4.4.5.2.1 Display templates in mailings based on standard method
A mailing may be linked to a template. You do not need to jump to the Template tab in order to view the contents of a template.
- Via Frame Content in the Content tab, you can view the input fields for the text as well as the HTML version of the template. If you created the mailing without using a template, only the line [agnDYN name="Text-Version"/] is entered in the text version input field. This ensures that the text-building block called Text-Version is pasted in.
This text-building block corresponds to the input field for text in the Content list. Similarly, the line [agnDYN name="HTML-Version"/] exists in the HTML version to paste in the HTML code from the Content list.
- It is possible to make changes to adapt the template. You must, however, remember to tell the system to Save any such changes in E-Marketing Manager.
Please note: Changes you make to the frame content do not affect the Templates section. There you will only find the templates that you have explicitly created. The changes in the frame content are only saved together with this mailing. If you have created a mailing with a template, the changes only apply to this mailing, the template remains unchanged.
- If your mailing is based on a template and you want to transfer changes made to the template to mailings that have not yet been sent, you must activate the Update mailing if template is changed slider in the template option.
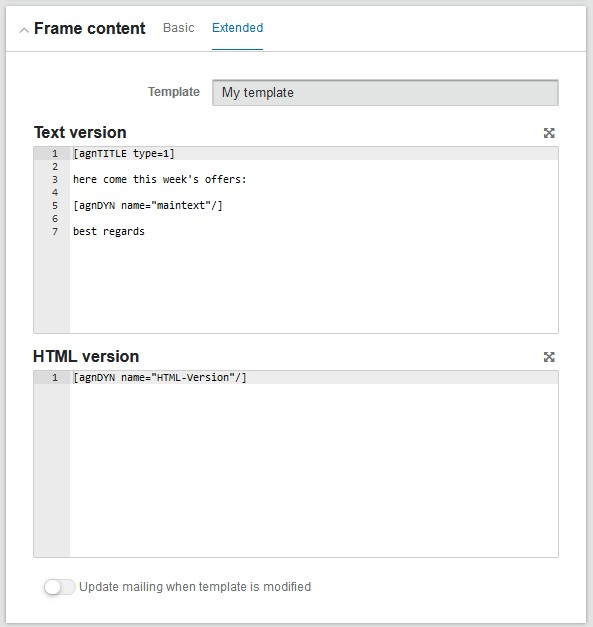
Fig. 3.43: Click on Edit frame content to view and edit the HTML and text frame of your mailing.
4.4.5.3 Creating customized mailings
A major factor in the success of a mailing is directly addressing the recipient. For example, each recipient should receive an e-mail that welcomes him or her by name. Customized mailings can however offer much more convenience, for example a link to where the recipient can alter the profile data, such as e-mail address, him- or herself. The subject line can also be personalized in this way.
This is done via special AGNITAS tags which are simply inserted into the text module. When sending out the mailing, E-Marketing Manager replaces the tag by the individual, recipient-specific value. For instance,
[agnTITLE type=1]
produces the following for the recipient John Smith:
Dear Mr. Smith
You can find out which salutation types you can use for this and how to add your own salutation types in the chapter Forms of salutation. Even if you prefer to use the first name or a combination of both instead of the greeting with surname, you will find instructions here.
4.4.5.3.1 Inserting AGNITAS tags
The AGNITAS tags can be used in various places. Classically, of course, in the content of a mailing, both in the text and HTML variants. It does not matter which method was used to create the mailing. Otherwise, you can also use some AGNITAS tags in the subject and for the sender name.
Type the required AGNITAS tag into the text in the content field. In our example, the mailing is to receive a customized greetings line. Type [agnTITLE type=1] into the first line. The emails sent out will then start with Dear Mr. Smith, for instance. Further details on this and other AGNITAS tags can be found in the chapter Appendix A: AGNITAS tags.
Please note: They also work within HTML tags, i.e. within \< and > brackets. However, you need to make sure you do not create an invalid HTML code.
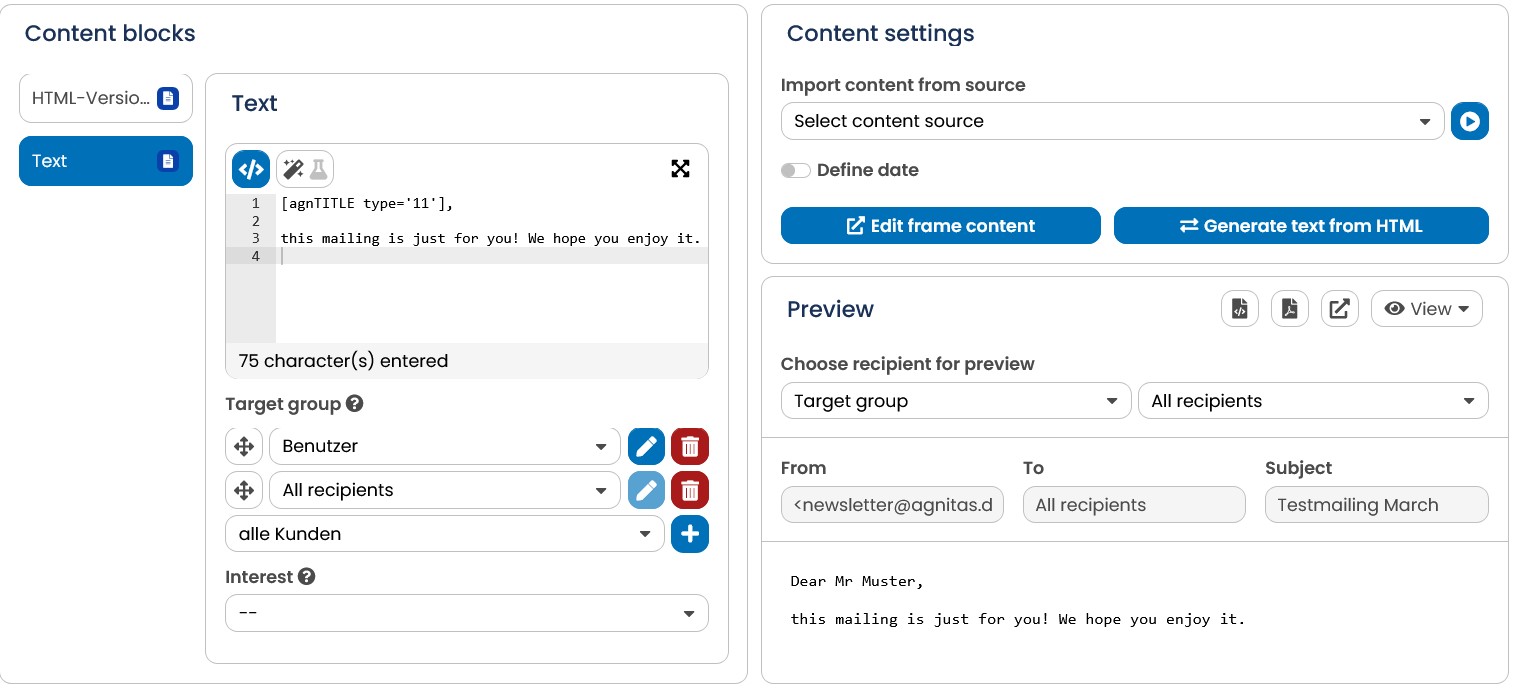
Fig. 3.44: Inserting a personalized greeting into a mailing using an AGNITAS tag.
You can also format the AGNITAS tags, which insert text here, with style specifications or using the WYSIWYG editor.
Tip: You can now paste AGNITAS tags directly into your mailing via a selection list using the WYSIWYG Editor. Click on WYSIWYG Editor over the input field. The list of AGNITAS tags is then available by calling AGNITAS icon in the HTML command bar.
Position the cursor on the point in the text where you would like to paste in an AGNITAS tag. Now click on the AGNITAS icon in the command bar. A selection window appears and lists all available AGNITAS tags in the drop-down menu Tag. The corresponding tag parameters also appear in the same window and vary according to the selection. For example, the AGNITAS tag [agnDATEDB_DE] enters the date value from a date profile column and uses the two parameters column (column name) and format (display format). An extensive list of all AGNITAS tags, with their description, can be found in the appendix Appendix A: AGNITAS tags.
When you have made your choice, E-Marketing Manager pastes in the AGNITAS tag, together with its parameters, at the cursor position in the text field. There you can further edit the AGNITAS tag as you wish.
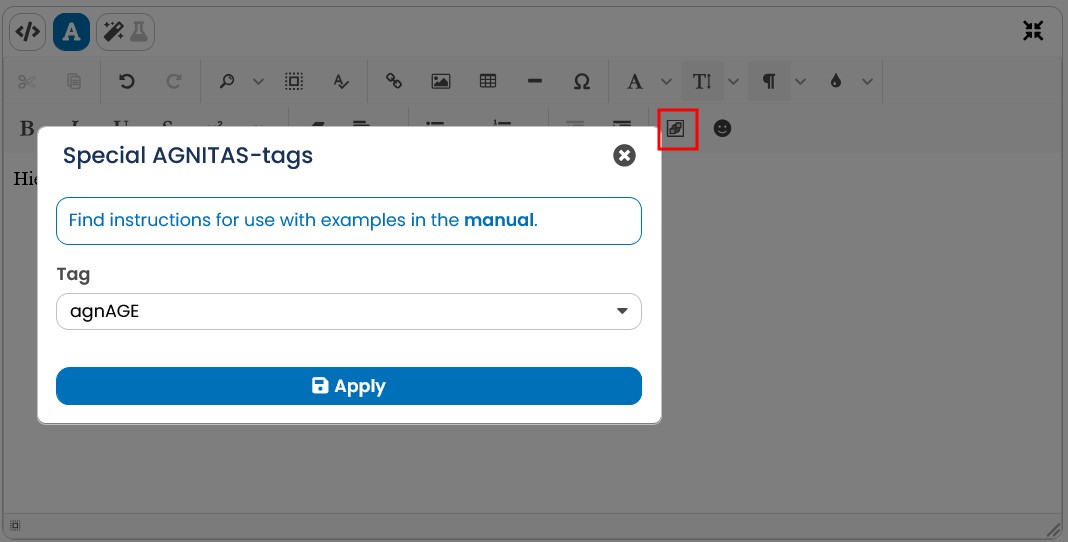
Fig. 3.45: The AGNITAS icon in the WYSIWYG editor calls up a list of all AGNITAS tags. You insert them with all parametres per mouse click.
4.4.5.3.2 Form of address - Individual greetings
Of course, you would like to address your customers personally and greet them by name. Greetings can be defined individually according to your wishes and available customer data. The E-Marketing Manager already offers numerous standard suggestions for the individual approach. Whether you prefer to address your recipients formally with "Dear Mr. Mustermann" or informally with "Hello Max", whether you use German greetings or greetings in other languages, whether the salutation takes place at the beginning of a sentence or within a text, whether a greeting formula is required or only the full name is to be inserted and how the E-Marketing Manager should proceed with recipients without a known salutation, you can control at will. If the predefined salutation types are not sufficient, you can also define your own salutation types at any time. Further information can be found in chapter Forms of salutation.
4.4.5.4 Dynamic content generation
E-Marketing Manager allows you to use special data to address customers according to their characteristics or properties and to supply certain groups among your subscribers flexibly with special offers by using flexible text modules.
Let us take the example of a shoe retailer: If you have, for example, recorded women with a German shoe size of 39 or men with a German shoe size of 42 in the database, you can have dynamically generated e-mails sent to them. This means that women with a shoe size of 39 will receive a different newsletter than men with a shoe size of 42 – without having to generate two different mailings to do this.
As a rule there is a large amount of information that is of equal interest to all customers, and a message such as “Adidas is bringing out a new style of shoes” would be information that could be used for all customers. The message “Adidas is releasing a new style of shoes for women with size 39 feet” however is only of interest for females with the corresponding shoe size. E-Marketing Manager can differentiate between general and special information and assign this to the respective customers, and men with a shoe size of 42 would not receive the message.
It is extremely easy to create such a dynamic newsletter using the E-Marketing Manager:
-
Create appropriate target groups (see chapter Target groups - Dynamic filters).
-
Create individual text modules or content buildingblocks for each target group.
4.4.5.4.1 Create dynamic content by using the standard method
The following example describes a mailing with different emails for men and women. To create the mailing, proceed as follows:
-
Create two target groups, one selecting men, the other filtering women.
-
Go to the mailing, and click on the Content tab.
-
Open the text module that you want to provide with target group-specific content. Please note: For the text and the HTML version, there are different text modules. If the dynamic content is to be displayed in both versions, you must insert the content in both text modules.
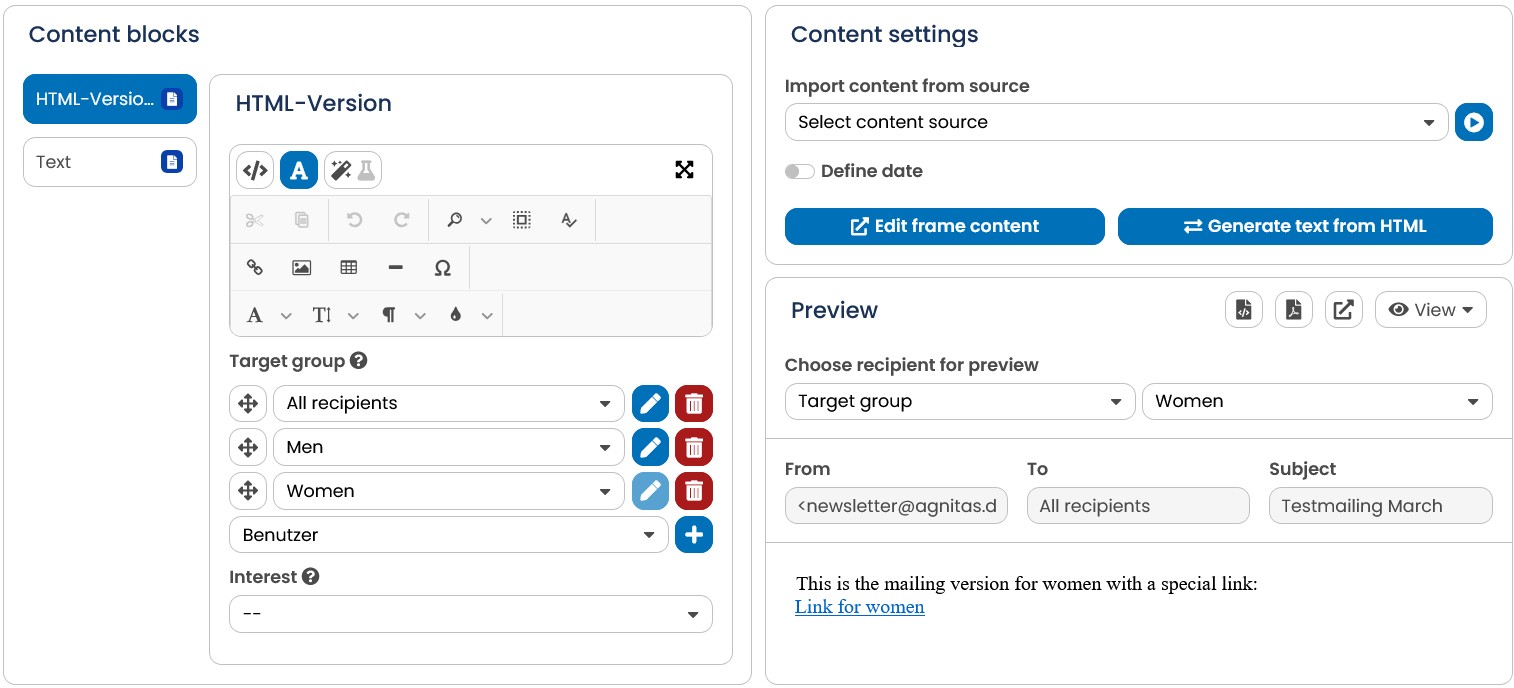
Fig. 3.46: Create content for male and female target groups.
-
As you can see, there is a drop-down list for you to select a target group for the content you're creating.
-
Adapt the first text entry to male recipients, then select men in the Target group dropdown list.
-
Now click the Plus icon, select women in the Target group drop-down list and insert the mailing version for women. In our example, women are offered a different link.
-
Now click on the Save button.
You can repeat this procedure as often as you like, creating, for instance, more than one text module for different target groups. In our example, it would be useful to create another module for recipients whose gender is unknown (the GENDER field has the entry 2).
Alternative text modules are displayed in the text module overview. The Target column gives the target group you selected for each module.
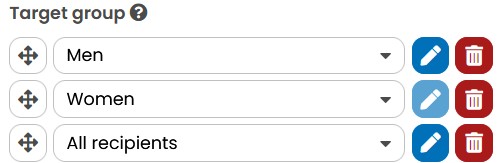
Fig. 3.47: The overview displays text modules by target groups.
Please note: The sequence of text modules plays an important role. E-Marketing Manager checks target groups starting with the top of the list. If a recipient belongs to the first target group, he will be sent the appropriate text module, and the system jumps to the next recipient. If you do not take care to select the correct target group sequence, it could be that some recipients do not receive the content intended for them at all. In other words: you should start with the “smallest” target group, as seen in the screenshot above. Here, the system distinguishes between HTML and text versions.
This is easiest to understand using an example. Suppose you wanted to send customized mailings to men and women. Furthermore, recipients are to receive a special greeting if it is their birthday. If you just append the birthday target group to the list shown in the figure, noone will ever receive a birthday greeting. Why is that? E-Marketing Manager checks first if a recipient belongs to the “men” target group, then it checks the “women” target group. As a named recipient is bound to belong to either group, the birthday target group will never be checked at all.
4.4.5.4.2 Create dynamic content by using the e-mail creator
The E-Mail Creator also allows you to assign different content to individual areas of your mailing for different target groups. To do this, proceed as follows:
- In the E-Mail-Creator tab, you can see all modules that you have either already created or that were stored in the template. If you move the mouse over a block here, a grey field is displayed above the editing icons, indicating which recipients can see this block. In the case of general content, such as logos, spacers, separators, etc., this usually contains all recipients.
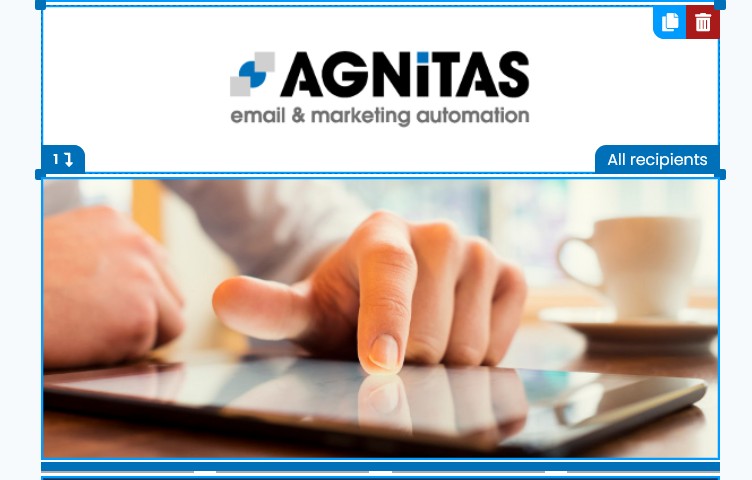
Fig. 3.48: Building block for all recipients
- If you would now like to display individual blocks or entire areas only to a selected group within the recipient group defined in the Settings tab, you can assign the affected blocks to a target group. First open the content module that you want to assign a target group-specific content to. Insert your texts and images as required. A dropdown menu Target group is offered at the top of each module. Here you can select the desired target group and confirm with Save. The module is therefore only contained in mailings to recipients who fall within this target group. For all others, this module is missing and you simply continue with the next content.
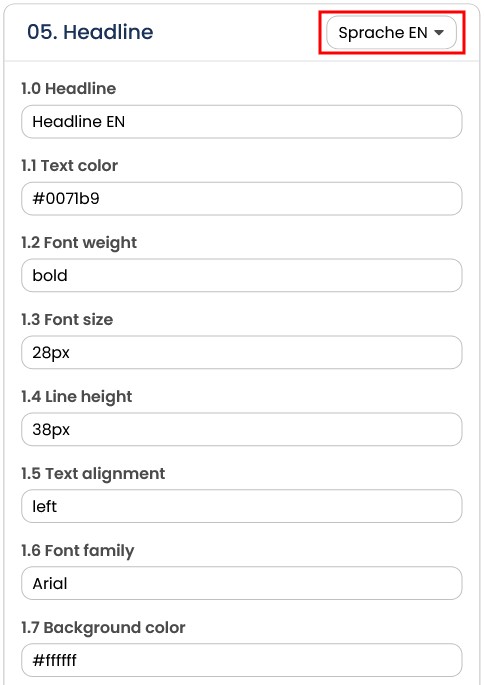
Fig. 3.49: Selecting a target group for a specific building block
Note: If you have already added a target group in the Settings tab and all recipients of this target group are to see this content, you do not need to add a target group in the module. All recipients always refers only to the recipient group of the current mailing.
- If different content for different target groups is to be output at the same point, simply drag another module from the left column into the mailing and place it exactly above the first module. The EMM borders the module with a blue line and a number and a small arrow are displayed in the lower left corner. The number tells you which level you are currently on. You can use the arrow to browse through the various contents so that you can access underlying contents again at any time. In the stacked view, you can also see which target group the module is addressed to with mouseover and can edit the content as usual.
Fig. 3.50: Switching between building blocks by pressing the blue arrow
- If you work with target group-specific modules and have assigned more than one module accordingly, it will be difficult to keep track of what the mailing will look like for a specific target group. To simplify this, you can customize the view with the Target Group drop-down menu at the top. The E-Marketing Manager will now only show you those modules that have not been assigned to a group or that match your selection.
This allows you to view the mailing from the perspective of the respective target group.
To see all available modules again, choose Reset filter.
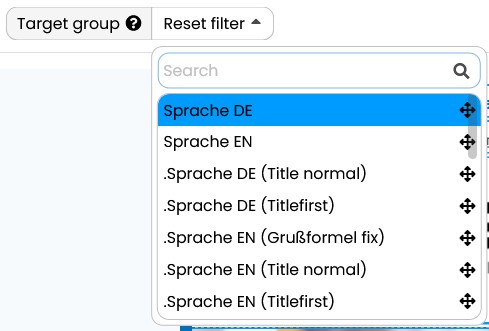
Fig. 3.51: Target group drop-down menu
- The Target group dropdown menu has another function. You can sort the target groups in the list using drag & drop. To do this, click on the control pad to the right of the target group description and drag them to the desired position while holding down the mouse button. This sorting determines the sequence in which they are processed during mailing generation. For example: there is both a target group Sprache DE and a target group Sprache DE (customers). The German-speaking customers would meet the criteria for both target groups. In order for the customers to see a different content than the prospective customers, this target group must come first. It can also be expressed in this way: The "smallest" target group belongs at the beginning of the list.
4.4.5.4.3 Using Mailing Inline Script Interpreter (MISI)
There are areas of use in the content where commands are to be executed directly in the mailing content, such as if-then decisions. The advantage is that this does not require separate building blocks with target groups created specifically for this purpose. With the Mailing Inline Script Interpreter (MISI) such conditions can be written and executed directly in the content. The implementation is based on LUA technology and uses a syntax that is also used for velocity scripts.
An example code for this could look like this:
#if(\$gender == 0) Dear Mr #else #if(\$gender == 1) Dear Mrs #else Hello #end #end [agnDB column="firstname"/],
The decisive profile field is prefixed with \$ and referenced with the field name in the database. The condition for the value is entered after two is-equal characters. Please contact our support for a comprehensive documentation.
4.4.5.4.4 Sorting content by interest
It is possible, to sort the contents of a newsletter according to the individual interest of each recipient. Mark the text building blocks in the mailing content with these fields of interest. In the newsletter, the text building blocks that are linked to fields of interest are sorted according to the interests profile of the respective recipient. It is assumed that the greater the value of the profile field, the greater the interest. For this reason, only profile fields with the data type Numeric are suitable for sorting.
- Define profile fields as fields of interest
When you set up a new profile field under Recipients and Profile fields, you can define a numeric field as field of interest after creating it first. You can also define already existing fields. Just open this field and activate the slide Value defines grade of interest. For
each marked profile field an interest group according to the naming scheme INTEREST_FIELDNAME is created automatically.
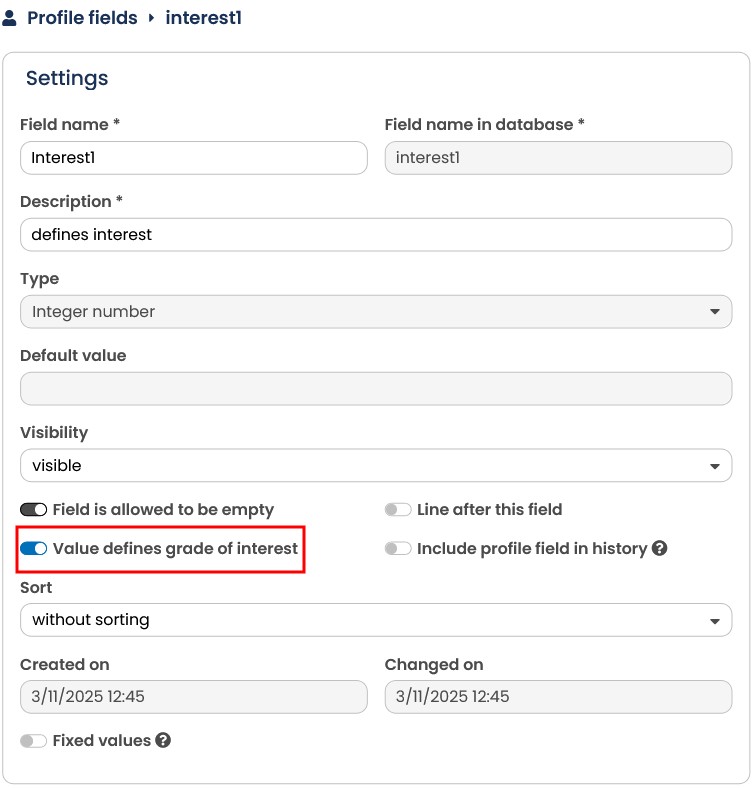
Fig. 3.52: Mark as interest field.
- Connect text blocks with interest fields
Next, go back to your mailing content and select a text block. Connect the text block with the interest group, as the picture shows.
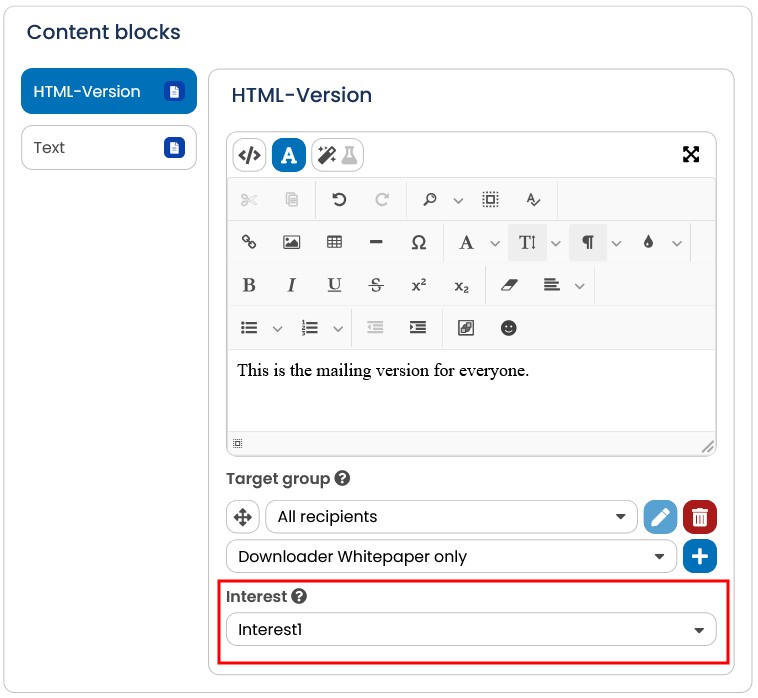
Fig. 3.53: Connecting with a text block.
Repeat this process if necessary with different texts and different fields of interest, as a result, each recipient receives the content in the order of his or her individual interest.
For example: You combine the phrases "Tennis course" and "Island tour" with the fields of interest "interest sport" and ” interest tourism". Now, each recipient receives your offer either with the tennis course offer or the island tour first, depending on whether he is more interested in sports or travel.
Tip: You should automatically grow the fields of interest by the reactions (clicks) of the recipient. For details check the chapter Closed-loop marketing.
Note: A numeric profile field is required for this function.
4.4.5.5 Undo-function for mailing content
To prevent the contents of your mailing being accidentally overwritten and therefore lost, EMarketing Manager can restore the previous version of your mailing if desired. With the Undo function, you can undo the last 10 editing steps.
E-Marketing Manager saves a security copy of your mailing if, after editing a text building block, you click on the button Save. You can therefore change the content of your mailing up to 10 times and still restore its original status by using the Undo function.
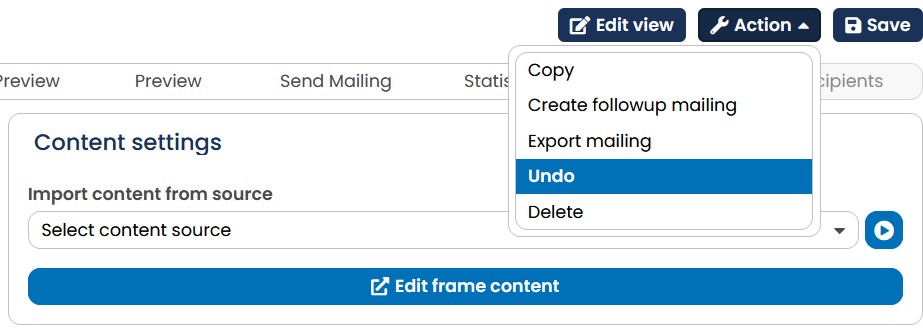
Fig. 3.54: You can restore the last 10 versions of your mailing by clicking the Undo button.
The Undo function is active as soon as you create and save the first contents of a mailing, for example text building blocks, a title, link URLs or the introduction text. To retrieve a previous version of your mailing, click the upper right of the window you can find the dropdown list Action where you can choose between Copy and Delete. Depending on the kind of mailing you have chosen in the beginning, the Undo button will be the third or fourth option besides Create followup mailing. If the mailing is part of a campaign you will additionally have the option to Campaign. By clicking this option you will be leaded to the assigned campaign in the Campaign Manager.
After clicking on Undo, the security query below appears in a new window. Confirm this with Undo if you want to undo the last editing step.

Fig. 3.55: Confirm this security query to return to the previous version of your mailing.
Please note: The Undo function
-
can undo a maximum of 10 editing steps.
-
saves only the HTML structure and text building blocks for mailings and templates. Other contents such as file attachments or images are not saved.
If present, E-Marketing Manager deletes all Undo steps in a mailing or template if these have not been edited for more than 60 days. With this time limit, E-Marketing Manager simply prevents valuable database space being unnecessarily occupied. The current content of the mailing naturally remains untouched.
4.4.5.6 Create AI Content
With the AI text generation premium feature, the E-Marketing Manager offers you the possibility to generate texts for your standard- and e-mail creator mailings quickly and easily using artificial intelligence. If you are interested in this feature, please contact sales@agnitas.de.
For this purpose, the program ChatGPT from OpenAI is used, which is connected to the EMarketing Manager via RESTful API.
Please note: Because OpenAI, the company operating this service, is based in the United States, the data you enter may be processed outside the EU. Therefore, please do not enter any personal information!
Click on a text module and go to the AI text generation menu.
The interface offers you 4 input fields that define the frame of your desired text.
-
Language: Use this dropdown to define your desired language. You can choose between German, English, French, Spanish, Dutch and Italian. The default language is German.
-
Number of words: Set the maximum length of your text here. We have created this feature with a strong focus on newsletter texts for you and defined a limit of 1 to 1000 words for suitable text lengths.
-
Tonality: Use this to set the tonality of your text. In this dropdown you have a selection of different tonalities (Dynamic, Modern, Factual, Relaxed, Committed, Serious, Fun), from which you can choose freely as required. If none of the tonalities is desired, you are of course welcome to leave the default selection Without predefined tonality.
Dynamic: lively and energetic
Modern: Contemporary communication that reflects current trends or language styles.
Factual: sober and fact-based, without much emotion or personality.
Relaxed: Relaxed and informal
Committed: Interest, passion, or dedication
Serious: Seriousness with a focus on important issues or problems. Fun: Humorous and entertaining
- Content description: Define here what your text should be about. You can freely decide whether you work with catchwords / keywords or whole sentences. We recommend that 3 to 5 keywords (individually or in phrases) are used for a standard text. The more details you provide, the more precise the result will be.
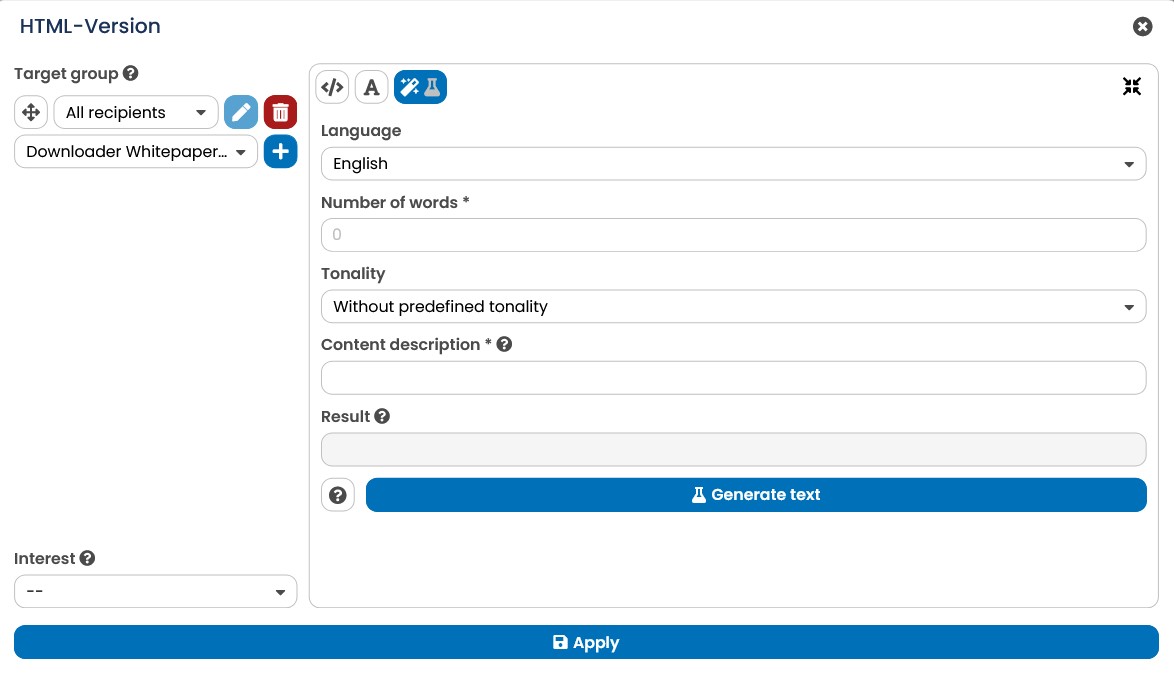
Fig. 3.56: Define the framing for the text generation.
Note: This BETA feature of the E-Marketing Manager at this time can only create plain text without certain formatting. We are already working on enhancing this feature for you and welcome feedback and suggestions!
Once you have made your entries, click on the Generate Text button. The EMM will process your request and output a finished text in the Result field. If you are not satisfied with the result, click Regenerate Text. Otherwise you can adjust the parameters according to your needs and then click the button. This text is a preview that you can now paste into the body of your mailing. If you want to apply the text, click the Apply button. Depending on the available tab, HTML or WYSIWYG, the text will be inserted here and you will switch directly to the corresponding tab.
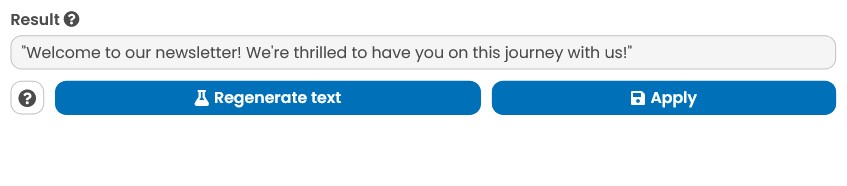
Fig. 3.57: By clicking on Apply, you can accept the generated text.
Please note: Clicking Apply will overwrite existing texts in HTML / WYSIWYG.
Now click Apply again to save the text.
If you choose x instead, you can continue editing the content. Clicking the x in the menu window will always cancel the operation without saving the changes and close the menu window.
4.4.6 Using image elements
HTML emails often contain pictures or image elements. Using the tag \<img src=""> you can insert a link to an image. It is usually on your server and has a similar address to https://www.agnitas.de/uploads/pics/EMMLogo.gif. Using the Images tab you can check whether the URL was typed correctly.
Tip: In the Mediapool, you can copy the URL of an image directly to your clipboard to avoid typing errors.
-
Open the mailing you want to edit. Then open the Images tab.
-
The tab displays a list of all images inserted into the mailing using the \<img> tag. The left-hand side shows you a preview of your images. Next to this you have additional information like the File name, Description, Link, the uploading point of time, Device type, Dimensions, Size, File type and the assigned actions. By clicking on the corresponding line you can see the image in full size.
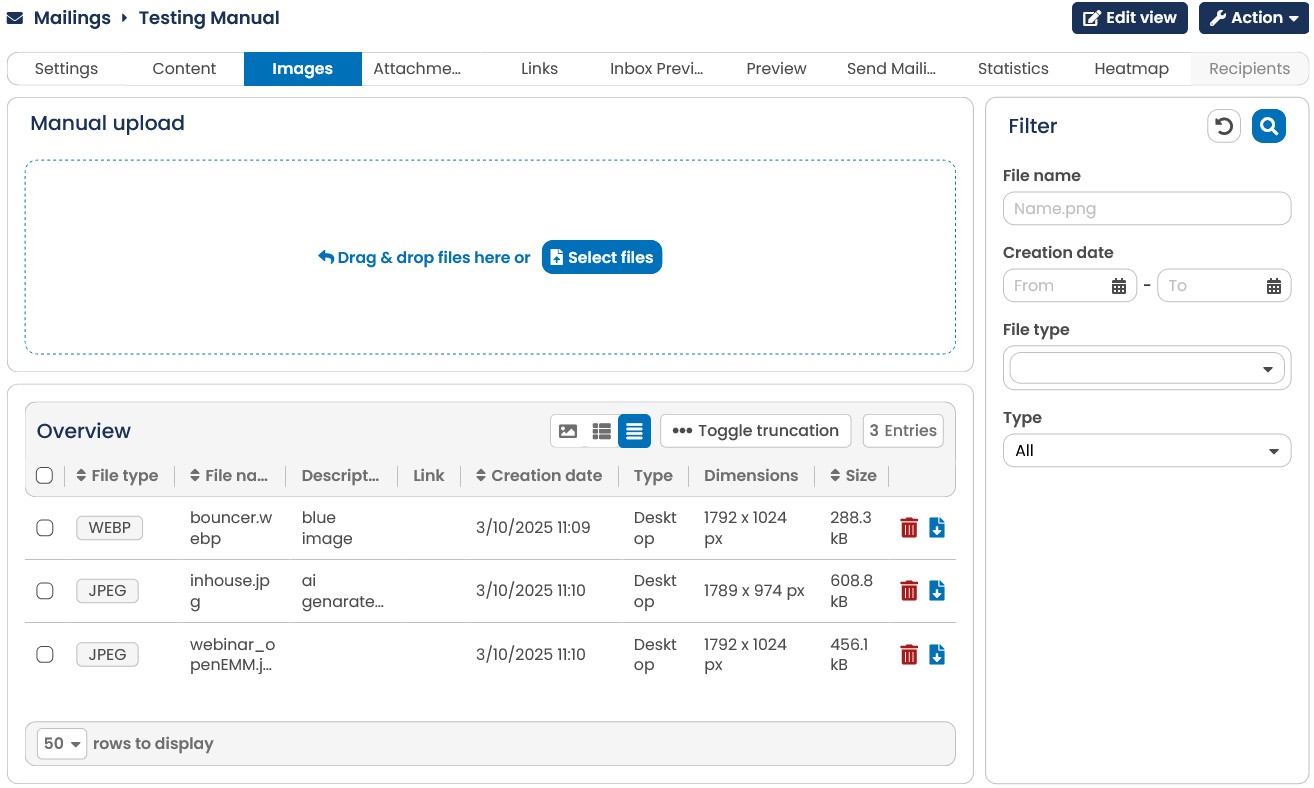
Fig. 3.58: The Images tab shows all images inserted into an HTML mailing.
Please note: Many errors occur because of the file name spelling. It should only contain characters and figures, no special characters or symbols, a space character, is fine. Also note that a web server distinguishes between upper and lower case characters. For a web server, picture.gif and Picture.gif are two different files. If you still cannot see the correct image in E-Marketing Manager, the graphics format may be the problem. E-Marketing Manager can only display GIF, JPG and PNG images.
Instead of saving the graphics file on your web server, you can upload it to the AGNITASServer
-
You can drag and drop your image or you use the button Select files.
-
Description: In this field you can add keywords to your image. In this way you can sort images and find them faster, but don't confuse it with the alternative text.
-
Link target for image: After you added your image with the image-upload function, you can add the link, which will be connected to the picture in the mailing.
Note: You cannot assign a link to the image afterwards. Here you have to link the image directly in the source code.
-
By clicking on Upload file, you are sending the file to the E-Marketing Manager.It is now displayed in the table below the upload area.
-
Now the system displays the new image in the overview. To delete the image, just click on the Delete symbol. Using the AGNITAS tag [agnIMAGE name='picture.gif'] you insert the image into a mailing. You must use the exact file name just as it appears in your picture components overview.

Fig. 3.59: The picture is saved on the server as an image and can be used in HTML mailings.
If your mailing contains a lot of images, you do not have to upload these individually since E-Marketing Manager supports the upload of multiple images simultaneously. Pack the images you want into a zip archive. Then select the corresponding zip file via Browse.
In addition, you can define a version of each image for mobile device types. E-Marketing Manager automatically recognizes whether the recipient has opened the mailing with a mobile device and in this case delivers a suitable image optimized for the device.
To add a mobile component to your mailing, you must first upload the normal graphic component as described above. You can determine the mobile component by calling the drop-down list Source image for mobile asset and selecting the corresponding file name for the basic component.
You can either edit an image by clicking the corresponding line or click on the symbols in the right-hand column to delete the image ( ) or download it to your hard disk (
 ).
).
If the corresponding function has been enabled by AGNITAS Support, you additionally have the possibility of sending individual images as offline HTML. In this case, all recipients with the e-mail type set to Offline-HTML do not receive the images together with the mailing (normal procedure) but from the AGNITAS server. A prefix in the file name that is issued to each customer individually permits individual images to be sent together with the mailing. An example: All recipients of a mailing should receive the offline version of the company logo. For this, all recipients must have the e-mail type Offline-HTML and the file name of the logo must have the appropriate prefix. The image is then appended to the mailing.
You can download all the images used in a mailing at once from the E-Marketing Manager server at any time. To do this, check the checkbox in the header of the table to then
download all used images at once by clicking on the small download icon () appearing on the right side of the header.
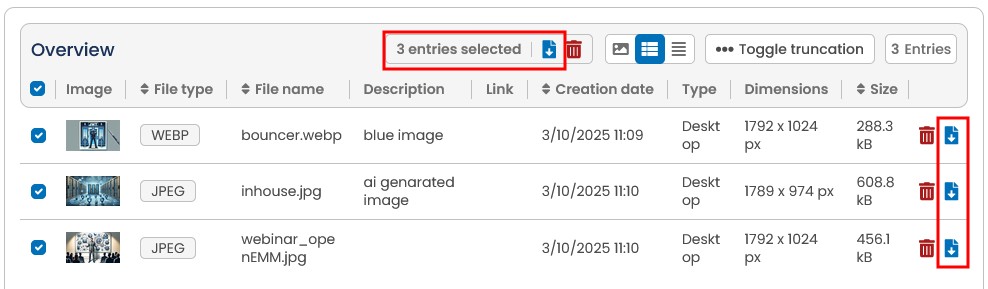
Fig. 3.60: You can either bulk download all the images from the AGNITAS server or choose an individual image via the download icon.
Please note: Additionally to the already described possibilities, you can also transfer images via SFTP when clicking on the SFTP tab. This feature is not a standard. If you are interested in it, please contact your Key Account Manager.
4.4.7 Sending file attachments
The optional function for file attachments considerably extends the scope of E-Marketing Manager for marketing campaigns. It allows you to provide recipients with further information over and above the newsletter text. You could, for instance, send out vouchers or price lists by way of a file attachment.
This effective feature also offers a target group function: Mailing attachments can be set according to target groups, and different recipient groups can be sent any number of different files. You could even create a personal file name for each recipient.
Please note: The function to create personalized PDFs is not a standard feature of EMarketing Manager; you can, however, order it separately.
Add a regular file attachment as follows:
-
In order to attach a file to your mailing, you must start by selecting the mailing. In the mailing details, open the Attachments tab.
-
It is easiest to use the Browse button to call up selection dialog. Select the file you want to send and click on Open. The browser inserts the complete file directory into the field.
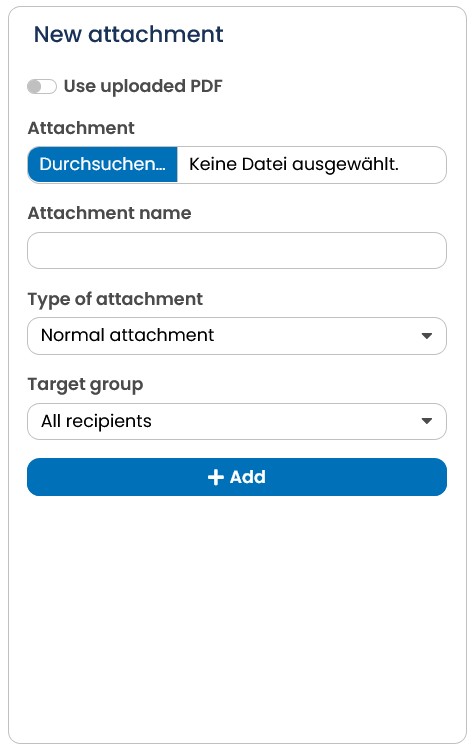
Fig. 3.61: After choosing the type of attachment and a target group, you store your selection in E-Marketing Manager by clicking on the Add button.
-
By activating the slider Use uploaded PDF you can select a previously uploaded PDF document as an attachment. Simply drag the slider from left to right. For details on uploading a document see the chapter File Upload.
-
The entry field Attachment name is used to define a name for your file attachment. In our example, the original name AGNITAS_OpenEMM_2015_Manual_v1.pdf will be used.
-
Now, specify the Type of attachment. A Normal attachment will always have the same name and be sent to all recipients under that. This selection menu is only available if you have authorization for personalized attachments. A Personalized file attachment will be different for each recipient. Further information on customization and individual mailings is contained in chapter Sending customized file attachments.
-
The Target group drop-down list is used to set which recipients are to receive the attachment. Since you may define any number of attachments for each mailing, you can easily specify different attachments for different target groups.
-
By clicking on Add, the selected file is appended to your mailing. Underneath the entry dialog, E-Marketing Manager now shows a list with all defined file attachments.
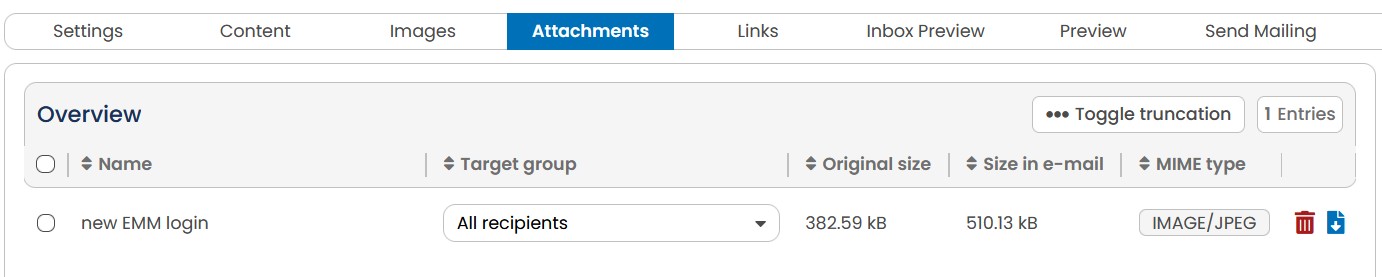
Fig. 3.62: The file has now been defined as a file attachment for the mailing.
-
In the overview, you have the option to change the Target group for this attachment. If you are sending out several attachments, this does make it easier to assign an attachment to a different group later. In our example, you leave the original settings. You must, however, remember to tell the system to Save any such changes.
-
The attachments list gives several interesting details. The MIME type (Multipurpose Internet Mail Extensions) tells you what sort of attachment you have selected. When sending out a mailing with a text attachment, this will be characterized as text/plain.
Our example uses a PDF file as an attachment, so the MIME type is application/pdf.
Any HTML element included will also be shown here.
There is also a difference between the Original size and the Size in e-mail. The reason is that the software converts the file attachment into a sendable format (ASCII-Format) which is about 30 to 40 per cent larger than the original format.
10.As soon as all data have been entered to your satisfaction, click on Save to tell the system to store your data. If you want to delete the attachment again from the mailing, just click on the Delete icon.
11.To define further file attachments, call up the entry dialog again and click on the Add button.
Please note: You must remember to check your file attachments for size in order to take recipients’ band width into account. Since, depending on the target group, the majority of emails are retrieved via mobile devices and the addressee does not always receive the data via a WLAN, it is essential to take this into account. These recipients will not be very happy if you send out large files requiring long download times. For successful mailings, you should try and keep the size of file attachments under 100 kb to 300 kb.
Tip: You can also send .vcf-files.
4.4.7.1 Sending customized file attachments
Customized attachment will be different for each recipient. The only possible file type for sending customized attachments is portable document format (PDF). The PDF master must be available as a text file in XSL-FO format. You will need to insert the usual AGNITAS tags for personalizing the file attachment – a complete list is attached as Appendix A: AGNITAS tags. The E-Marketing Manager replaces all AGNITAS tags with text and converts the file to PDF format before sending it. The recipient may then use the Acrobat Viewer free of charge to read the file. If you have further questions on the XSL-FO format or on how to structure or create such a file, please contact the AGNITAS Support. In order to send a customized file attachment, proceed as follows:
-
Select the Personalized attachment entry from the Type of attachment drop-down list.
-
In the Attachment input field, use the Browse button to select a XSL-FO file as an attachment. The entry field Attachment name takes a different name for the attachment, just like for any other file attachment.
-
The entry box PDF background file is only used for personalized attachments. Select another PDF file here. This PDF file will be used by E-Marketing Manager to “print” the contents of the XSL-FO file into it. This PDF background file will typically be a blank sheet with the company logo and the usual data – company name, address etc. This file may be created using any software able to save files in portable document format (PDF). All data can also be written into the XSL-FO file. It is easier however, to create a file containing only data which are strictly necessary.
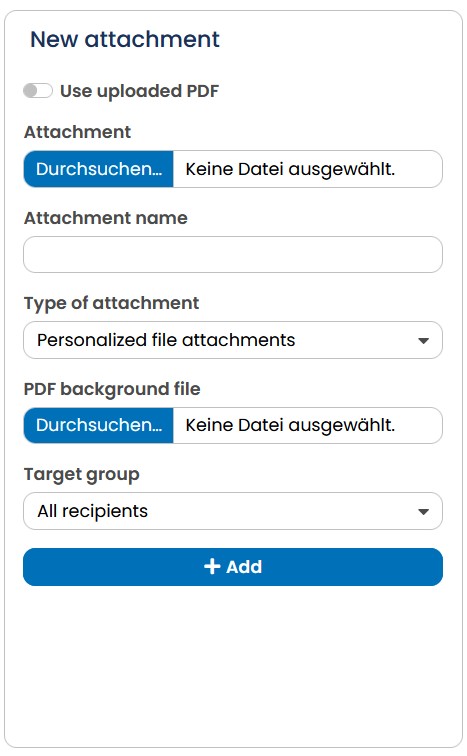
Fig. 3.63: A personalized attachment consists of a text file in XSL-FO format and a PDF background file.
- All other settings are exactly the same as for any other normal file attachment. To finish, save the personalized attachment by clicking on the Add button.
Should the 14 default fonts available in PDF format not be sufficient, other fonts may be used within the XSL-FO file which must, however, be uploaded to the AGNITAS server first.
If you would like to be able to send Personalized attachments, please contact your Key Account Manager who will be pleased to make you an individual offer for using this feature of E-Marketing Manager.
Please note: Personalized PDF attachments can also be digitally signed and sent. However, this form of sending requires additional tools to generate a corresponding template file. Please contact AGNITAS Support on this.
4.4.8 Using trackable links
In order to evaluate the success of a mailing, trackable links may be inserted into the text. As soon as a mailing recipient clicks on the link, it calls up a URL linking to the AGNITAS server. The server registers a click and assigns it to a recipient. This works both for text mailings and for HTML mailings. However, the difference is in the notation. The example contains an integrated link. For an explanation, see chapter Create a link in the text version.
A trackable link measures whether a mailing recipient clicked on that link. You can then measure the recipient's interest in the mailing subject. Find more information on the evaluation of trackable links in the chapter Statistics - To gain a broad view.
Please note: Links to forms are always measurable.
Please also note: After you have activated the separate link measurement, the button will be grayed out so that you can see that the measurement is already active. The button will only become clickable again when new links have been added to the mailing.
4.4.8.1 Trackable and non-trackable links
In E-Marketing Manager you can specify before sending which links you want to measure (i.e. convert into rdir links) and which not. In the presented case, the tracking function is switched off.
-
To do this, click on the Links tab. An overview of all links that exist in the text modules appears.
-
To edit a specific link, click on the corresponding entry.
-
The input dialog for measurable links shows the selected link at the top. Below this you will find an input field for a description. Enter a short text here that briefly describes the meaning of the link. This text remains invisible to the recipients of the e-mail. However, the E-Marketing Manager shows the description in the statistical analysis of clicks. This makes it much easier to evaluate long URLs. If no description has been specified for a link, the title of the link (if available) specified in the HTML content is displayed in the overview under Description for a better overview.
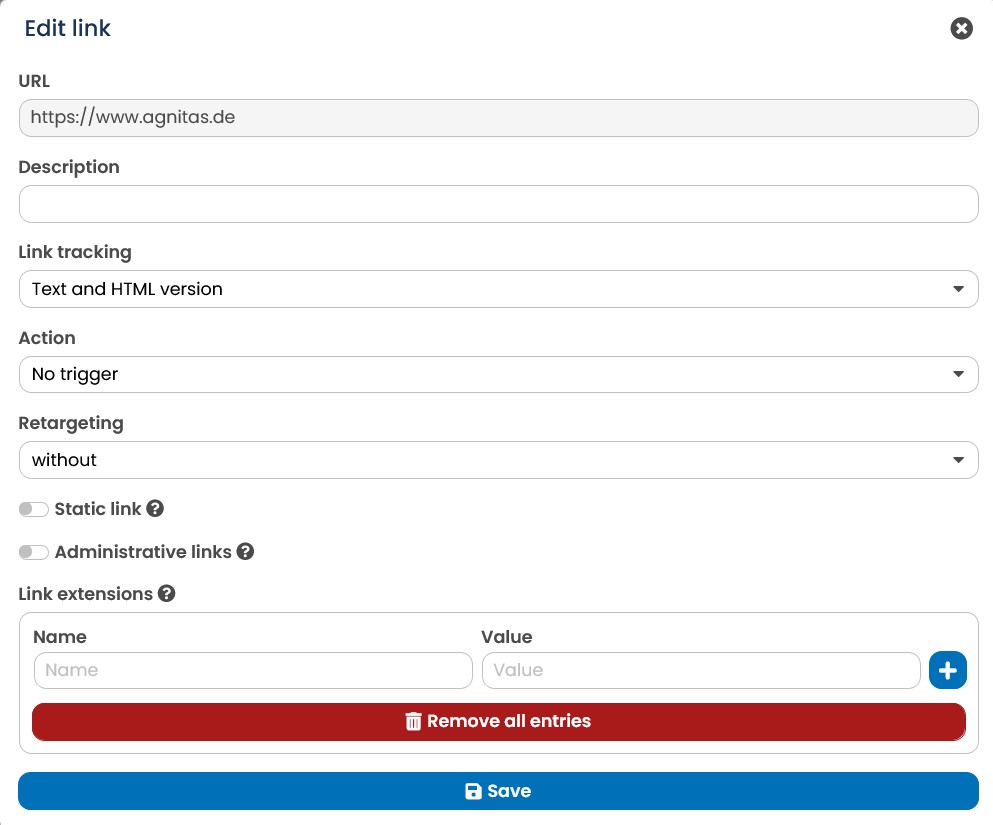
Fig. 3.64: In this input dialog, you set the mail formats in which the link can be measured.
- The Link tracking selection list determines the mail format in which the link is converted into a measurable rdir link.
Please note: The only HTML version setting means that the link in the text version can no longer be measured and is therefore worthless. You should therefore only use this option if a specific link should appear in plain text, such as the general company address (www.firma.de)./) If you have selected not trackable, it is not possible to assign a trigger to the link for technical reasons, so this selection is deactivated.
-
You can use the Action selection list to assign a trigger to your link that is to be executed when someone clicks on your link. Note: For this, it must be possible to use the selected trigger for links. You can define the usage of triggers in the trigger management menu.
-
Retargeting: The Retargeting premium feature makes it possible to set a cookie for the tarckable links. This makes it possible to break down certain behaviors such as dwell time and retrievals in the statistics area. This is the basis for the creation of key figures such as CPO, contribution margin or return on investment in connection with the respective mail campaign.If you are interested in activating the store measurement feature, please contact your key account manager, who will be happy to provide you with a non-binding offer for the use of this premium feature. If you do not wish to set a cookie, select the option without.
-
Static links can contain hashtags, i.e. variable values. However, the values for the hashtags are frozen at the time of sending and are therefore no longer variable.
-
Links that are not related to the content of the mailing, such as unsubscribe or the fullview, are marked as administrative links. You can find out more about administrative links in the chapter Preparing trackable links for mailing statistics.
-
You can use the Link extensions area to transfer additional parameters to a URL contained in the mailing. This is useful, for example, if you are carrying out web or store tracking and do not want to check the links manually each time. To do this, enter the desired extensions with Name and Value. You can add a new list entry by clicking on the blue plus. If you want to delete one of the parameters, remove the corresponding line by clicking on the recycle bin symbol. Apply your changes by clicking on Save.
-
Finally, transfer the changed link setting to the system by clicking on Save. The recipients of the mailing will now receive a meaningful link.
Important note: If you generally do not use personal tracking for your client, some key figures will not be available in the summary. This affects openers (measured), openers (invisible), openers (total), clickers and the evaluation of openers and clickers by end device type. These key figures are directly linked to a recipient profile and therefore cannot be determined. All reactions (openings and clicks) are only recorded anonymously, i.e. it is unclear how many people the reactions came from. This means that it is not possible to extrapolate the number of invisible openers, even for anonymous openings.
There is another interesting option available to you here: You can also change a link after it has been sent and thus adjust the redirect destination of the link at any time. However, the E-Marketing Manager only allows this if the associated mailing is a normal mailing, has already been sent or is scheduled. The updated web address is displayed by the EMarketing Manager in the Links tab with a warning signal. The previous version is marked in the detail view with the addition of the original URL.
Please note: The subsequent modification of links is a feature that must be activated. If you are interested, please contact AGNITAS support.
Settings for the links can also be made directly in the Links tab. There you can either change the settings for all measurable links in the mailing (Settings section, see below) or only for certain links (via the checkboxes in the first column of the table). If you use the latter option, you can adjust the parameters Description, Link tracking, Default trigger, Retargeting and Static link. You can also define special Extensions for selected links. Click on the Save button at the top right of the page to confirm your settings.
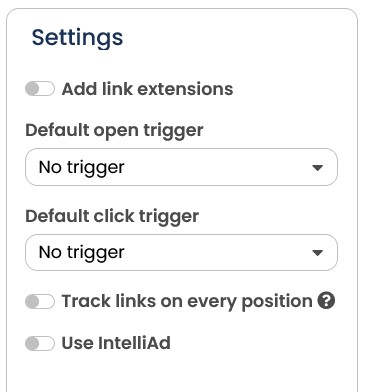
Fig. 3.65: Changes to links can also be set centrally for all links.
-
Add link extensions: This option allows you to define extensions that apply to all already existing links.
-
Default open trigger: With this option, you can define a trigger that is to be executed when the mailing is opened.
-
Default click trigger: Use this option to specify whether the E-Marketing Manager should execute one or more standardized triggers for each link click in your mailing. This allows you to modify the recipient profile, for example, so that you can immediately see who has clicked on the links contained in a mailing. Please note that the parameters of the standard trigger only work with trackable links.
-
Track links on every position: If you activate the slider, links that appear several times in the mailing (e.g. as text and image) are measured separately at each position and can also be configured separately in the Links tab. This function is particularly useful in conjunction with the heatmap (chapter Heatmap) because it allows you to see exactly where in the mailing the recipients clicked on the link.
-
Use IntelliAd: You can read what you can do with this setting in the chapter intelliAd tracking for trackable links.
Note: With theE-Marketing Manager, the AGNITAS AG allows you to create a customized solution for almost any request. For example, you can have the mailing ID automatically added to every link in every mailing. However, this is only possible via the backend. If you are interested, please contact your account manager or the AGNITAS support team.
Please note: After you have activated the separate link measurement, the button is grayed out so that you can see that the measurement is already active. The button only becomes clickable again once new links have been added to the mailing.
4.4.8.2 Create a link in the HTML version
The trackable link is inserted directly into HTHML-Code of your mailing. Click on the Content tab. Insert a tag with the following notation in the text directly into the HTML source code of your e-mail and note the lowercase writing of the HTML tag:
\<a href="https://www.my-company.com/springseed.html">here\</a> In the example this would appear as follows:
Looking forward to banning your winter boots to the attic and doing some gardening? We can offer you all you need for a colorful garden. This week's special offer: spring flower seeds for your garden! Check it out \<a href="https://www.mycompany.com/springseed.html">here\</a
Kind regards from your Seed Newsletter Service
Note: Of course, you can also use the WYSIWYG editor to mark any text and store a link using the icon (chain symbol). In the background the same tag is set as described before.
An HTML tag written in this way enables you to tell whether the recipient is for example interested in spring flower seeds.
In technical terms, the following happens: When sending out the mailing, E-Marketing
Manager replaces the link you have integrated with a reference to a redirect server at AGNITAS AG. In your e-mail client, the link looks just like any other link, i.e. in a blue font and underlined. In the mailing-source text you will find an entry of the following type:
\<a href=https://rdir.de?43124322>Link-Text\</a>
The encrypted rear part of the link refers to a unique ID in order to identify the person. The click is counted on the redirect server and forwarded by the recipient’s web browser to the actual web page on your server which recognizes the original address assigned to the encrypted ID, i.e. https://www.my-company.com/springseed.html. Of course, E-Marketing Manager registers the redirect process.
Attention: If you include a link in the HTML code in such a way that it is displayed in plain text - e.g. a link shortened by link shorteners, but in the background it becomes a redirect link, then some spam filters will classify this as suspicious and block it.
4.4.8.3 Create a link in the text version
The text version does not allow the use of HTML tags. Here you can insert the link without additional coding, like in the example:
https://www.my-company.com/springseed.html
In the text version, E-Marketing Manager replaces the link with a reference to an AGNITAS redirect server. In the text mailing which is delivered to customers, a trackable link can then be seen. To the subscriber, it appears as follows:
https://rdir.de/r.html?uid=nc.D.B.CDh2.X1
It depends on the e-mail client whether the link can be clicked or whether it appears as normal text. Some clients search the mailing text for https:// and format web addresses as links. Others don’t, and the recipient must copy the link text and insert it by hand into the browser’s address line.
There is, however, also a possibility of making do without the measurement, at least in the text mailings, so that the links in the text version are not represented as rdir.-links. We describe this in the following section.
4.4.8.4 Insert AGNITAS tags into trackable links
You can also add AGNITAS tags to a measurable link to personalize it. All profile field contents used with the agnDB tag as well as the two tags agnDATE and agnALTER can be used. The E-Marketing Manager automatically ensures URL-compliant display of the parameters.
In contrast to the content, where you can insert AGNITAS-tags at any position, there are some differences with measurable links, however, which primarily revolve around the spelling: On the one hand, the name of the AGNITAS-tags differs from the usual scheme with the prefix "agn". On the other hand, the AGNITAS-tags for measurable links are not in square brackets, but begin and end with the command ##.
The following example illustrates this:
The AGNITAS-tag agnDATE looks like this in a text or HTML module of a mailing:
[agnDATE]
In a trackable link, the AGNITAS-Tag agnDATE is appended written as follows:
##DATE##
Apart from the different notation, the functionality of the AGNITAS-Tags is the same for trackable links as for content. For the agnDATE AGNITAS-Tag you can, for example, select the preset format via the type parameter and set language-specific displays such as the name of the month via the language parameter.
The AGNITAS-Tags can be used anywhere in a trackable link, but must adhere to a certain format that differs from the format of the AGNITAS-Tags for HTML or text building blocks in the following ways:
-
There must be a colon between the AGNITAS-Tag and the parameters.
-
Inverted commas become apostrophes.
-
Individual parameters are separated by commas.
The notation is illustrated through two examples:
-
https://www.agnitas.de/##DATE:type='2',language='de'## becomes https://www.agnitas.de/Mittwoch%2C+8.+Juni+2019.
-
https://agnitas.de/##ALTER:column='BIRTHDAY'##years.html becomes
https://www.agnitas.de/23years.html
You can find all the details of the AGNITAS-Tags in Appendix A: AGNITAS tags.
Please note: Links containing AGNITAS-Tags must be marked as trackable. Profile field contents in # tags can be encrypted with the addition ##MD5:\<FIELDNAME>##. Since MD5 encoding can be made readable again using a reverse code, this is not recommended for sensitive database values. For stronger encryption, use the following structure: ##ENCODE-HEX:\<FIELDNAME>,\<List of algorithms>##. If you want to encrypt a first
name in this way, the structure is as follows: &firstname=##ENCODEHEX:FIRSTNAME,sha512,md5##.
4.4.8.5 Editing links
Calling the Links tab of a specific mailing you can first see an overview of all used links that you have used in the Content section. While you may not create another link in this section here, you do have the possibility to edit those links that are already being used. In particular you can choose settings on the trackabilty of a link. In the Overview you can edit links individually by clicking the corresponding line or field. On top of that you can edit all links collectively by clicking the checkbox in the header of the table. You can find additional Settings on the right hand side. In the table header, you can use Show deleted links to set whether links that were deleted after the first test delivery should continue to be displayed in the EMM statistics.
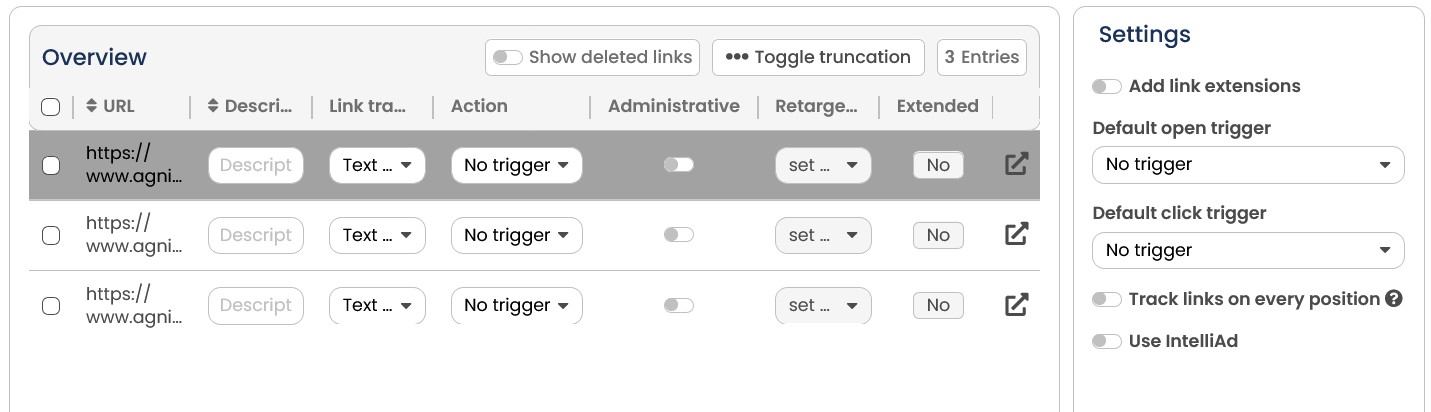
Fig. 3.66: E-Marketing Manager shows you an overview of all used links which you can either edit individually or collectively.
The overview contains a detailed list of all already used links. All functions are shown in the table overview as well as in the new opening window when clicking on a specific link. Just the Link extensions as well as the marker for a static link function can only be edited by calling the window of the relevant link.
- The URL field shows you the link found in the content. By clicking on this small icon
 you can directly call the corresponding website.
-
The second field is called Description. Here, you can insert a short text describing your link. The mailing recipient cannot see that description. In the statistical evaluation, E-Marketing Manager does, however, display the description. This simplifies evaluation if your links are very long or differ only slightly, significantly. If there is no description for a trackable link, the title used in the HTML content is displayed in the column description on the overview page.
-
The Link tracking drop-down list sets the e-mail formats for which the link is converted into a trackable redirect-link. The setting Not trackable makes the link in the mailing not trackable. Setting Only text version makes the trackable link nontrackable in the HTML version. Conversely, a link with the setting Only HTML version is not trackable in the text version. If the link in your mailing should be trackable whatever the version, select the fourth option Text and HTML version. Please note: The setting Only HTML version means that the click on the link can no longer be tracked, making it useless for statistics. This option should therefore only be used if a certain link must appear within the mailing, for instance the company address (https://www.mycompany.com)./) In the HTML version, this is usually not a problem, because the link that is called in the background and what can be seen in the e-mail can differ from each other.
If you have selected Not trackable, it is for technical reasons not possible to assign an action to the link.
-
Calling the drop-down list Action you can assign any action, that you have created in the Actions section of the main menu point Forms & Actions. For more information go to chapter Linking actions and trackable links. The chapter Click summation for trackable links provides you with detailed information on how to define all links as trackable at once by assigning an action.
-
Retargeting: This function permits it to mark measurable links for Behavior Tracking outside the email - what happens on your website. For tracking purposes, you can use without or set cookie. When using cookies, the validity period defined in the cookie applies. This means that you can also record the behaviour of recipients who have visited your website days before via a mailing and are now returning. Legally, this is a first-party cookie. The cookie runtime is the current session by default, but can be configured for each client. You need tracking to be able to assign a sales measurement to your mailing and also for various retargeting campaigns. It is the basis for creating key indicators such as CPO, profit margin or return on investment for each mailing campaign.
-
The abbreviation Administrative stands for Administrative links. Those links are not related to the content, such as unsubscribe or fullview. By ticking a link as an administrativeyou influence the sorting of the click statistics for each link. In this way, you can make the detailed evaluation of clicks clearer and clearly differentiate between performance-oriented clicks and the administrative intentions of your recipients. The productive links are displayed in the statistics above, while the administrative links are displayed below. Find out more about administrative links in this chapter Preparing trackable links for mailing statistics.
-
The field Extended tells you whether you have set a link extension to this link. In order to do so, click on the relevant link. You will now see a new window with all already described parameters and are able to set the link extension. Via the field Link extensions you can attach additional parameters to a URL contained in the mailing. This is, for example, meaningful if you want to carry out web or shop tracking with your own tracking system. First click on Add new property and then set the Name and Value. You can add more link extensions by clicking on the Add new property button again. If you want to delete one of the parameters, remove the corresponding line by clicking on the trash symbol. Save your changes by clicking on Save. In case you cannot see this option please contact the AGNITAS Support.
-
The Static link selection enables you to select links that work with a placeholder that refers to a reference table, for example, for individual product recommendations for each recipient. In this way, you can ensure that the link target does not change after the mailing has been sent and would therefore no longer match the content of the mailing if new product recommendations were already stored in the reference table.
A link that you mark as static could look like this:
https://www.yourdomain.com/?productid=##CATALOG.PRODUCT_ID##
The link in the content is always the same, it is only dynamically filled with the current value from the reference table "Catalog" with the value from the column "Product_ID". In the case of static links, the value is nolonger determined live from the reference table when the user clicks, but is passed via an extension in the generated redirect link. The trackable link remains the same and the statistical data also runs there.
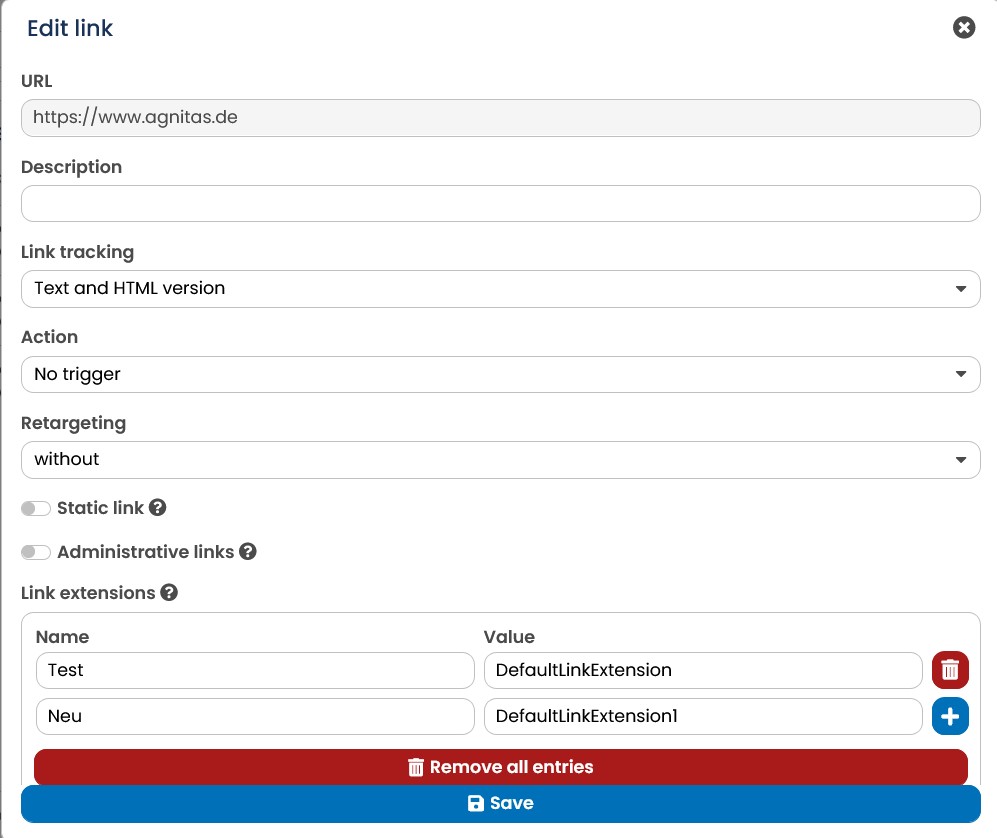
Fig. 3.67: By clicking on the Plus you are able to set the name and value for a link extension.
An interesting option is available to you here: You can also change a trackable link after sending and in this way modify the forwarding destination of the link at any time. EMarketing Manager only permits this, however, when the associated mailing is a normal mailing that has already been sent or scheduled. E-Marketing Manager displays the updated web address in the Links tab along with a warning signal. The previous version is marked in the detail view with the suffix original URL. If you subsequently replace a link with a new one in mailings that have been running for a longer period of time (action-, date- or interval-based), the old link remains in the link overview so that recipients who still received the mail with the old link can continue to click on it. However, the link is grayed out and marked with a trash can. For better clarity, deleted links are initially hidden and can be shown using the Show deleted links button.
Bulk action - Edit links
In addition to the detail settings for each individual link, you can make settings that apply to all links in the mailing once you toggle the checkbox in the header of the table first. After that, click the pencil icon to edit the links collectively. In the editing window you have the convenient setting - Keep unchanged - : This setting enables you to change only one parameter for all links without changing the previously defined settings for the other parameters. These functions are Trackable, Relevance for statistics, Default action (corresponding to the Action drop-down menu of an individual link) as well as the Measure through Website/Shop function. More information on these functions can be found above. The following functions are only available in the Edit links collectively section:
-
By removing the tick next to Keep link extension unchanged, you can see an overview of all shared link extensions. You can use this function to set up link extensions that are intended to be valid for all trackable links. The rest of the Link extensions function remains the same. If your E-Marketing Manager does not show this, please contact the AGNITAS Support.
-
Track link on every position: If you click on the Execute button, links that occur several times in the mailing (e.g. as text and image) are measured separately at each point and can also be separately configured in the Links list. In conjunction with the Heatmap (see chapter Heatmap) this function is especially practical because by using it you can see exactly at what point in the mailing the recipient clicked on the link.
-
Default action: This option determines whether E-Marketing Manager executes one or more standardized actions for each trackable link in your mailing. In this way, for example, the recipient profile can be modified such that you can immediately read out what person opened which mailing or clicked on the trackable links contained in the mailing. Please note that the parameters for a standard action only work with trackable links.
E-Marketing Manager offers three setting possibilities for standard triggers: Default trigger connects all trackable links with a specific trigger. The trigger can be individually changed for each link. You can read more about actions in the chapter Linking actions and trackable links.
Default open trigger: The trigger defined here is executed when the recipient opens the mailing.
Default click trigger: If the recipient clicks on a trackable link in the mailing, the trigger defined here is executed.
- IntelliAd ID string and Use IntelliAd: When you integrate the intelliAd tracking string into E-Marketing Manager, you can view the value of your e-mail campaigns compared to other online channels. In order to do so you need to have received your ID string from the intelliAd system first. All further instructions can be found in the following chapter intelliAd tracking for trackable links.
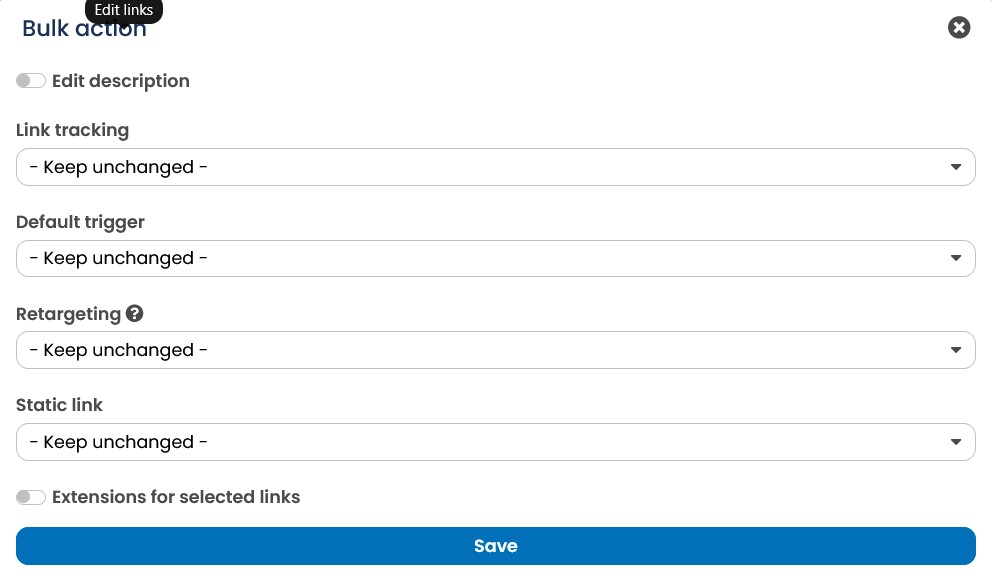
Fig. 3.68: Open the bulk action to conveniently change any setting for all links.
Please note: The E-Marketing Manager of AGNITAS AG offers customized solutions to almost all requests. You can, for example, automatically add the mailing ID of each mailing to all links. However this can only be done by AGNITAS itself. If you are interested in this option please contact your Key Account Manager or our AGNITAS Support.
You can also mark links as static if you integrate data into a mailing via a reference table. This ensures that the link target does not change at a later point in time, even if new recommendations already exist for the recipient.
4.4.8.5.1 Preparing trackable links for mailing statistics
E-Marketing Manager not only knows what to do with each individual trackable link in the mailing, but can also take these into account in two different forms in the mailing statistics. To do so, the program differentiates between administrative links and leading links. The latter category includes, for example, links to offers or to the homepage of a provider. Administrative links are links that are not related to the content of the mailing, such as unsubscribe or fullview. E-Marketing Manager automatically recognizes an administrative link when this points to a form. Key here is the command form.action in the URL.
You can mark any trackable link as an administrative link, for example a link to to the Terms & Conditions or the Imprint. E-Marketing Manager assigns all other trackable links as leading links. To do so, click on the Links tab and in the Administrative column tick those trackable links that are to be treated as administrative links. Then store your changes with Save.
The statistical evaluation of the administrative and leading links can be called by clicking on the Statistics tab in the mailing and calling Click statistics link clicks in the drop-down menu Select Statistics. If the mailing has already been sent and the contents clicked on by customers, you will see three tables, one for administrative links and one for leading links, as well as a summary.
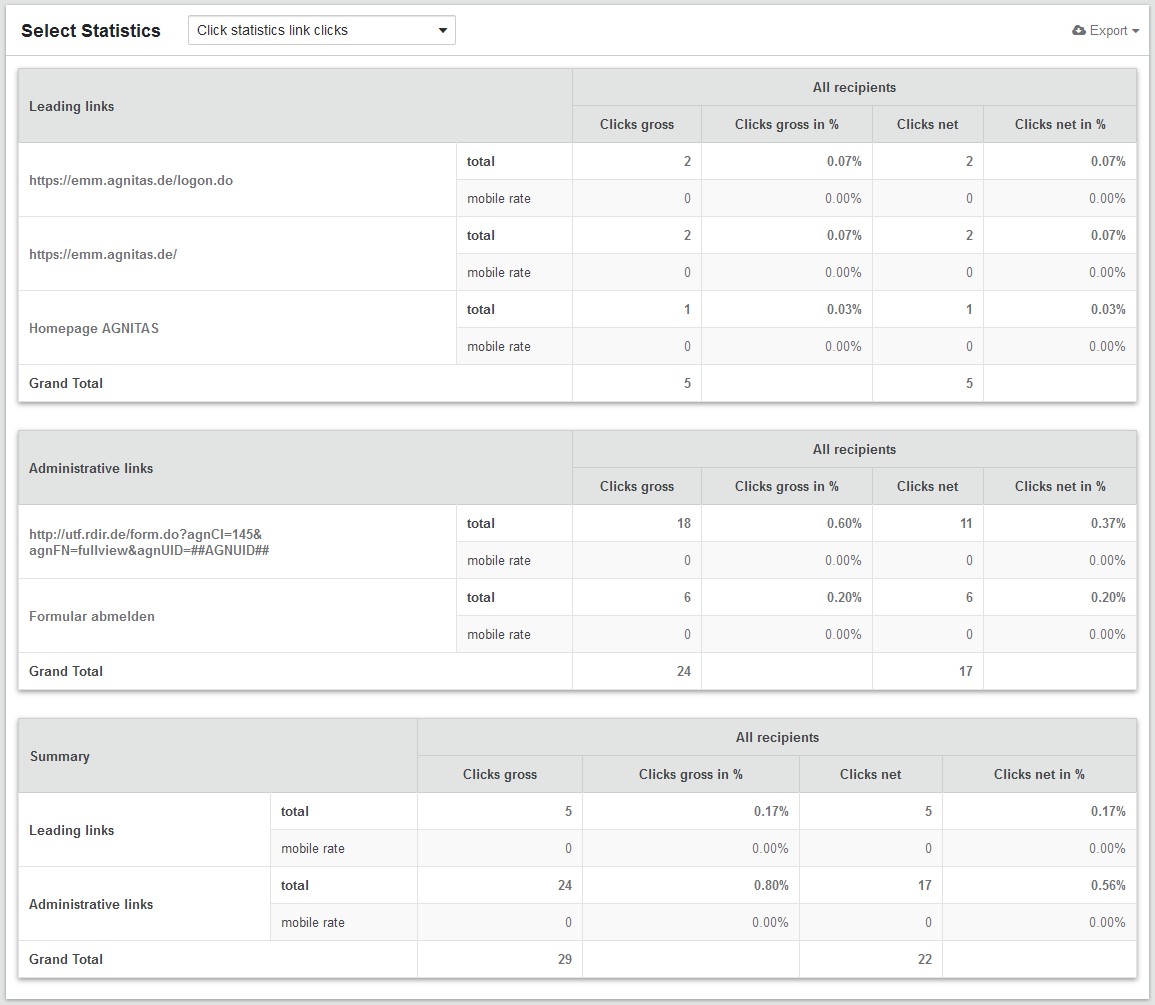
Fig. 3.69: E-Marketing Manager differentiates between administrative links and leading links.
4.4.8.6 Click summation for trackable links
Sometimes it makes sense to record the number of clicks on measurable links in the profile of a recipient - regardless of which link in particular was clicked on. In this way you can, for example, filter out very active newsletter subscribers and reward them with a thank you campaign or special offers for your interest. You can decide for yourself whether you only want to record the clicks within a mailing or the clicks in different mailings. E-Marketing Manager lets you do this by using summation. In order for the clicks of all links to be recorded in the recipient profile, you must provide all links in your mailing with a trigger that is automatically executed on a click. If you have already assigned another trigger to your links, you must add a further step to the existing trigger, since only one action can be assigned to each link. In order to be able to use this function, you will need to do the following:
-
Define a trigger which increments a numeric field in the recipient’s profile by 1. The field must, of course, exist in the recipients database; if it doesn’t, you will have to create it.
-
Define this new trigger as a Default click trigger for trackable links.
-
If a trackable link already has another trigger assigned to it, amend this other trigger by the step used in the standard trigger.
The following example will give you a step-by-step explanation of the process. Start by creating a profile field.
-
Click on Recipients in the navigation bar, then on the submenu Profile fields. Click on the New button in the upper right corner. Define Click count (or any other meaningful name) as a Field name. Enter a short, but meaningful Description for the new field – for instance click_count. Under Field name in database enter CLICK_COUNT . The field entry for Type should be Integer Number. Assign a Default value of 0. Save the new settings by clicking on the Save button. Further information on fields is contained in chapter Extending recipient's profiles.
-
Now call up the Trigger management and click the button New in the upper right corner. Select a meaningful Name in the entry dialog, e.g. Link feedback. In the Description box, you can give a description of the intended aim of the action. The Usage drop-down list should be set to Only for Links. In the right window, the Steps section, you can now select the step Modify profile in the Type drop-down list. Click on the Plus button.
-
E-Marketing Manager will now display the entry fields for the first step of the new trigger. Select the profile field which you have just created from the Column name drop-down list. In our example, it is the CLICK_COUNT field. Do not change the plus sign in the second drop-down list. Enter 1 into the last entry field in this line. Now click on the Save button.
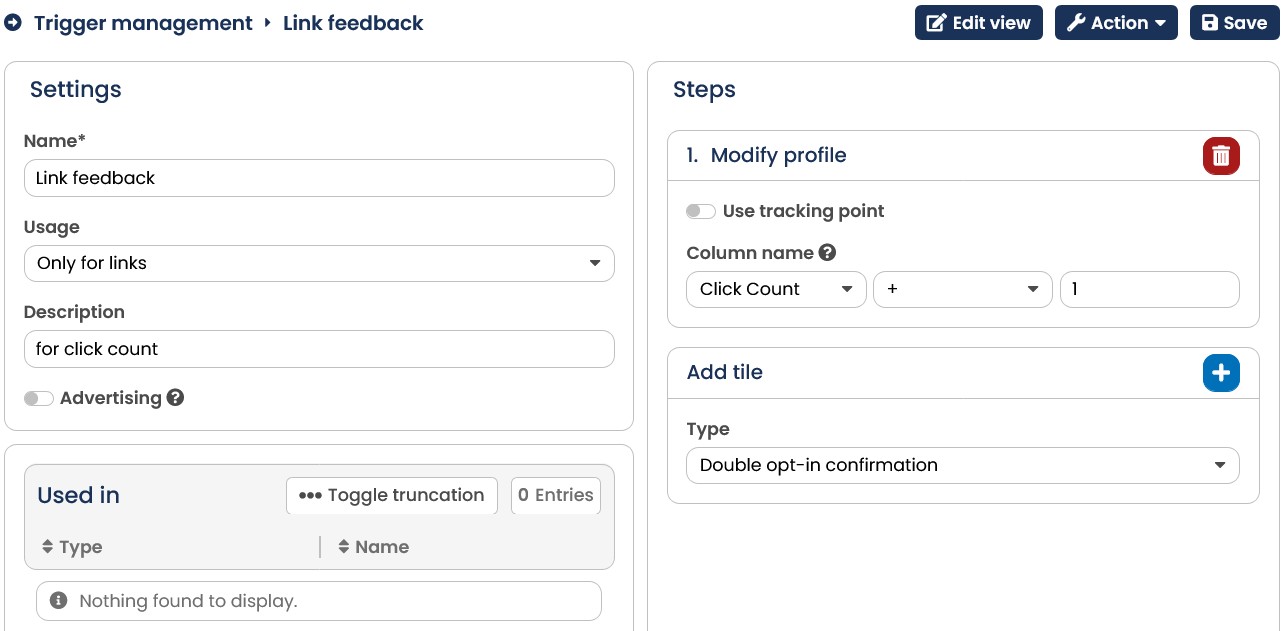
Fig. 3.70: This trigger increases the click counter by 1.
-
Now call up the Mailings section and open the detailed view for the mailing where you would like to count all link clicks. Call up the Links tab. This will give you a list of all links embedded in the mailing. The column Trigger shows for each link whether clicking on it will cause a certain trigger. The trigger Link feedback is meant to apply to each link click where this column shows No trigger.
-
Click on Default click trigger next to the table. In the Default click trigger drop-down list, select the entry called Link feedback (or whatever name you gave it). Click on Save to store your entries.
-
If none of the links is linked to a different trigger, you have now successfully set up the counter function. If you find another link with another action, you must edit the action, because E-Marketing Manager can only initiate one followup action per link. If you do not edit the action, the link in question will not count in the click counter. However, if you wish to leave out a link in order to count the clicks separately, you may skip step 7.
-
Write down the name of the action in question and open the Actions section. Now click on a name in the overview to call up the detailed dialog for that action. You will now add one step to the action – the very same step you used for your Link feedback action. Follow the procedure described in step 2. This adds one more step to your action, incrementing the CLICK_COUNTER by 1 each time. Click on Save to store your entries.
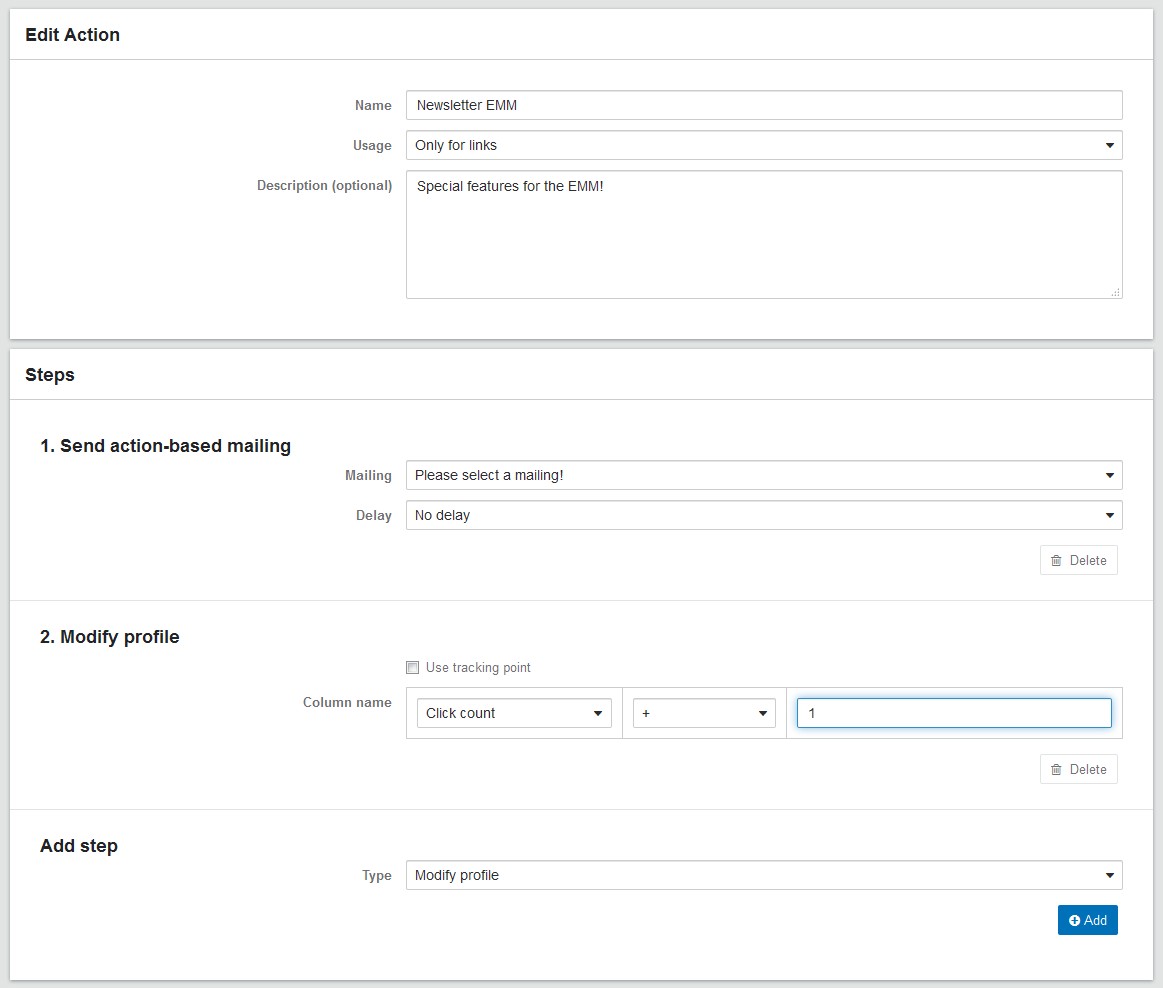
Fig. 3.71: Add the relevant step to each of the actions used in your mailing.
There is now one more entry in the recipient's overview. This will show you whether the recipient clicked on a particular link in the mailing.
Please note: In your definition of that particular action, you also give a meaning to the number which appears here. It is possible to either count all clicks regardless or to decide that certain links from the mailing should not count in the total number of clicks.
4.4.8.7 intelliAd tracking for trackable links
intelliAd is a tool that is primarily used for optimization in bid management (for SEA campaigns). Due to the cross-channel tracking, all online campaigns can be improved and efficiently matched to one another. When you integrate the intelliAd tracking string into EMarketing Manager, you can view the value of your e-mail campaigns compared to other online channels.
Once you have received your ID string from the intelliAd system, you can integrate this into E-Marketing Manager. To do so, call the Links tab in the Mailing section. At the bottom of the right hand side you will find the section for intelliAd tracking. To make the mailing visible in the intelliAd system, activate the Use intelliAd slider and enter the string into intelliAd ID string. Transfer your settings with Save to E-Marketing Manager.
Fig. 3.72: You can track e-mail campaigns in comparison to other online channels by using intelliAd.
You must first integrate a tracking pixel into your website. Every time a link in the mailing is clicked, the intelliAd tracking is called up as well and the recipient is redirected to the actual link goal via forwarding. In the intelliAd user interface you can now see your own newsletter campaigns as well as the other online campaigns. Clicks and purchases are displayed, allowing you to carry out a cross-channel evaluation of your newsletter (catchword: Customer Journey).
4.4.9 Testing and sending a mailing
You are now almost ready to go. You have defined the contents and configured your mailing in line with your needs. Nevertheless, prior to starting the mailing, you should check that all the entries are correct. The E-Marketing Manager system gives you far-ranging control options. Click on the Send mailing tab in the detailed mailing screen.
4.4.9.1 Inbox Preview (Premium)
The E-Marketing Manager Inbox Preview is a valuable aid that firstly allows you to check the correct delivery of your mailing. The system also tests whether the mailing was correctly represented on different e-mail clients. The delivery test gives graphical feedback. You can therefore see at a glance whether there are formatting or display problems and can correct and eliminate these before sending.
You can start a Inbox Preview for each of your mailings. Via the navigation Mailings,
Overview first select the desired mailing and then switch to the Inbox Preview tab.
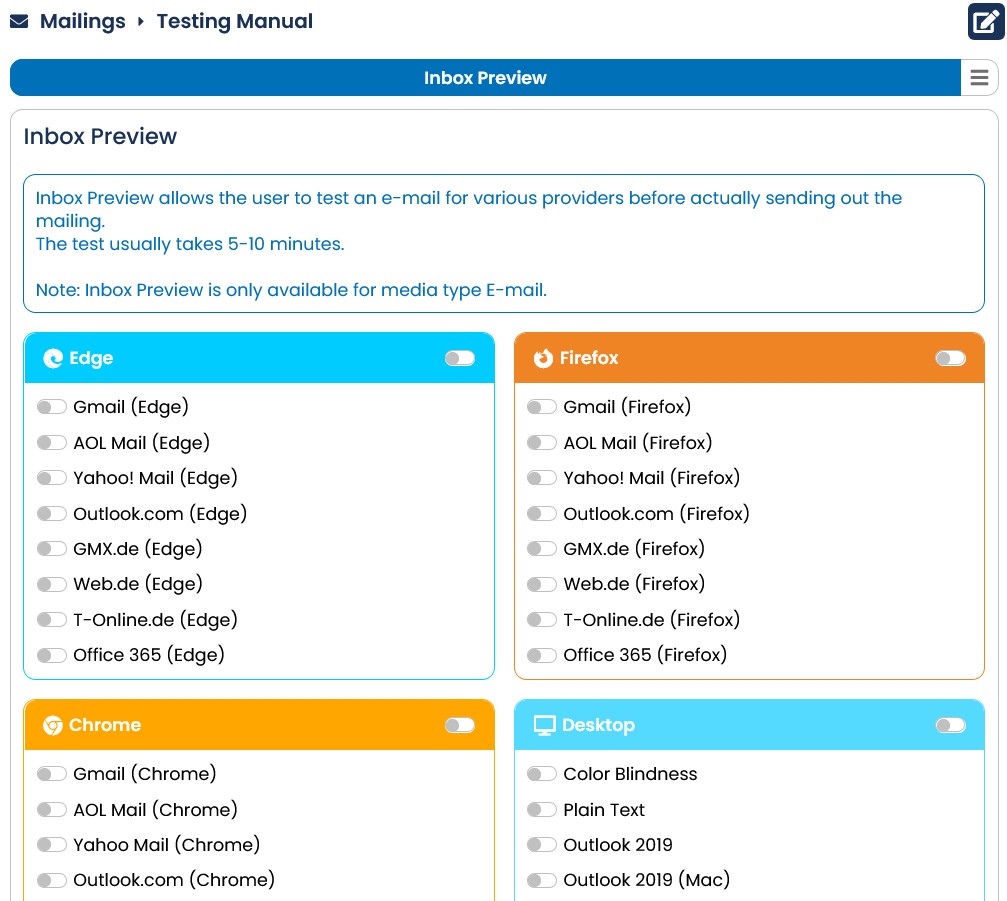
Fig. 3.73: A section of the E-Marketing Manager Inbox Preview.
- Desktop: These are normal e-mail programs used in most companies and by almost every user. They include Microsoft Outlook, Lotus Notes and Mozilla Thunderbird. To be on the safe side, E-Marketing Manager tests correct representation on differing versions of the e-mail client: For Lotus Notes, for example, these are the Versions 6.5, 7, 8 and 8.5.
Private individuals often use e-mail clients that are only available to users online. In this case, the display of the mailing varies not only because of the receiving e-mail program, but also because of the browser used.
-
Edge: Tests the illustration using the Internet Explorer for popular email clients. Yahoo Mail and Google Mail (Gmail) are among the best-known representatives of these category and are therefore taken into account by E-Marketing Manager. Further web clients are planned.
-
Mozilla Firefox: Tests the illustration of mailings using Mozilla Firefox. The best-known representatives of these web clients include Yahoo Mail, AOL Mail, Outlook.com and Google Mail (Gmail), and are therefore handled by E-Marketing Manager. Further web clients are planned.
-
Google Chrome: Tests the illustration of mailings using Google Chrome. The bestknown representatives of these web clients include Yahoo Mail, AOL Mail, Outlook.com and Google Mail (Gmail), and are therefore handled by E-Marketing Manager. Further web clients are planned.
-
Mobile: Cell phones, smartphones and tablets that have an own email-client and can therefore display e-mails. E-Marketing Manager takes into account most current models such as the Apple iPhone as well as cell phones that use Symbian, Windows Phone 8 or Android 2.3 as a platform.
-
Spam clients: In this category tools for email clients that are intended to block spam (e.g. MessageLabs) or e-mail clients that already have an integrated anti-spam module (e.g. Outlook 2003) can be found.
The Inbox Preview can be individually constructed by selecting participants from each category. Simply place a tick next to the desired entry. If you want to include all tests, click on the command Toggle On/Off to be found above every category. E-Marketing Manager subsequently selects all entries or removes all ticks.
Finally, select a recipient who is to receive the results of the Inbox Preview via email on the right hand side. Please note that only addresses of the mailing list who are allocated the recipient type Administrator can be recipients. You can receive a list of all recipients and mailing lists by clicking Recipients and Overview in turn in the main menu.
After you have made all the settings, start the test by clicking on the Send button. Depending on the scope of the test, it can be between 5 and 10 minutes until a complete result is available. General rule: The more category entries E-Marketing Manager has to check, the longer the Inbox Preview lasts.
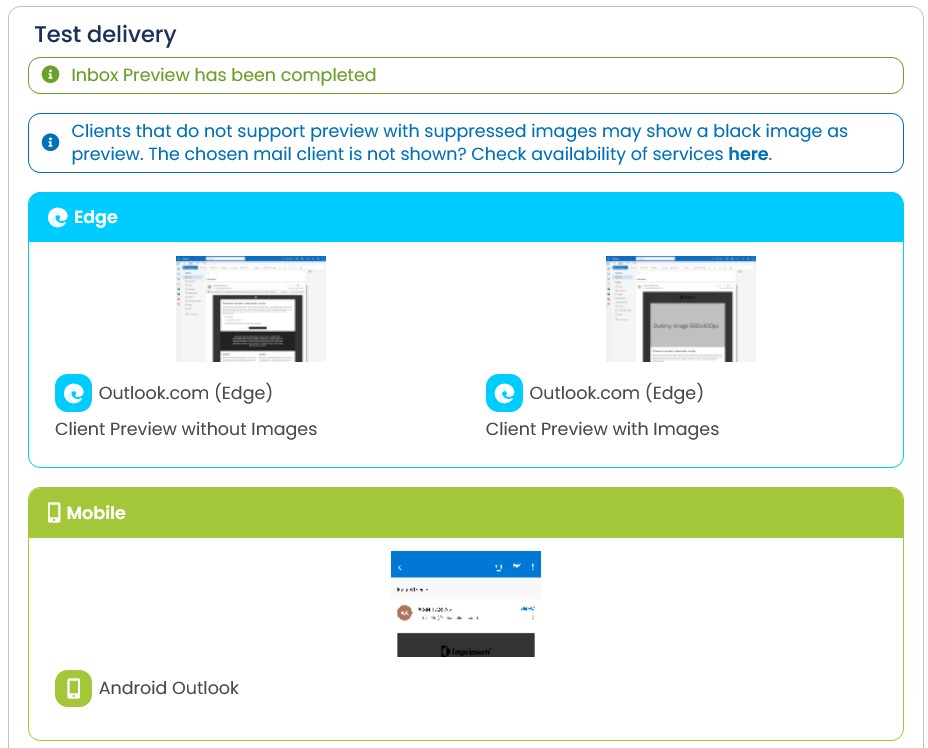
Fig. 9.1: E-Marketing Manager has checked whether the mailing can be delivered correctly and how differing email clients display it.
After the test is completed, you receive a clearly laid out list of results. The selected representatives of the recipient categories each appear with a small preview image showing how the mailing is displayed in the e-mail client concerned. You can enlarge the preview by clicking on it with the mouse. In Mobile, you can directly see how your mailing will be represented on the mobile phone display. E-Marketing Manager shows you a preview of the mailing at the display correct size for this purpose. In addition, you can use the arrow keys to scroll up and down in the e-mail.
The representatives of the category Spam deliver either true or false as the result. In the first case, the mailing is marked as spam and blocked. The second case is, however, much more usual: If false stands behind the entry, the mailing is delivered as normal.
Please note: Some clients don't have the possibility to suppress images in which case you might see a black preview.
Please also note: The Inbox Preview is a charged-for E-Marketing Manager premium feature. If you are interested in it, please contact your key account manager.
4.4.9.2 Preview - For in-depth checking
For quick and easy checking of mailings before sending them out, E-Marketing Manager offers a preview function. With this function, you can check newsletter quality, find any errors and correct them.
This preview function offers additional advantages. E-Marketing Manager being able to create customized mailings, you can decide to preview e-mails for individual recipients. This allows you to check whether customizing contents for various target groups of recipients have been done in exactly the way you wanted to and if recipients are being sent the right newsletters.
Let us take an example. You have decided to send mailings with different contents to defined subscriber target groups. Target group A will receive a special software offer, target group B a special hardware offer. By selecting a recipient from target group A, you can check whether the relevant newsletter does, in fact, contain software-related texts.
Proceed as follows:
- Select the mailing you want to check by calling it via the overview window of the Mailings main menu point. You can access the preview function by clicking on the Preview tab.
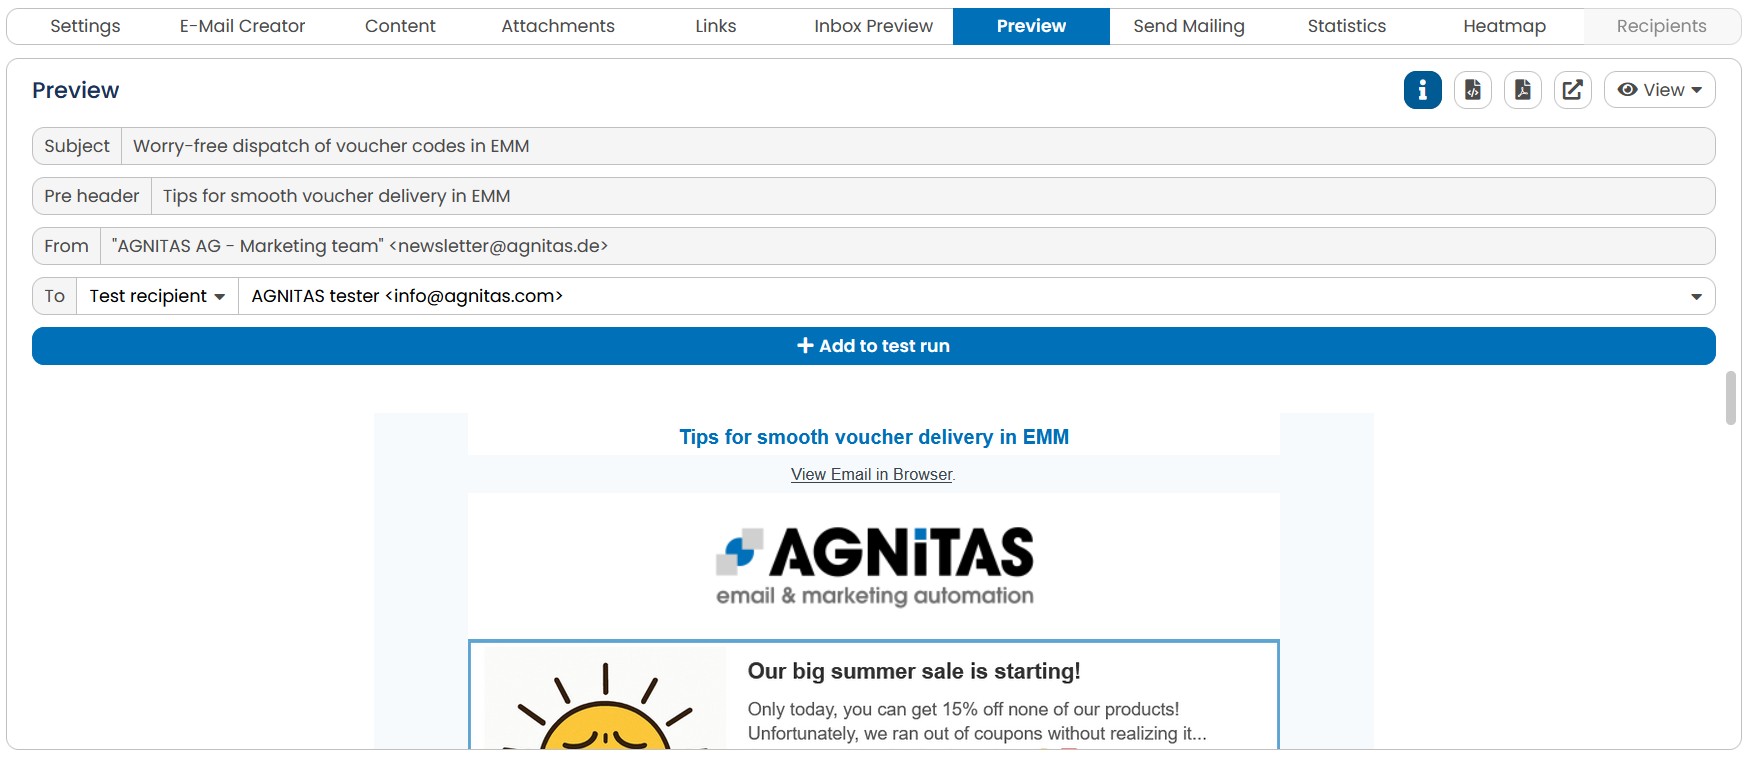
Fig. 3.74: Ready for sending, but not yet sent out. Call up the preview function by clicking on the link.
- You can specify the content of your preview further. Once you click the Info-icon, EMM displays additional information. Calling the drop-down list To you can set a specific recipient. If you want to trigger a test shipment to the email address of your user account that contains exactly the building blocks and content of the selected recipient, click the Add to test run button. You can add more test addresses here. With the button TestMailing you trigger the test mailing to your e-mail address. If you have not created test and admin recipients for the selected mailing list, the preview will be displayed without personalization ("template mode"). However, it is required that your mailing list contains at least one recipient.
Please note: The list only contains administrators and test recipients who subscribe to that mailing. You may have to create a special recipient for your preview test. Further information can be found in the next chapter on test mailings Sending out test mailings. Alternatively, you can also show the preview for a specific recipient. To do so, enter the recipient's e-mail address in the empty entry field below the drop-down list. This e-mail address must be active in the set-up mailing list of the mailing. Otherwise, E-Marketing Manager displays an error message. The preview is subsequently shown for exactly this recipient – the setting for the recipient is ignored during this. To display the mailing preview again for the selected recipients, delete the e-mail address from the entry field.
If you want to see the preview for a specific target group, simply select it under To. In addition, the Subject and Pre header of your email will be displayed at the top in the Info section.
Note: If you select To Target Group, you can have the number of recipients per target group calculated for you. This feature is also available in the preview pane of the Content tab.
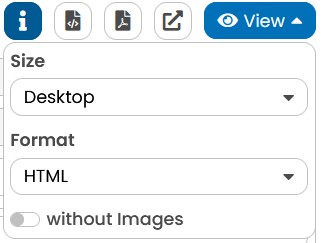
Fig. 3.75: Select format and size for the preview.
-
The drop-down list View allows you to select whether or not you want to see the preview with images. Ticking the option without Images offers a preview with suppressed images.With this features you see how e-mail clients and web mailer display your mailing if images have to be loaded manually. So you can optimize the mailing to look good in this case as well.
-
The Size drop-down list allows you to select which screen size the preview function should simulate. The selections are Desktop, Mobile (Vertical), Mobile (Horizontal),
Tablet (Vertical) and Tablet (Horizontal). With the selections Mobile (Vertical) and Mobile (Horizontal) not only the screen size is adjusted but the mobile image components are also displayed.
-
The Format selection allows you to view the mailing as an HTML or Text. Please Note: you will be only able to see the options that you have set prior in the mailing.
-
Once you have entered your selections, click on the Refresh button. E-Marketing Manager will now generate the e-mail for your selected recipient.
-
By clicking on Open preview in new window, the small icon to the left of the View button, your mailing is displayed in a new window that you can leave open should you wish to change anything in the mailing.
-
With Saves preview as PDF, you can export a preview as a pdf file. In order to do so, just click on the small PDF icon (
 ) to the left of the Fullview and View buttons.
 -
You can also export the unpersonalized HTML code of the mailing using the HTML icon.
In this case, the HTML does not contain redirect links.
If there is anything else you want to change, use the navigation bar and the Content tab to go back.
Please note: Accessing the E-Marketing Manager is done via a secure sockets layer (SSL) connection. When using the preview function, your Internet browser may generate a message asking you whether or not you want to view non-secure components.
Fig. 3.76: A message will pop up warning you that unsafe objects may be displayed if you proceed.
You can safely click on Yes. For the preview function, only components (i.e. images) for your newsletter which are outside the secure connection will be selected. This does not affect secure working with the E-Marketing Manager.
4.4.9.3 Sending out test mailings
If the preview was conducted to your satisfaction, you can send your mailing to a few selected test recipients. They could be your administrator(s) or a test distribution list. This test distribution list should only contain the e-mail addresses of selected persons who can give you feedback about the appearance of the e-mails. The tab Send mailing provides you with several test options.
-
Test mailings to administrators: In the area Testing single-click with the mouse on the Admin-Mailing button. All recipients who are marked as Administrator in their profile and who have subscribed to the mailing list will be sent a test mailing. Further information on creating administrators is contained in chapter Creating administrators and testdistribution lists.
-
Test mailings to test distribution list: In the area Testing single-click with the mouse on the Test-Mailing button. All recipients who are marked as Test recipient in their profile and who have subscribed to the mailing list will be sent a test mailing. Further information on creating test distribution lists is contained in chapter Creating administrators and test-distribution lists.
If only a specific target group is to receive the test mailing, select it from the Test run drop-down menu. By clicking Test-Mailing, all recipients in this target group receive the mailing. To make a target group available for selection in this drop-down menu, you must reserve it for admin and test sending in the detail view of target group concerned. You can find out how this works in the chapter Creating and managing target groups.
-
Test mailings for a single recipient: Here you can enter an email address for a single recipient, e.g. a certain colleague who would like to see the test version as well. After you've finished entering the addresses you can hit Test mailing and the mails will only be sent to the entered addresses. If you want to write to these people more often with the test delivery, you can also save the selection as a target group. If you activate this function, enter a unique name in the Target group name field and confirm this with the Save as target group button.
-
Target group for test mailing: If you select Target group in the drop-down menu, you can define a target group of recipients to whom your test mailing should be sent.
-
Send only to me (user email address): With this option, you will receive a test email at the displayed email address.
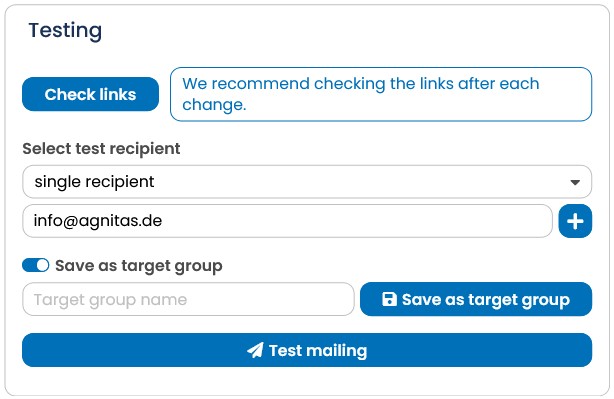
Fig. 3.77: You can save selected test recipients as a target group for future test mailings.
Check the test emails sent very carefully! Flawed e-mails sent to hundreds thousands of customers are simply embarrassing. If you do find any errors, modify the contents accordingly and start the test run over again.
Almost nothing is worse for recipients than being unable to open a web link in your mailing, for example because a spelling mistake has slipped in, or the web page referenced no longer exists. E-Marketing Manager helps here by checking all web links given in your mailing. Therefore click on the button Check next to Check links. This check may last for some time.
Are all the web links contained in your mailing correct? As soon as you checked the web links, E-Marketing Manager points out possible problems. Invalid links appear as a warning message.
If you should delete target groups after placing these in a mailing, these continue to be displayed in red with the comment (deleted). As long as you do not delete this target group from the target group overview, no test delivery can take place.
There is no bounce management for testimonials. This means that automatic answers are not recorded and processed by the system.
The Status area gives you further information on how many e-mails have been generated.
The value Delivery size indicates how large the data volume of the mailing (HTML and file attachments, if applicable) is when it is sent. If you send the mailing in offline HTML, the images are also sent and taken into account here in this value. Since images are usually not delivered directly with the mailing, but are only retrieved when it is opened, the value including images shows the size of the mailing accordingly, after the images have also been loaded. Both values are determined taking into account all optional and variable content modules.
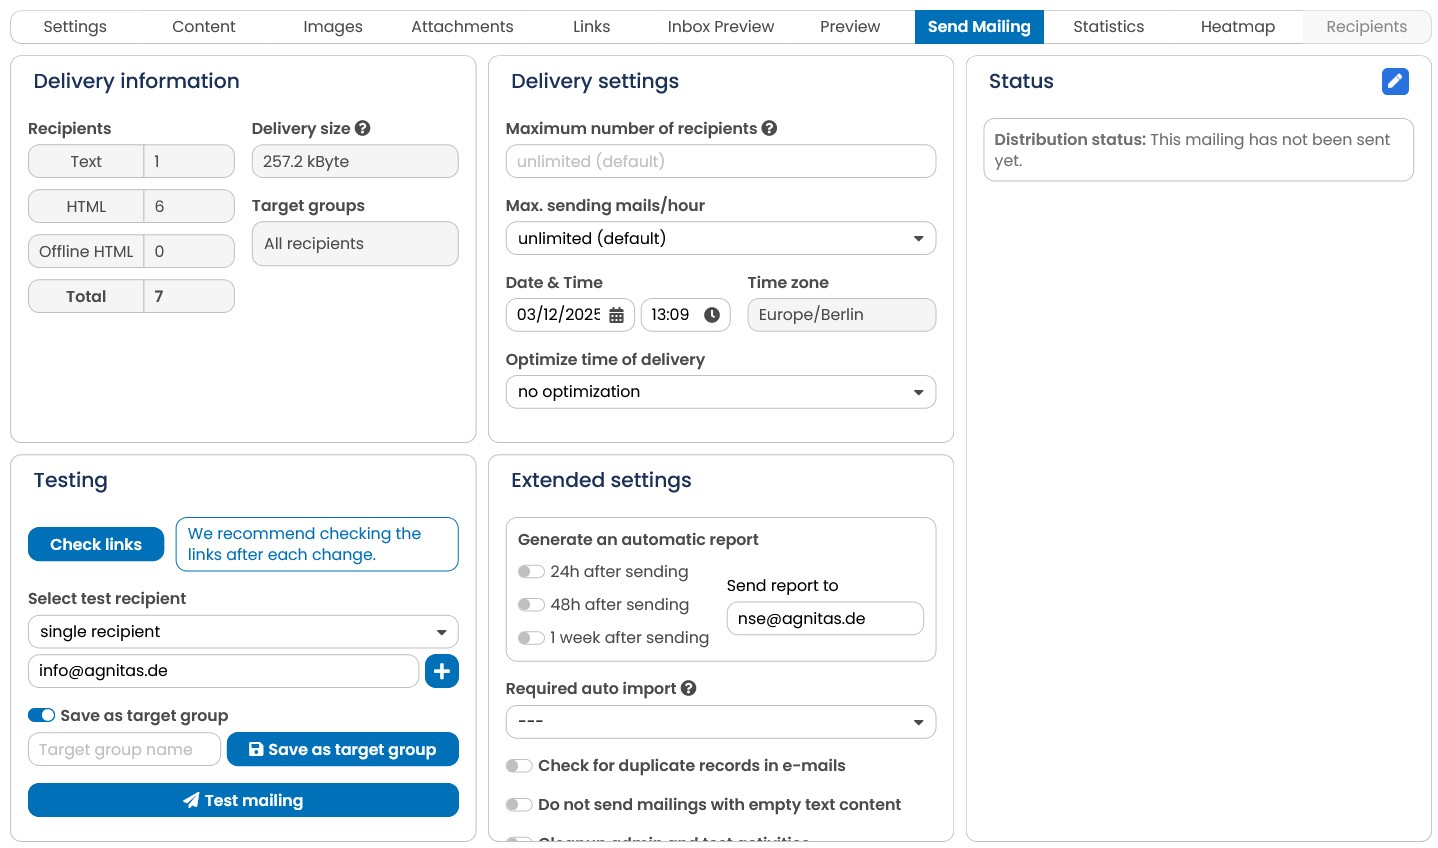
Fig. 3.78: The Send mailing tab
4.4.9.4 Approve a mailing
The Approve function allows you to request approval before sending a newsletter. In this case, the newsletter can only be sent once an authorized user has given their approval by clicking on the link. For example, an editor can create a newsletter, but only send it once the marketing department has given their approval. Once approval has been granted via the link in the mailing or directly in EMM, the person who triggered the approval request is notified by an info mail. The approved mailing can then be set for dispatch by all users who have the authorization to do so. If the content of the mailing is changed again after approval, it must be granted again. You define the rights to grant approval or send mailings in the user rights. This can only be done by a user who is authorized to assign rights (see chapter Assigning user rights).
Fig. 3.79: The mailing can only be sent after it has been approved in the top right of the Send mailing tab.
4.4.9.5 Status mail for sending
When you create a mailing, you can set one or several email addresses in the send settings to which an email is automatically sent concerning the send status. If the number of emails sent is small, these recipients receive a message when sending is complete. For a larger number of recipients, you are informed about halfway through as to when the transmission is expected to be completed.
If you want to use this function, enter a valid email address in the field Status mail recipients and then click on Plus. Repeat this procedure if further recipients are to be added.
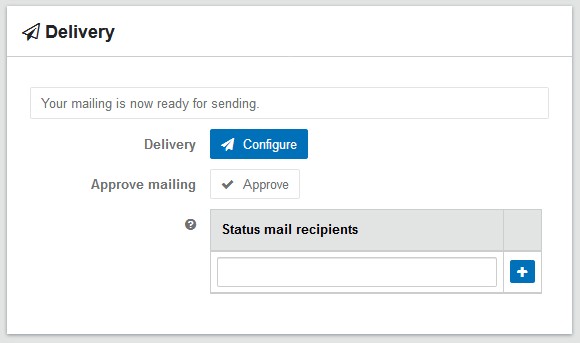
Fig. 3.80: Enter a valid e-mail address in the field Status mail recipients and then click on Add.
4.4.9.6 Select the maximum send quantity
Imagine that you want to advertise a product that is only available in limited quantities per newsletter. In this case, you would like to limit the number of newsletters sent. When creating a mailing, you can define the maximum number of e-mails to be sent in the send settings. The selection of which recipients on the mailing list receive the e-mail is a random process. In order to select the maximum number of e-mails to be sent, you must have a one-off authorization. Contact the AGNITAS Support if you are interested in this possibility.
4.4.9.7 Send mailing
OK, so far, so good! Your mailing is now ready, the contents have been incorporated and the test mailings have been reviewed several times. You are now ready to send your mailing!
The shipping settings differ slightly depending on the mailing type:
-
In case of an action-based mailing, you can simply release it for sending by clicking Activate, as here the date and time are determined by the trigger used. For more control of this mailing type, you can add Status mail recipients. With the setting Send status mail only for 0 e-mails you can also be notified only if there is no dispatch.
-
For the mailing type date-based mailing, you specify when the mailing is to be sent under Daily delivery time and confirm this selection with Activate. In addition, you can switch on various notifications via Security and notifications. In the Options area, you can also specify whether a check for duplicate records in e-mails should take place or mailings with empty text content should not be sent. Further options are a Required auto import, a Maximum number of recipients as well as a dispatch limit of Max. sending mails/hour. For more information, see Automatic date-based mailings - an example. If you subsequently adjust the target group, you can decide whether the mailing is to be resent on the same day or the following day.
-
For the mailing type interval-based mailing, the Interval area is displayed in advance, in which you can define the exact mailing cycle. You can find more information in the chapter Interval-based mailing. In the next step you have to Activate the mailing.
Note: All mailing types show the dispatch size of your mailing. In addition, you can optionally see the setting options for Send mailing independent of prioritization as well as Send mailing encrypted if you have the corresponding premium rights.
For the mailing types Follow-up as well as normal mailing the setting options are somewhat more extensive. Therefore, the Send mailing page is structured as follows:
- E-Marketing Manager will allow you to view the planned mailing. The Delivery information area shows all target groups, you have chosen to check your selection again prior sending. The system also displays the number of recipients as well as the selected e-mail formats.
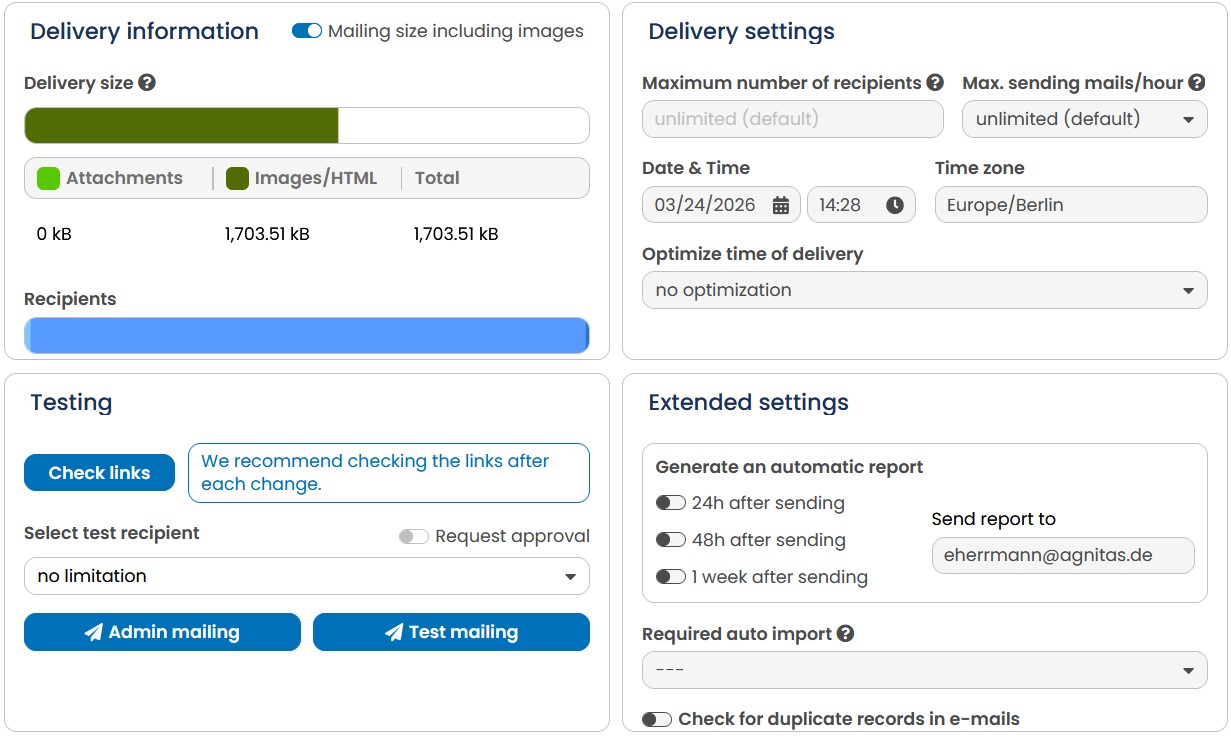
Fig. 3.81: Prior to sending, you will again be given a status report where you can select when to send out the mailing.
-
In the Date & time area, several drop-down lists allow you to select precisely when sending out the mailing should start. You could for example select automatic sending at 6:00am. E-Marketing Manager will then comply with your wishes. If you want to send the mailing immediately, simply accept the suggested date and time. The EMM allows the mailing even if the set mailing time is already slightly exceeded.
-
You can request an automatic send report on a mailing via the section Generate an automatic report. You do so by setting one or more ticks by one of the three options 24h after sending, 48h after sending or after 1 week. After the expired time period, E-Marketing Manager subsequently sends a report to the email address that is entered as the Statistic e-mail address for the logged-in user. You can change this setting at any time by clicking first Administration and then User on the main menu and then selecting the corresponding user and editing the Statistic e-mail address field.
-
Tick Check for duplicate records in e-mails to avoid a recipient being mailed twice even though he or she has multiple entries in the database.
-
If you are creating a mailing with multiple text building blocks and complex target groups, it is possible that a recipient receives an empty e-mail. In this case, tick Do not send mailings with empty text content.
-
If you would like to Cleanup admin and test activities, check this checkbox. This cleaning means that data from test and admin recipients will not distort the statistics of your final mailing. If you would like to use this option for every mailing, you have the possibility of setting the cleanup by default in the Clients menu item.
-
If a previous auto import is required to send your mailing, you can have it automatically cancelled if the import did not take place for various reasons. In the Required auto import dropdown, select the import profile that is responsible for the required import. Note: This function requires the Premium Package for Auto-Import & Auto-Export. If you choose this package, the function is available for interval-based mailings too.
-
Imagine that you want to advertise a product that is only available in limited quantities per newsletter. In this case, you would like to limit the number of newsletters sent. When creating a mailing, you can define the maximum number of recipients in the Delivery settings. The selection of which recipients on the mailing list receive the email is a random process. In order to select the maximum number of e-mails to be sent, you must have a one-off authorization. Contact the AGNITAS Support if you are interested in this possibility.
-
You can alter the speed of your email delivery using the Max. sending mails/hour menu. You can only reduce the speed to values that are lower than the maximum value set for your client. To find out how to change the maximum mail delivery per hour for your client, see Configure clients.
This feature is not activated as standard. If you are interested, please contact AGNITAS Support.
- Via the selection menu Optimize time of delivery you can set an individual dispatch time. The options no optimization, only set calendar day or upcoming 24h interval are available. If you choose the option only set calendar day or upcoming 24h-interval, the selection menu Max. sending mails/hour disappears. It will be available only if you do not choose any optimization.
If you have chosen only set calendar day, the mailing will be sent throughout the day. This goes as follows:
Example: Dispatch set on 14.02.2022 for 15.02.2022 at 12 o'clock with optimization only set calendar day.
a recipient who prefers openings at 7 a.m. will receive the mailing on
15.02.2022 7 a.m,
a recipient without openings on 15.02.2022 12 o'clock, an admin recipient on 15.02.2022 0 o'clock
The selection of the upcoming 24h interval has the following effect:
Example: dispatch set on 14.02.2022 for 15.02.2022 at 12 o'clock with optimization the following 24h-interval
a recipient who prefers openings at 7 a.m. will receive the mailing on
02/16/2022 7 a.m,
a recipient without openings on 15.02.2022 12 o'clock, an admin recipient on 15.02.2022 12 o'clock,
11.Now click on the Send button. This starts the mailing. Should you wish to make further changes, click on the x instead.
Please note: Maybe after making all entries and setting a date for sending the mailing at some future time, you decide you do not want to send the mailing after all. It is still possible to cancel a mailing until very shortly before production of the mailing is actually started by pressing the relevant button.
Note: If you cancel a mailing and then resume it, the mailing in question will be copied.
You will then find the statistical data associated with the mailing in the statistics of the copied mailing. The statistics stored for the canceled, i.e. original mailing, only contain data that was generated before the mailing was canceled.
12.You will receive another security query with the key data including mailing name, a thumbnail of the mailing, the subject and number of recipients. Confirm your entries by clicking Send mailing or Cancel.
Please note:If you do not send the mailing immediately but specify a future send date, the mailing will begin to be generated approximately 1 hour before sending. Once a mailing has been scheduled, it is locked for editing. You can cancel the dispatch at any time before the set send date and make changes to the mailing. After cancellation, the date of your mailing will be changed back to the originally set send date. If you notice errors after generation has started, these can only be remedied by the AGNITAS team. Please contact us on +49 (0)89 552908-44 should this occur.
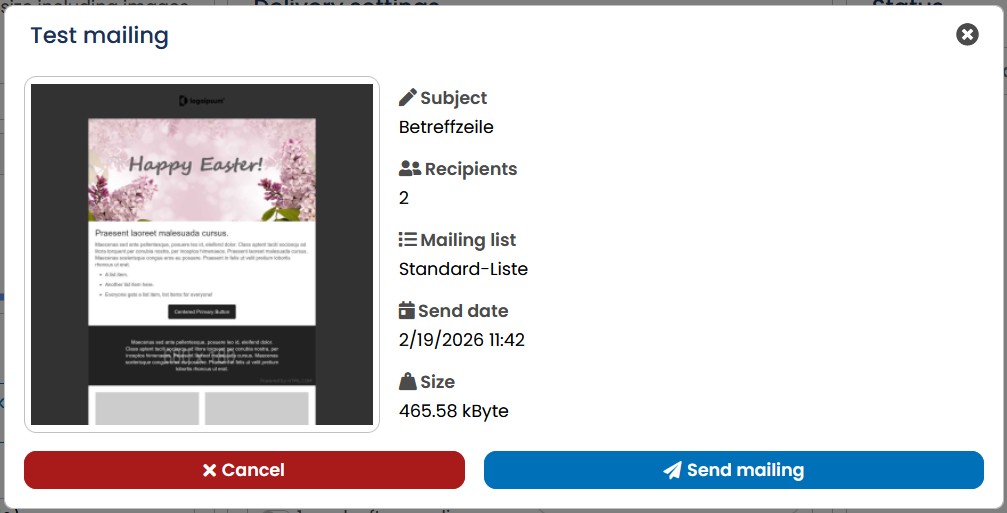
Fig. 3.82: A security query gives you the key data of a mailing and offers the final send button.
13. After sending, the Status section on the Send mailing page will display a status report. You can still call up the preview and send the mailing to administrators and the test distribution list. The normal send mailing selection is now unavailable. In this way, sending out a mailing more than once by mistake will be prevented. The Status report in the right part of the screen now displays how many recipients the mailing has already been sent to.
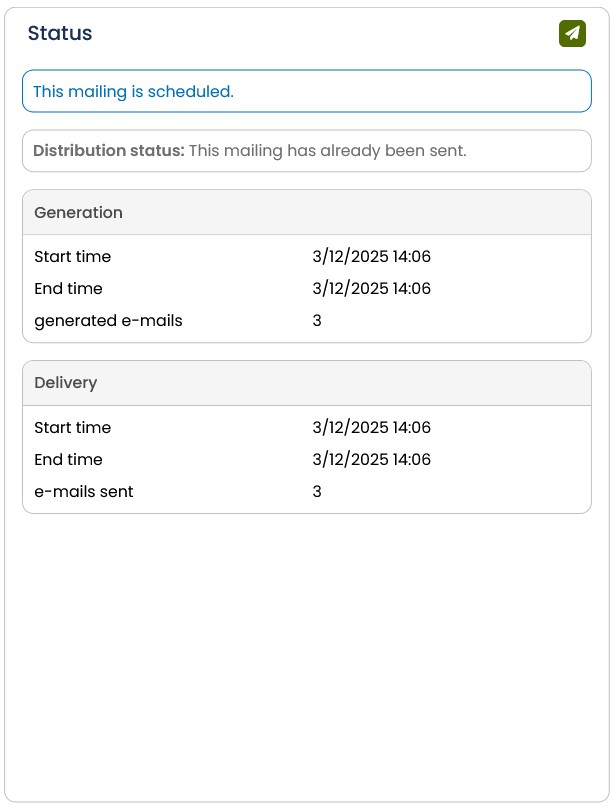
Fig. 3.83: The status report shows you how many emails were already sent.
Please note: You will notice that after a mailing has actually been sent, various options in the detailed view have been disabled: It is no longer possible to make any changes in the Mailing list or the Target group or the Mailing type drop-down lists. You can also no longer select to send the mailing to all recipients. This is meant to prevent accidentally sending the mailing more than once. However, you still may send the mailing to administrators and test recipients as often as you wish.
Please also note: AGNITAS AG puts the highest priority to data security and therefore supports TLS encryption in the mailing delivery. As far as the requested target server can decrypt TLS, the mailings are sent encrypted as default. Thus, AGNITAS AG always requests encrypted communication first. Should you have any further questions on data security, please contact our AGNITAS AG support.
4.4.9.8 Send mailing encrypted
The Send mail encrypted slider allows you to set the advanced encryption protection (Premium) when sending a mailing.
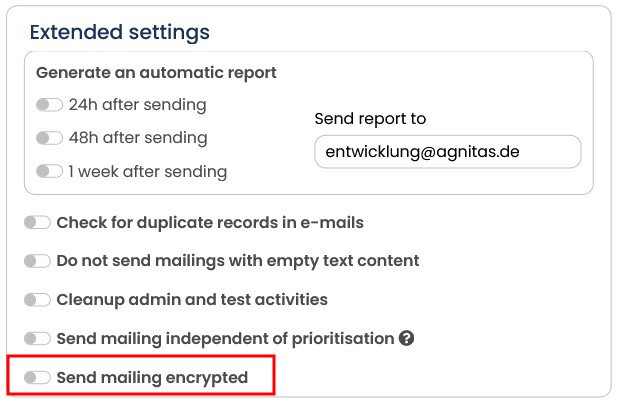
Fig. 3.84: Send mailing encrypted
Note: Basically, the EMM always tries to send TLS-encrypted, but also delivers mailboxes that receive unencrypted.
In this case, the email is only sent if the remote peer can also receive encrypted. This means that so-called man-in-the-middle attacks can be prevented. You can also see which recipients can receive encrypted e-mails by looking for a green lock symbol in the recipient overview and in the recipient profile. If the lock is red and crossed out, the mailbox does not support TLS-encrypted emails. With this function, you can also send e-mails with confidential personal data, e.g. account statements, without hesitation and be on the safe side legally.
4.4.10 Statistics
E-Marketing Manager provides you with many tools to evaluate your mailing in the Statistics tab. To get more information about the statistics tools, take a look at our Mailing statistics chapter.
4.4.11 Heatmap
Click statistics in the form of a bar chart can quickly become confusing, especially for extensive or elaborately designed newsletters containing many links. E-Marketing Manager provides you with the Heatmap for exactly this case. This tool gives you click statistics that are directly embedded in the mailing. The Heatmap shows the mailing in the HTML view and places the number of clicks and click rate, expressed in percent, directly next to each URL. This kind of view lets you quickly see what links your recipients click often.
The name Heatmap says it already: The statistics shown in the HTML view are coded in color to give a better overview. The more often recipients click a link the “hotter” it gets, and the associated click statistics are correspondingly shown in warmer colors. EMarketing Manager uses the following color gradations for the Heatmap:
| Click rate | Color coding |
|---|---|
| up to 5.0% | white |
| up to 10.0% | blue |
| up to 15.0% | green |
| up to 20.0% | yellow |
| up to 25.0% | orange |
| up to 100.0% | red |
To analyze one of your newsletters in the Heatmap view, first select the corresponding mailing with a mouse click in the Mailings column and then switch to the Heatmap tab.
The system now shows the mailing in the HTML view with the click statistics for each link.
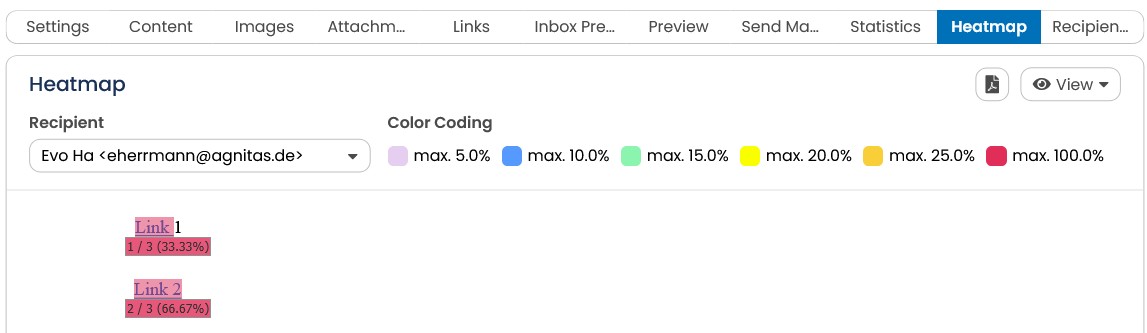
Fig. 9.2: The Heatmap shows color-coded click statistics directly in the selected mailing.
In the View selection list in the upper right, you can switch between various Heatmap views. Clicks are preset and are shown by the system as a number followed by the percentage value. In addition, the Heatmap shows the clickers in the same pattern. Select the option Pure Mailing when you want to view the mailing in the HTML view without clicks statistics. In addition, you can also filter the heat map by device type.
In the Recipients selection list, choose the desired addressees. Attention: The list only shows administrators and test recipients who were created for the chosen mailing. If you want the heatmap for certain target group contents, an admin or test recipient must fulfill the characteristics. You can read more about this subject in chapter Sending out test mails.
You can adapt the percentage values and colors of the Heatmap individually to your wishes. Please contact AGNITAS Support for this.
4.4.12 Recipients
the option Recipients is part of the Automation Package, if you are interested in it, please contact our customer support.
The Recipients tab contains information about the individuals who have received the corresponding mailing. The recipient overview contains a table with information about the first name, last name, e-mail of the recipient, as well as whether the columns Mailing received, Mailing opened, Mailing clicked, Mailing bounced or Mailing unsubscribed. A timestamp is used here to record when the corresponding event (last) occurred, otherwise the field is empty. The Recipient tab contains data only if the mailing has already been sent. The retention period for the data included here is 1,100 days. If the mailing has not yet been sent, the tab will be grayed out.
By clicking in the individual column headings, you can arrange your table alphabetically or chronologically. The heading is highlighted in blue and a triangle pointing up or down appears to the left of that. You can use the triangle to sort the column ascending or descending.
The Export tab allows you to export the overview as a CSV file. The View drop-down menu to the right allows you to set the list length for your recipient overview. You can choose to display 20, 50, 100 or 200 recipients. In addition, you can display the data of all recipients or only those who have opened, clicked or have bounced or unsubscribed.
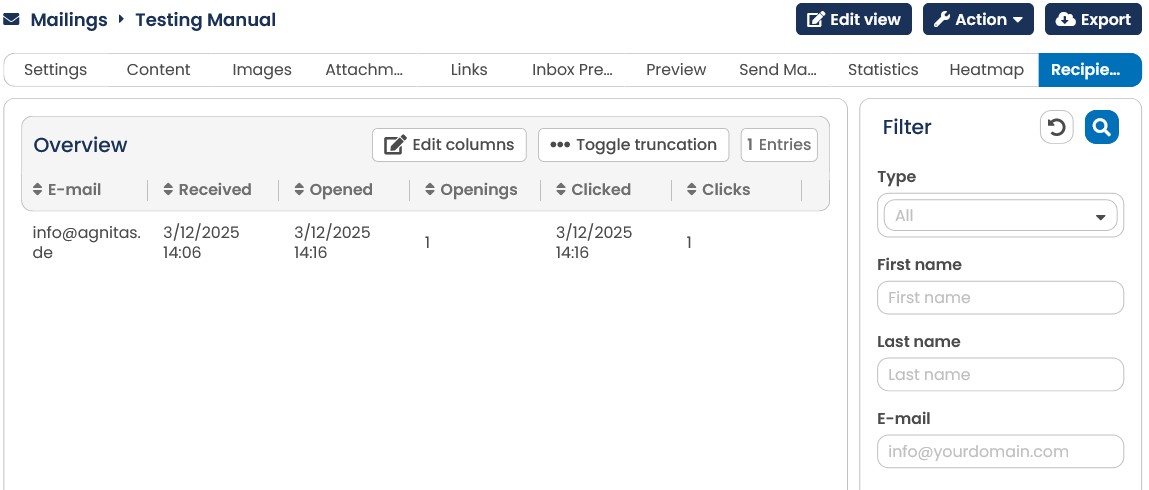
Fig. 3.\<%ABB_MAI%>: In the register tab you can see details about the people who received your mailing.
4.4.13 Fullview: Always display HTML e-mails correctly
Spamming is on the up, so many providers and developers of email software have started developing protection mechanisms which will prevent correctly displaying an HTML email within the email software, or which will even not display HTML at all.
Many email softwares such as Outlook or Thunderbird, for instance, do not display images embedded in HTML mails at all. Moreover, newsletter subscribers often do not know how to display the content correctly.
In such cases, the the E-Marketing Manager offers you the Fullview, which is a great way of dealing with this problem. The recipient of an email may click on a link embedded in the newsletter in order to view the email content in a browser over the web front-end.
The Fullview will display the opened newsletter personalized and individualized in the browser.
Creating Fullview
To create Fullview, please proceed as follows:
-
Create a trigger Fullview Display mailing.
-
Create a Fullview form.
-
Create a link to the current newsletter in order to display it and insert it into the mailing.
Step-by-step creation of Fullview
In order to be able to offer subscribers a way of viewing their customized mailing over the web browser, you must start by creating a trigger telling the system that the Fullview function should display the current mailing.
To do this, proceed as follows:
-
Click on Trigger management and then on the button New in the upper right corner.
-
Name the trigger Display fullview mailing and enter a short description for your trigger.
-
In the Usage for drop-down list, select Only for forms.
-
In the Steps window, select Show archived mailing from the drop-down list and verify by pressing the Plus.
-
An expiry date can be defined for use in the Fullview. This date indicates for how long the newsletter is callable on the website. The expiry date is, for example, useful for showing short-term sales campaigns. After the campaign has finished, the newsletter is no longer displayed by the Fullview.
-
To conclude this step, click on the Save button.
In order to be able to call up the trigger you have just created, you will create a form followed up by the trigger Display fullview mailing.
-
Click on thePages & Forms and then on the button New in the upper right corner.
-
Name the form fullview and enter a short description for your form.
-
From the Introductory trigger drop-down list, select the trigger you have just created, namely Display fullview mailing.
-
Enter the code \$archiveHtml in the Success form entry field.
-
After having entered an HTML code into the Error form field and having assigned that code a trigger in the Trigger drop-down list, finish this step by clicking on the Save button.
As a last step, you must now embed a link into the newsletter mailing which can be clicked to call up the Fullview function.
To do so, it is best to put a link tag at the top of your mailing so that the recipient can see it right away. In the parameter href="LINK" you can now either directly insert the link displayed in the form above and - important - add the parameter &agnUID=##AGNUID##. This is the only way for the EMM to know which recipient it has to load the data for, otherwise the error form will be loaded when the link is clicked. Or you simply insert the following AGNITAS tag between the quotation marks at href, this will automatically personalize it for you: : [agnFORM name="fullview"]
Please note: In order for the tag to work as desired, you must use exactly the same name that you used as the name for the form.
Each newsletter subscriber will in future be able to call up and display customized and individual newsletters as an HTML email over the web browser.