12.2 Managing triggers
If you click on Trigger management in the main menu, the overview of all actions created so far opens. In this area you can manage existing actions, create new ones or remove obsolete ones.
The overview is structured as follows:
-
The ID can be used to uniquely identify the trigger. The Trigger column contains the name you have assigned to it, which also appears in other places in the E-Marketing Manager. The Description helps to understand what the trigger does and should be formulated in a way that is as comprehensible as possible. In form shows whether the trigger is used in forms. The columns Created on and Changed on show the respective date. In the active column you can see whether the trigger is still in use and you can also adjust the status directly in the overview. Only active triggers appear in selection menus.
-
To keep track of a longer list, you can sort it by the column headings. Click on the respective column header to sort their entries alphabetically. For the status you also have the possibility to filter only active or inactive ones by clicking on the small funnel. In addition, you can set the list length to 20, 50 or 100 using the Show option.
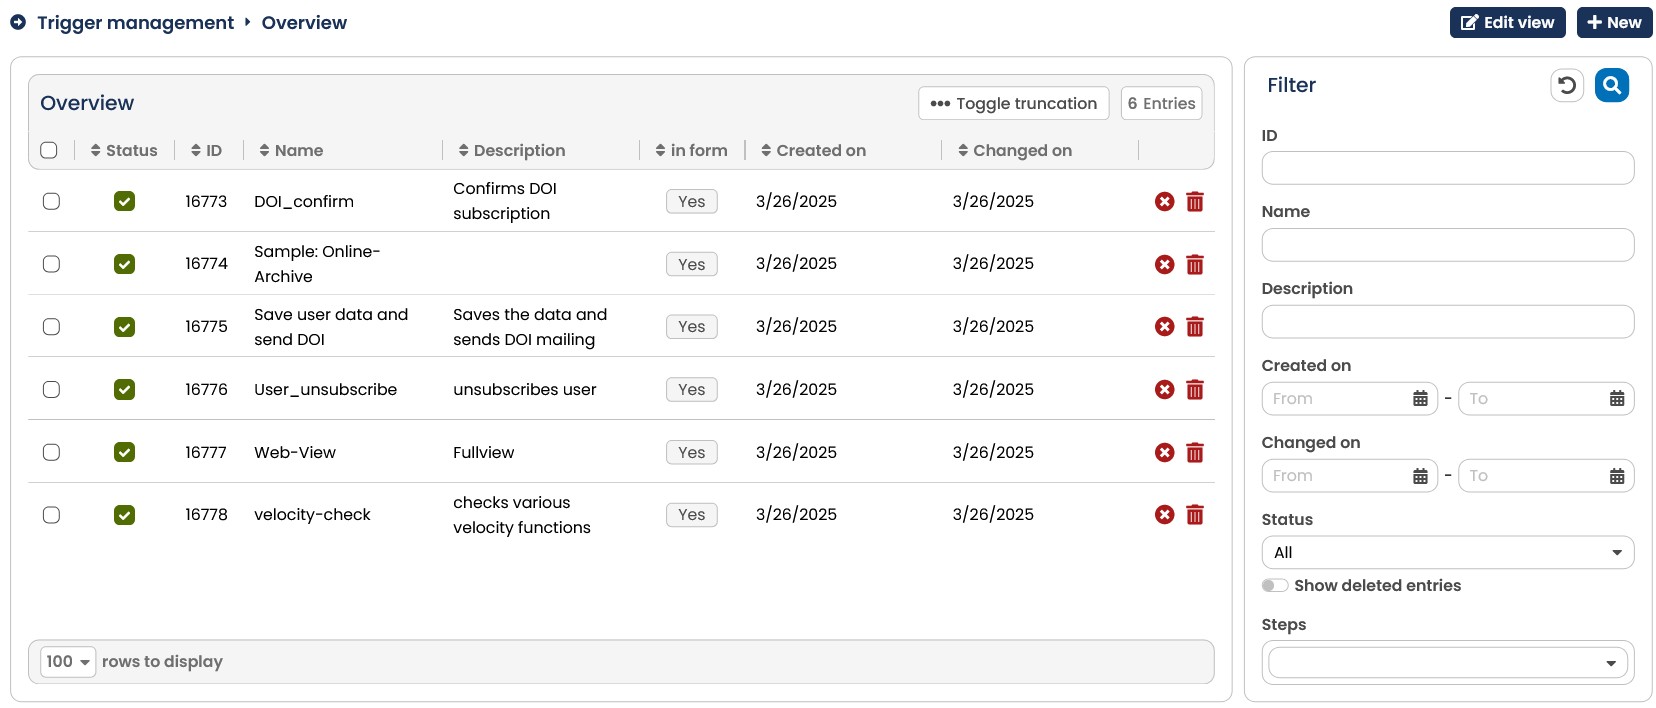
Fig. 11.1: The overview shows all existing triggers of the system.
-
To edit an trigger you have already created, simply click on the entry. The E-Marketing Manager will then automatically display the content of the trigger.
-
You can also copy an existing trigger after you have called it. To do this, simply click the Action button in the upper right corner and then click Copy.
-
If you no longer need an trigger, you can delete it by clicking on the trash can icon in the right column. If you want to delete several triggers, you can do this collectively. First select the triggers concerned using the checkboxes in the first column and then click on the Delete selected triggers icon in the header of the table. Please note that the selection of triggers is only active for the displayed page.
-
You can mark triggers that you currently no longer need but do not want to delete as inactive. The status is displayed both in the overview and in the trigger. In this way, you keep an overview of your active triggers and can retain the contents for quick reactivation. Inactive triggers are no longer displayed in the various selection fields.
-
The New button opens the input dialog for a new trigger to be defined. How to proceed is described in the next section Create or change triggers.