14.5 Managing, Creating, Sending and Evaluating Web Push Notifications
You can access web push notifications by clicking on the Push Notifications option on the main page. There are three links to the sub-pages for the Overview, Trigger and Statistics, which will be described in the following sections.
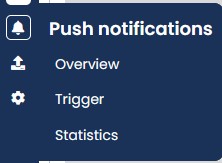
Fig. 13.2: The menu item Push-Notifications at a glance.
14.5.1 Managing Push Notifications
The Overview page will display a table with all of the web push notifications that have already been created. The relevant information will be provided using the following columns (from left to right): Status, Name, Description, Message title, Send date and End Date. The Overview can be filtered by clicking on the specific column header.
The Send date will be populated as soon as you have scheduled your mailing. This allows you to know in advance when your mailing will be sent.
Checking the box in the first column will allow you to select one or more web push notifications and then choose the desired action for the selected notifications, such as: Delete Selected Notifications for deleting the notifications all at one time.
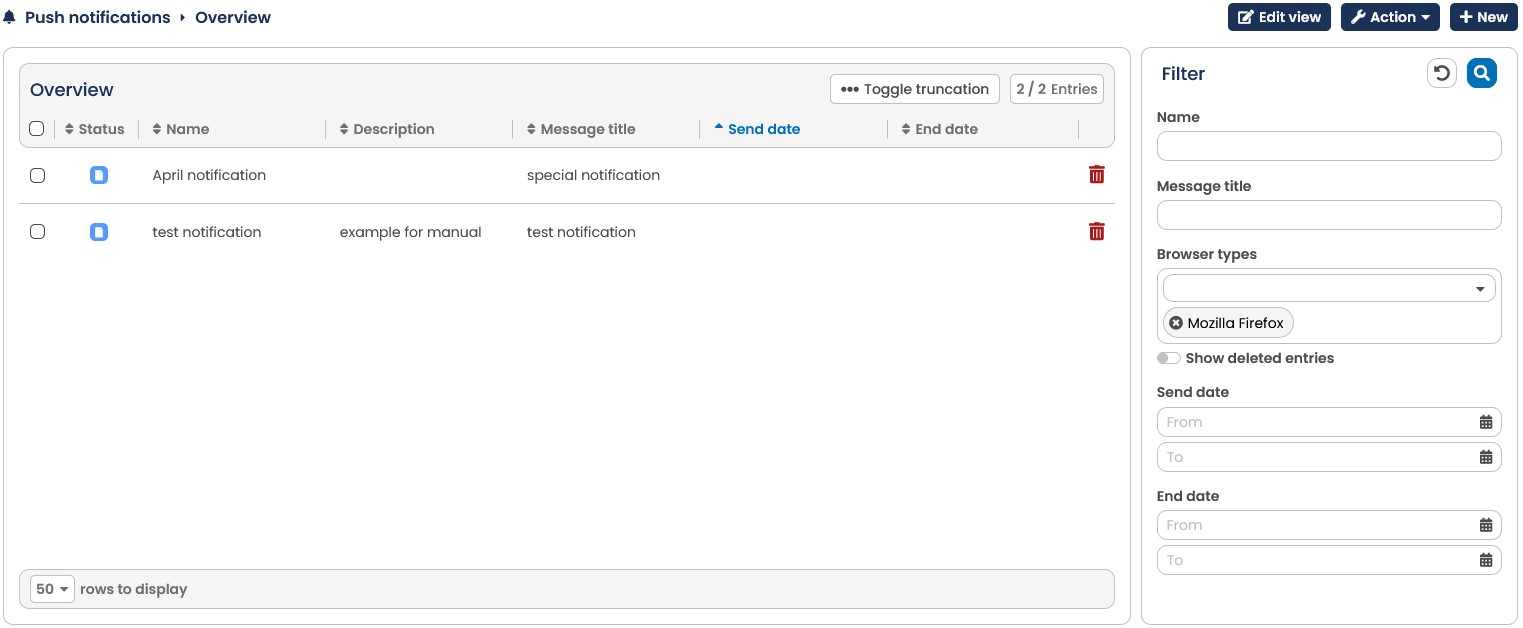
Fig. 13.3: The tabular overview of all created Web push messages.
The browser that should be used for displaying the notification must be set within the web push notification. Accordingly, the individual notifications can be filtered in the table by browser type. Use the Filter to do this. By default, all browsers will be selected, which effectively does not filter the table, meaning that all web push notifications will be displayed. By checking or unchecking the boxes on the selection list, the table can be filtered for the following browsers: Google Chrome and its derivatives, Mozilla Firefox, Microsoft Edge and Apple Safari.
Clicking on an entry in the list will open the corresponding web push message for editing.
14.5.2 creating a new push notification
Click New to create a new web push message. An edit page will then open, where you can determine the details of the message.
The page is divided into two sections for General Settings and the Push notification itself.
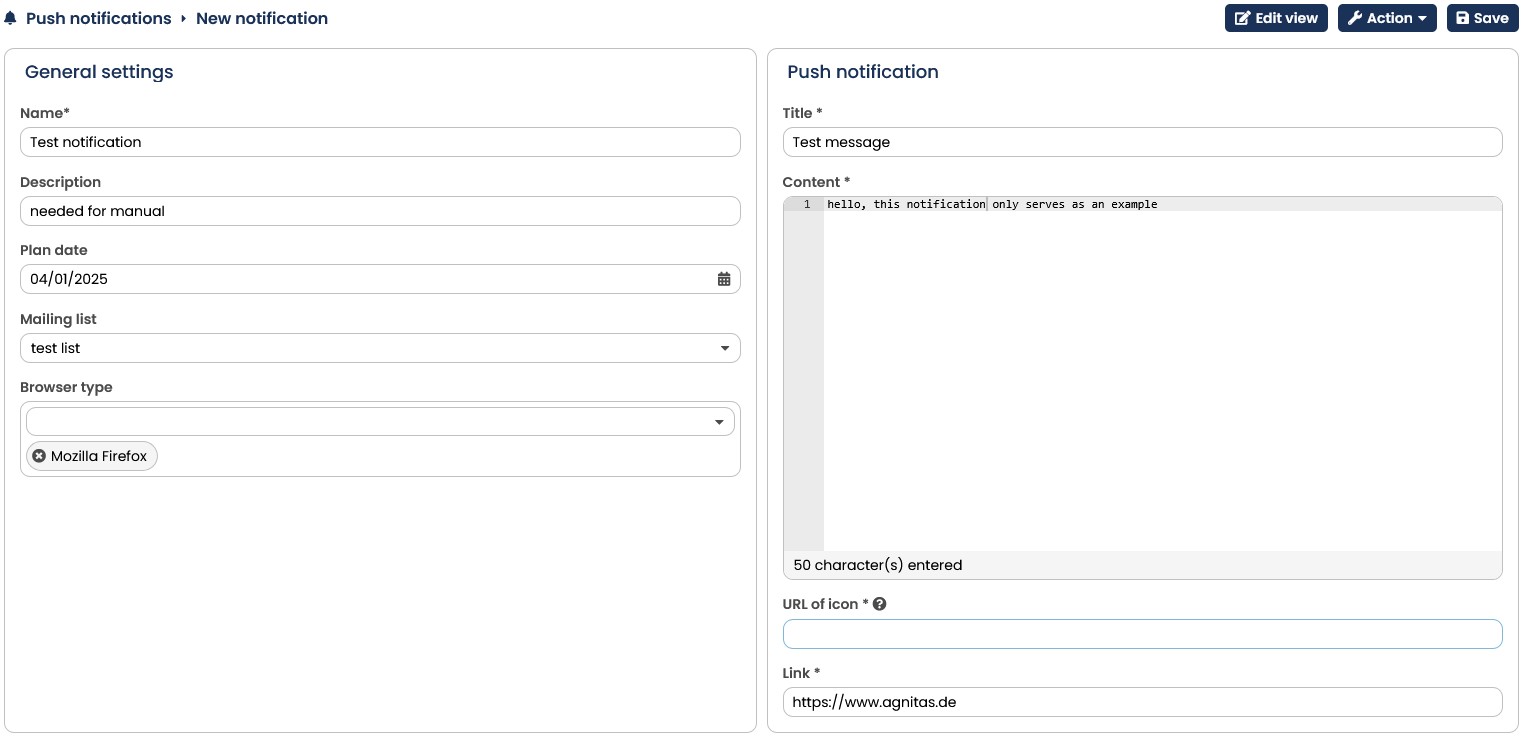
Fig. 13.4:The input mask for creating new web push messages.
-
General Settings: Enter a Name to designate the new web page notification. The Description and Intended for entries are optional. Entering a brief descriptive text and a send date using the calendar is recommended so that the web push notification will be easier to categorize later or make editing easier for third parties. The Mailing List that indicates the recipients who should receive the web push notification will be set from here along with the Browser type that should be used to display the notification. The default setting includes All browser types. Clicking on the X icon will delete these settings and another click will select from the following browsers: All, Google Chrome and derivatives, Mozilla Firefox, Microsoft Edge and Apple Safari.
-
Push Notification: In this section, you will determine the layout and the content of the web push notification. Enter the subject for your notification in Title and then enter the notification in the Body entry. Using the URL of Icon entry, you can set a small image (an icon or logo) that will be seen when the web push notification is displayed. The same applies for the Link entry. From that entry, you can set a link for your web push notification, whose URL will also appear when the message is displayed.
Tip: Select Preview after clicking Action to display the web push notification as the recipients will see it later.
Once you have made all of the settings, save the new web push notification by clicking on the Save button.
Once it has successfully been saved, E-Marketing Manager will display four sections within the web push notification. They include the General Settings as described above. In addition, the Push Notification, Send message and Statistics sections will also become visible. The following section on Transmission settings and statistics for Push Notifications will describe this in more detail.
Tip: If you want to copy a part of the web push notification into a new web push notification, you do not have to start from scratch. Instead, click on the Action button and choose the Copy option from the selection list. E-Marketing Manager will then automatically create a duplicate of the web push notification and add Copy of in front of the name.
14.5.3 Transmission settings and statistics for Push Notifications
With an existing web push notification, you can make changes to the appropriate Dispatch Settings in the Send message section. Set the start and end dates for dispatch as well as a time. To save these settings, click the Activate button.
The E-Marketing Manager will display the current dispatch status for the web push notification at the left in the Status entry. Potential status notifications include: new, completed, sent and canceled.
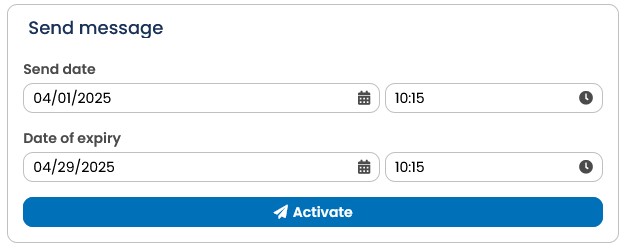
Fig. 13.5:In the Send message tab, specify the shipping settings for the Web push notification.
Once a web push notification has been sent, the Statistics tab will display the number of messages sent and delivered, the number of views, bounces and the number of clicks using a bar chart.
Directly below that, an XY-chart will display the date and time for the corresponding values. Click on the lines and keep the mouse button pressed while moving the mouse over the chart will show you a zoomed view of the values, including the precise time and date of the individual clicks.
A miniature display will be displayed below the XY-chart. E-Marketing Manager will display the area of the XY-chart that is currently being displayed in the zoom view by marking the area. If you have zoomed into the XY-chart as described above, you can now move the selected area in the miniature display to see the statistics for other dates.
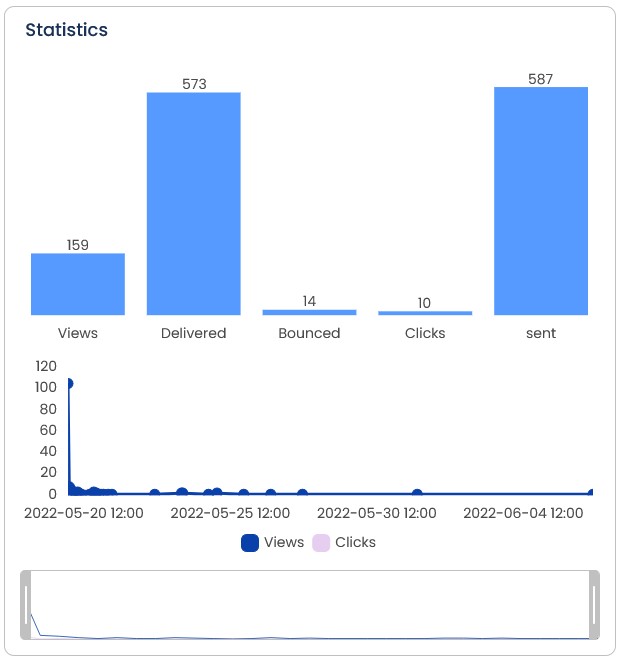
Fig. 13.6:Detailed statistics are available for each sent Web push notification.
14.5.4 Push Trigger Notifications
Push trigger notifications are a variation of web push notifications. A push trigger will automatically send a welcoming message once a recipient has registered for at least one push list. You can access push trigger notifications from the main menu by opening the menu Push Notifications and then navigating to the Trigger submenu.
Differences from normal web push notifications include the following features. Push trigger notifications do not have to be enabled. In addition, they are sent without consideration for the type of browser or the push list. Of course, push trigger notifications can be dealt with like normal web push notifications and scheduled for transmission.
You can create a push trigger notifications using the same schema as a web push notification. The creating a new push notification chapter describes how this works.

Fig. 13.7:A push trigger notification is automatically sent as soon as a recipient logs in for at least one push list.
You can use any saved web push notification as a push trigger notification. Simply select the desired Message to send on subscription in the drop-down menu. Once the Save button has been clicked, your push trigger message is activated.
If E-Marketing Manager should not send any push trigger messages, reset the option to the default setting Send no notification.
14.5.5 Statistics
The Statistics tab depicts the values for all recipients of push notifications. You can choose between two sets of statistics: Status and Browser type. E-Marketing Manager will prepare both sets of statistics weekly, monthly or for a custom-defined period as desired.
An Overview of the Statistics
-
Status: The Status statistic provides information about bounced web push notifications, Opt-ins and Opt-outs using a bar chart. It is displayed by default when you open the Statistics submenu.
-
Browser type: The Browser type statistic displays in percentage values how often a certain browser is used to open a web push notification. The following browser types are included: Google Chrome and derivatives, Mozilla Firefox, Microsoft Edge and Apple Safari.
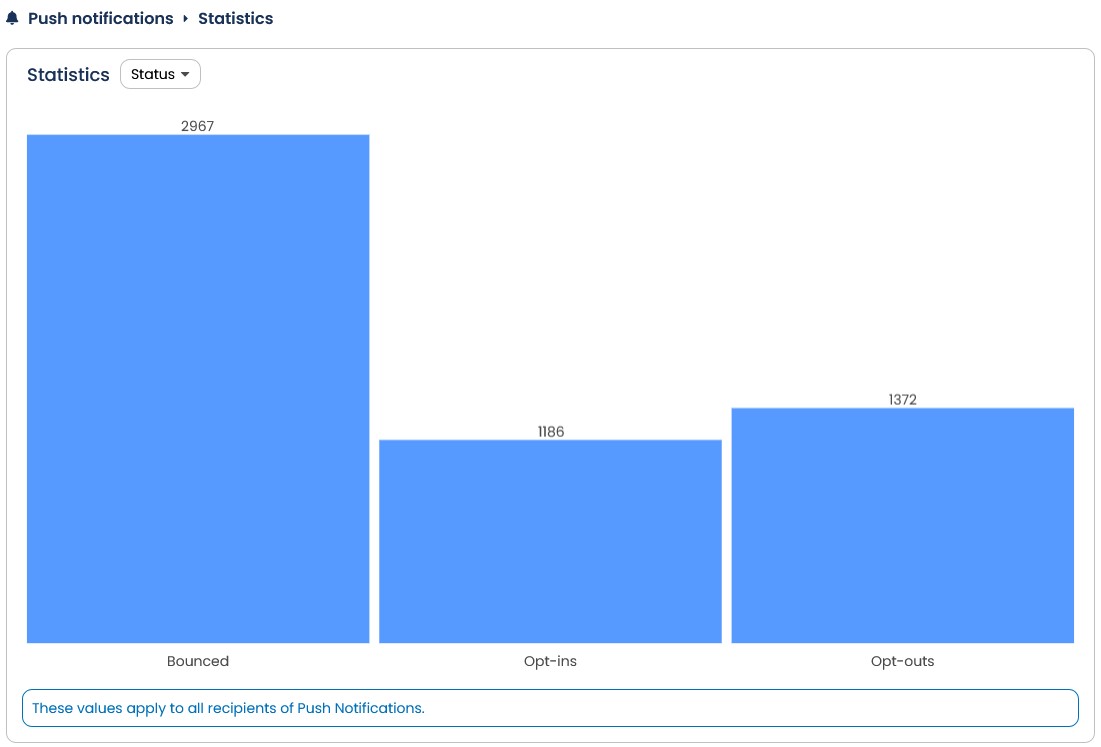
Fig. 13.8: You can evaluate Web push notifications according to their status and browser type.