5.1 Uploading and managing files
When you open the Mediapool menu, the overview tab displays all of your already uploaded files.
The overview menu gives you the most important parameters at a glance: Each element is listed along with its name, a small preview image, the size in pixels and kilobyte, the date of when it was added and the file type. E-Marketing Manager provides a convenient filter function on the right-hand side of your screen. Select as precisely as possible what you are looking for and click on Apply filter. To remove the filter, click the Reset filter button.
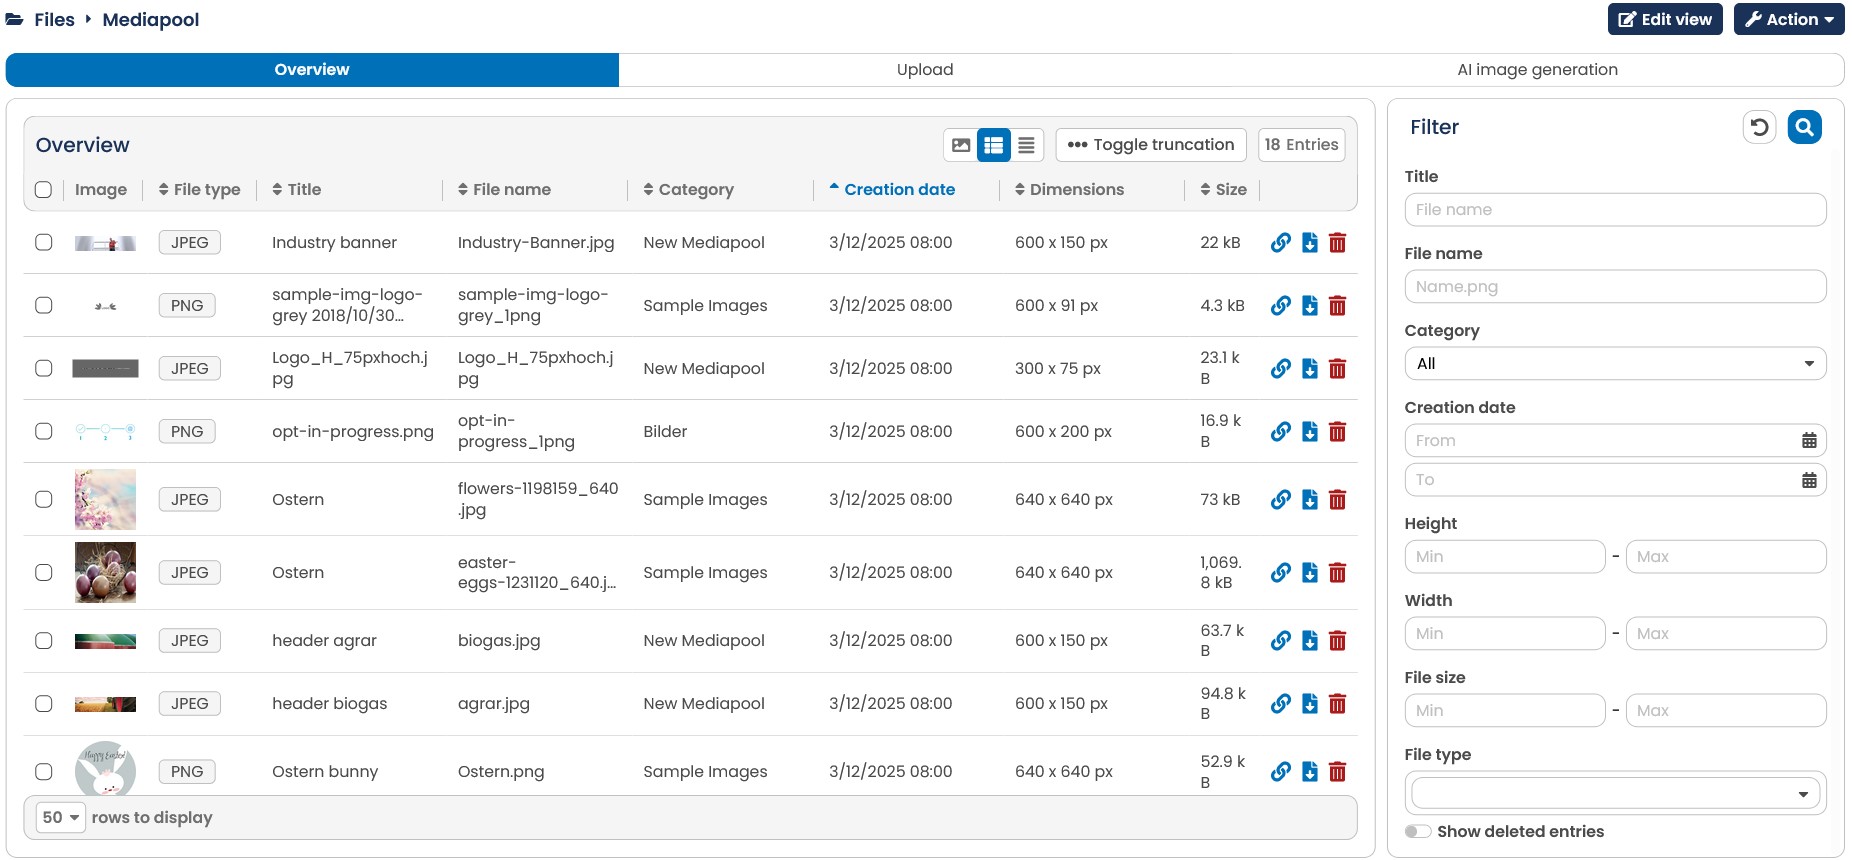
Fig. 4.1: You manage all files in the Mediapool submenu.
Edit files
You can edit the file size by clicking on the relevant entry.
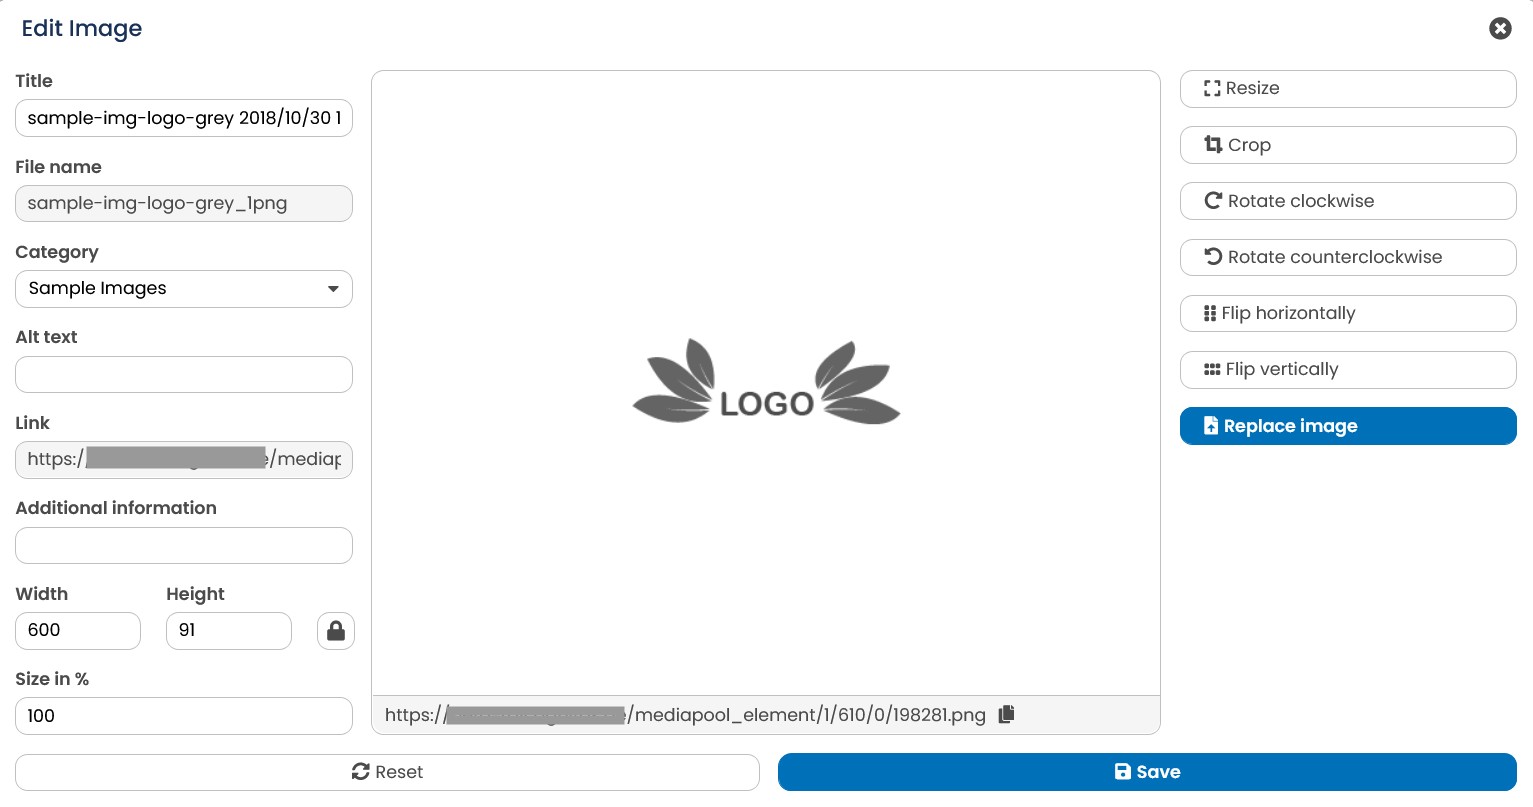
Fig. 4.2: Adjusting the size of a picture is possible in the E-Marketing Manager
If you want to replace an image later, click on the corresponding button and select the replacement file on your device (also possible for all other file types).
If you provide Alt text, it can be read aloud to your visually impaired recipients using a screen reader.
Under Additional Information, you can specify the source or author of your image if desired.
Please note: If a file is replaced, the image path of the original file is retained by the replacement, but only the new content is displayed. Use case: e.g. a time-limited promotion has ended or a product is out of stock.
Icons in the overview
The Copy link icon at the end of each row in the table allows you to copy the link of an uploaded file directly to your clipboard so that you can then paste it more easily into a mailing.
You will also find the Download button on the far right of each line. This allows you to download individual images directly.
If you want to remove one or more files from the Mediapool, this can be done in two ways. The first way is to click individually on the Delete symbol in the corresponding line and confirm the security query with Delete. If however you want to remove multiple files at the same time, a second method is more convenient and faster: Place a tick next to the corresponding entries and then click on the bulk action link Delete selected files above the table.
Please note: In addition to the security query, E-Marketing Manager automatically checks whether the selected files are in use and in such a case prevents deletion.
Upload a new file
To load files into the mediapool before creating a newsletter, you have the following option:: You use Upload file integrated into the Upload menu point.
By doing so, you can assign keywords and a name to the file directly in the input mask. This information can be useful when searching for files using keywords, particularly when you expect that you will be editing many Grid CMS posts in the future.
Note: The mediapool has a storage limit of 2 GB per client. If you need more storage space, please contact our customer service.
Because too large files and attachments cause problems on different pages, e.g. at the recipient, there is an upload lock that warns you when a file exceeds the limit. The following upper limits exist: Images 1 MB; Attachments 10 MB.
5.1.1 Uploading files
If you want to upload a single or multiple files into Mediapool and also give it keywords and a name, open the Upload tab, and choose select files in the left half of your screen. EMarketing Manager now asks you for more information.
In the Title field, enter a meaningful designation for the image. In the field below this, optionally enter one or more Keywords separated by commas in order to be able to find the image. If a webpage is to be opened by clicking the image in the newsletter, inform the program of the corresponding URL in the Link field. If you have already created one or more categories (see chapter Creating and managing categories), assign the image to one of these categories via the selection menu Category.
Please note: To permit the image upload to function correctly, you must assign the image to a category. Otherwise, E-Marketing Manager gives an error when an image upload is attempted.
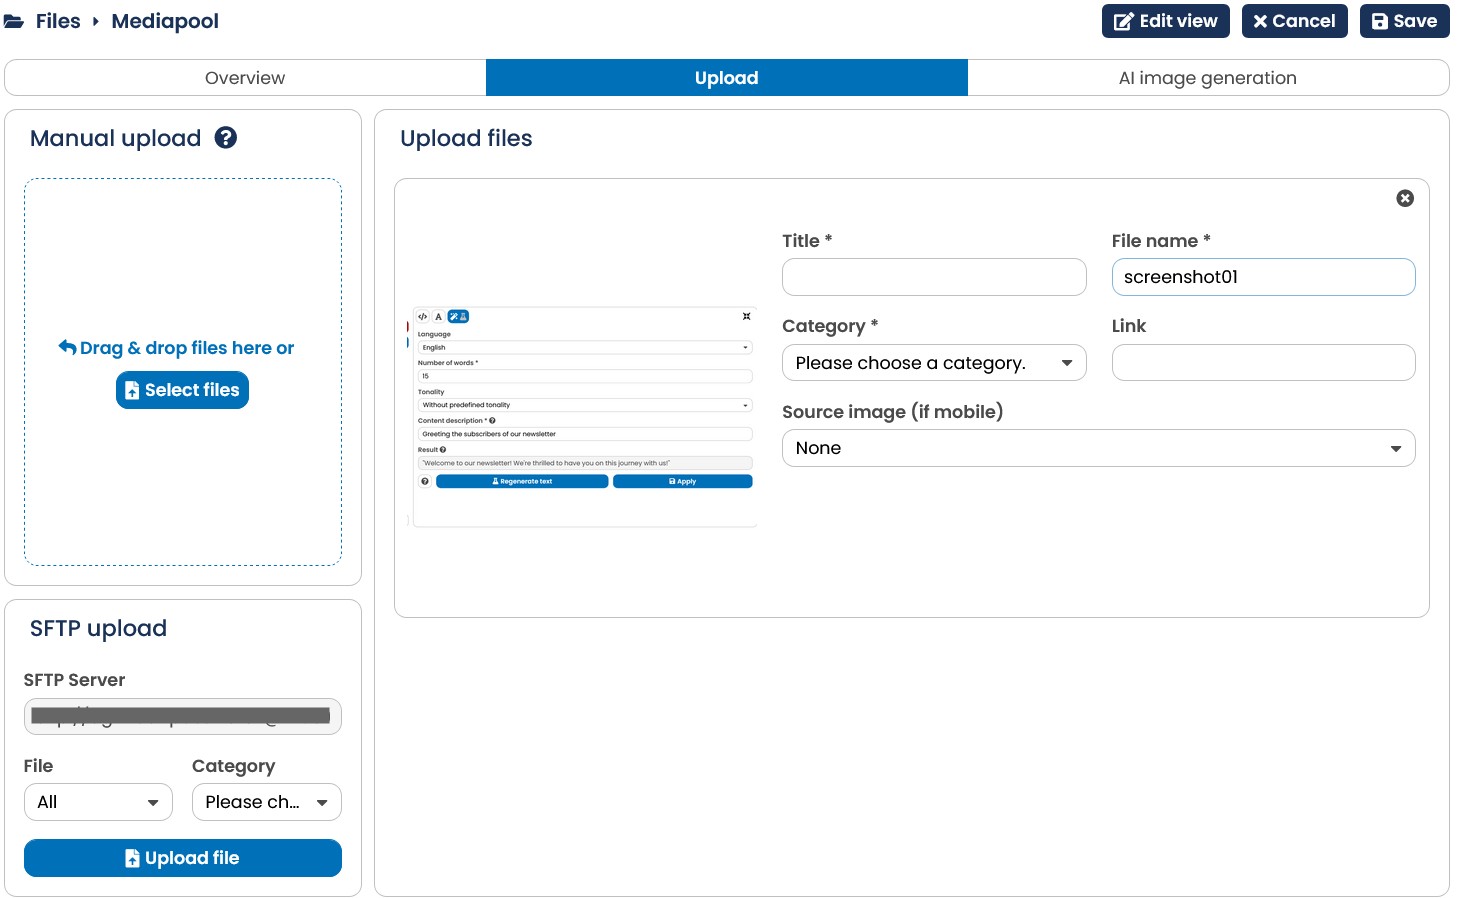
Fig. 4.3: You can assign a name and keywords when uploading images.
When all the information has been entered, click on Save. The file is now uploaded and you get back to the list containing all files. The newly uploaded file appears as a new entry in the list.
Note: The media pool checks with each image upload whether the file (content) or the used image name already exists. The E-Marketing Manager will inform you of duplicates or suggest the renaming of identical image names to avoid errors and confusion. This also reduces the load on the database and increases performance.
Also note: You can also add a mobile alternative for your image. This will be displayed when a recipient opens your mailing on a mobile device.
5.1.2 Generate images using AI
In the Mediapool menu, you will find the AI image generation tab. This tool is based on a model developed by OpenAI and allows you to create images with the help of artificial intelligence. AI image generation is a premium feature. If you are interested in this function, please contact sales@agnitas.de.
Note: This feature is currently implemented experimentally in the EMM as a BETA feature and due to the location of the operating company, OpenAI, in the USA, the data you enter may be processed outside the EU.
When you open the AI image generation, you will be shown an input screen for all relevant information:
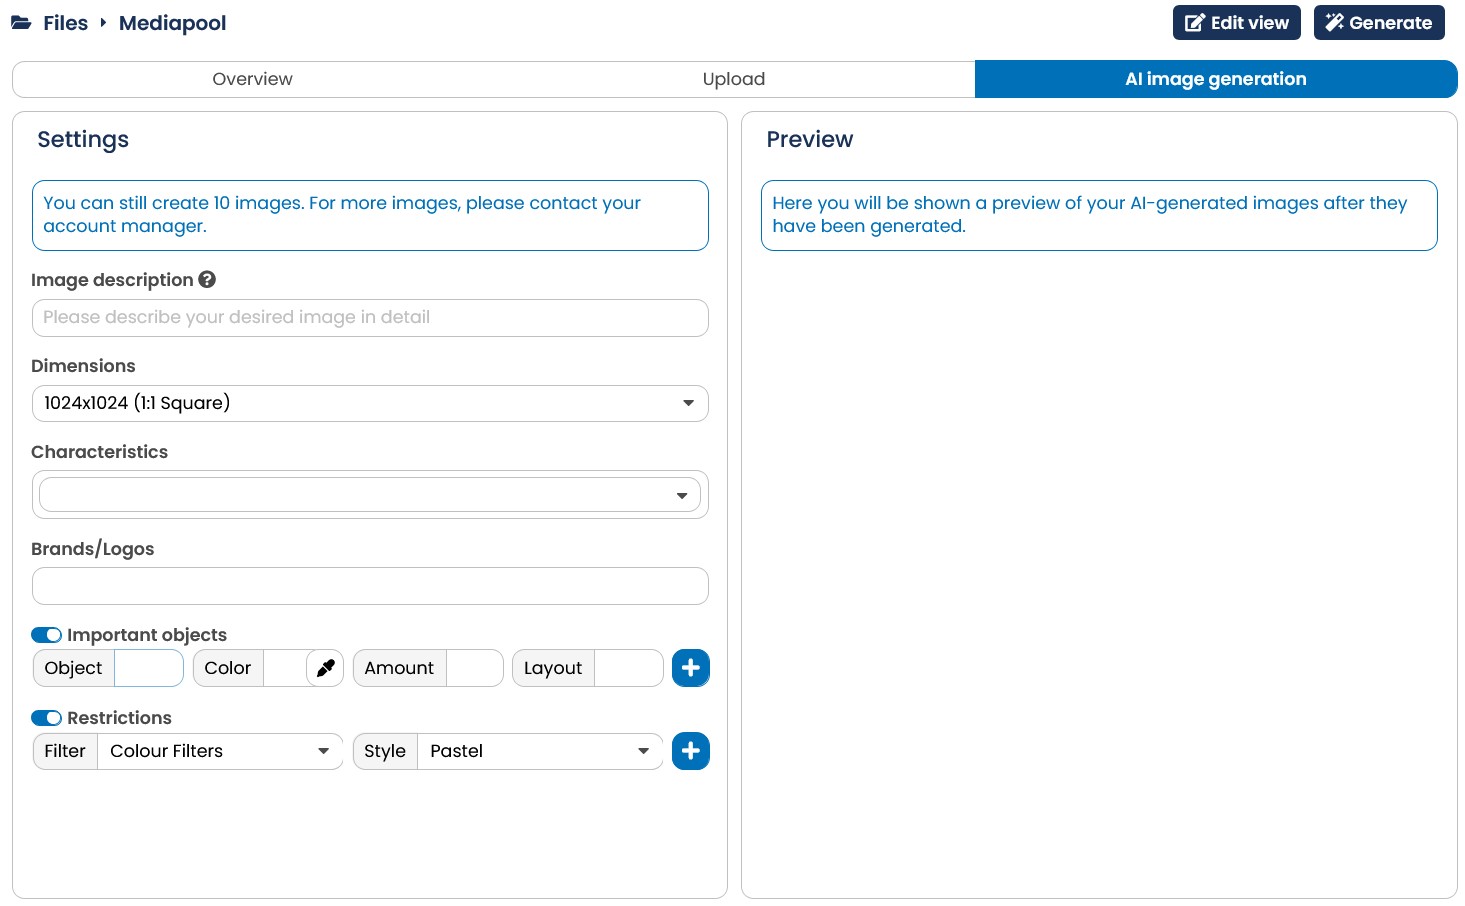
Fig. 4.4: Enter all relevant data for the generation of your image here.
At the top you will find a note indicating how many images you can generate. At the moment, the EMM offers you a daily limit of 10 images
Under Image description, enter the details of your desired image. You should make sure that you formulate your requirements as precisely as possible. You can answer with keywords, phrases or whole sentences.
Under Dimensions, you specify the frame in which your picture is to be created. You can choose between Square, Portrait and Landscape format. The current selection of formats is initially specified by OpenAI and is an important framework condition for image generation.
You can define the style of your desired image more precisely under Characteristics. You can select individual or multiple aspects from a variety of options (such as semi-abstract, asymmetrical, colorful) to draw inspiration from a wide range of representations during image generation.
You can also use Brands/logos to list certain brands or logos if you want them to appear in your image.
If there are objects that should definitely be included in your image, activate the Important objects button. A table is then displayed below the button in which you can specify Objects and details on Object colors, Amount and Layout. To add a new row and confirm the entry for processing, press the plus button.
If you activate the Restrictions button, you have the option of using two dropdowns to define the Filters and Style of your desired image more precisely. The same applies here: To add a new line and confirm the input for processing, please press the plus button.
Please note: The interpretation of your input is the responsibility of the AI model used. It is therefore possible that individual requests may not be taken into account exactly. The capabilities of AI-based tools for image creation are constantly evolving and the level of detail of the processing can unfortunately not be finally influenced by us despite the transfer of all entered parameters.
As soon as you have entered all the information relevant to you, click on the Generate new image button. After a short processing time, the EMM will display the generated image to the right of your entries.
If you are not satisfied with the result, you can simply edit your requirements and click on Generate new image again. As soon as you are happy with the result, click on the Save button.
The AI-generated image is now saved in the media pool under the Content images tab in jpg file format. All images created in this way will be labeled [AI generated] for easier identification and sorting.