4.5 Templates - Re-usable mailing contents
Most mailings, especially regularly sent newsletters, always have the same structure.
There are subheadings, separator lines, credits with imprint and links to unsubscribe etc.
Preparing the entire text for each mailing is cumbersome, time-consuming and error-prone. The E-Marketing Manager helps you to reduce the effort to a minimum. The magic word is template: you define a fixed frame and only add the current texts in the mailing.
With a template you define the fixed elements of a mailing and the places where current texts should be placed. You define the current texts as content modules just like in a normal mailing (see chapter Inserting content). For a new newsletter, you use the template as a template in which the basic framework is already available and supplement the content with the current topics.
Note: The E-Marketing Manager distinguishes between two creation methods:
If you create your mailings with the E-Mail Creator, you access the templates, which you can create and edit with the Layout Builder (part of the Layout Package). You will find a description of this in the chapter Layout Builder (Premium). The standard method is available to all users of the software. The following texts refer to the template creation for the standard method.
Templates are a fixed basic framework, but not rigid. Using AGNITAS tags, you set up your templates so that they react dynamically to the existing text blocks. For example, if a newsletter lacks the usual text module called Surf Tip, the template will also omit the heading and the separator line. In addition, you can flexibly set whether changes to the template are automatically applied to all mailings that use this template, or whether you just update individual mailings.
If you have any questions about the creation of mail templates (or also called templates) beyond this introduction, please contact the AGNITAS-Support. We can create these templates on request or discuss the customized design with you.
If you have already created templates outside of your EMM account, you can easily import them by clicking the Import template button under the Action button.
Note: If you do not work in the E-Marketing Manager for 30 minutes or do not show him that you are still active within this time, for example by saving or reloading a page, a socalled session timeout occurs and you are automatically logged out of the E-Marketing Manager. In order that you do not completely lose work steps that you have already performed in this case, an AutoSave is performed every 10 minutes and your work processes are thus automatically buffered. The first time you log in after session timeout, you will be taken to the last edited object and will be asked whether the changes you have made but not yet saved should be displayed.
This function only applies to mailings, templates, content modules and forms.
4.5.1 Creating a new template
Templates are not tied to a mailing list or a specific mailing. They are available to all mailings.
Please note: It is possible to display and amend the contents of a template directly from the detailed view of a mailing. By using copy&paste, you may select a copy of an existing template, use this to create a new template and then make any amendments required. This saves a lot of time and a lot of typing effort. For details see chapter Show template data.
4.5.1.1 Entering basic template data
A new template requires a number of steps which vary according to the required functions and the selected media types.
- Click on the Mailings button in the navigation bar and then on Templates to call up an overview of all available templates. By clicking on the button New in the upper right corner, you will receive an entry dialog to create a new template. There is no limit to the number of templates you may create.
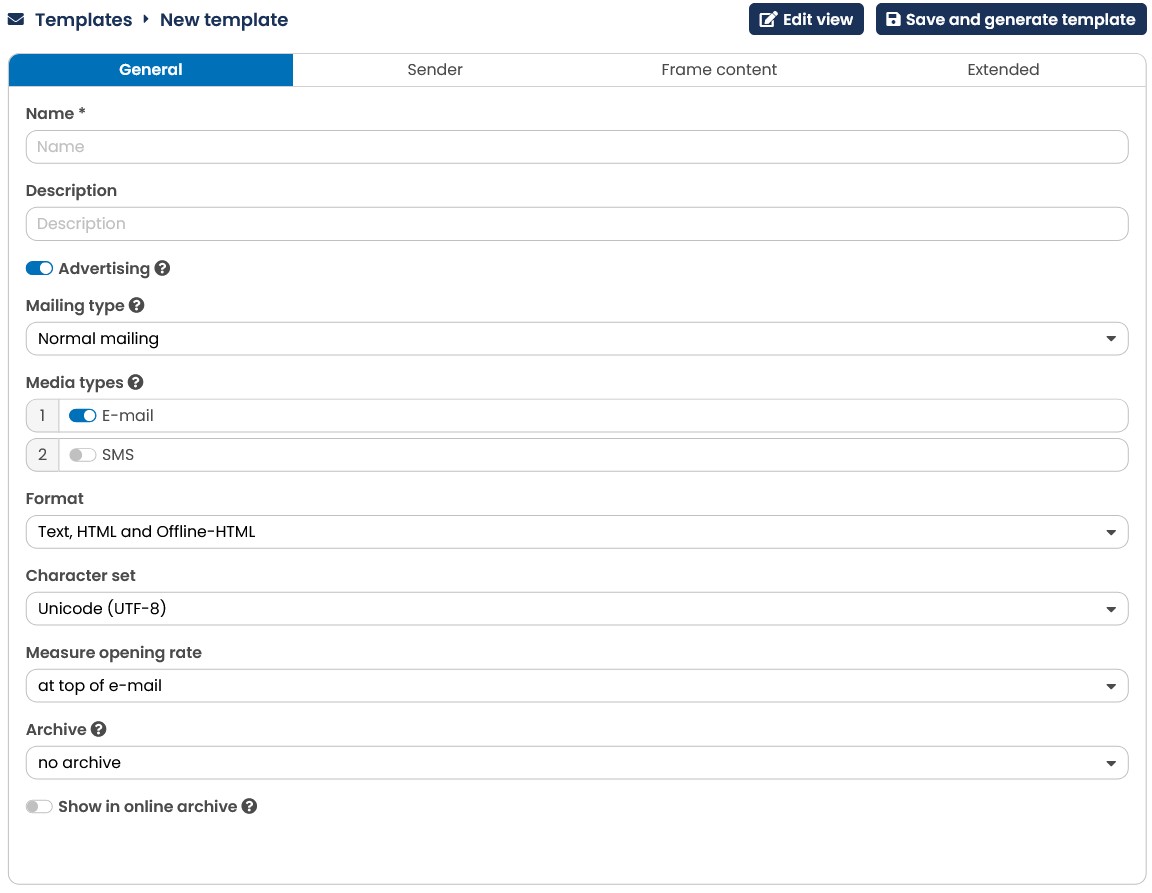
Fig. 3.85: A new template with various texts for the different media types.
-
In the Name field you may enter a meaningful name for your template. This name will later be shown in overview lists and drop-down lists used for selecting templates. You will make it much easier for yourself if you select a meaningful name here.
-
The same applies to the Description box. The text should consist of one or two sentences. A shortened version of the description will later appear in the overview and the template’s detailed view. You are also making it easier for someone else to work with templates or amend them if the description is clear and meaningful.
-
In the General tab, you can also enter information on the Archive and Mailing type. This is useful when you use templates for a newsletter in which the mailing list, archive and/or mailing type is always the same. You can also change this information later when you create a mailing with the help of the template. Further information can be found in chapter Creating a new mailing.
-
After a click on the Sender tab, you can enter information a Mailing list.
-
After a click on Target groups, you can choose Target groups for sending and select a List split. You can also change this information later when you create a mailing with the help of the template. Further information can be found in chapter Creating a new mailing.
If you always want to select target groups for future mailings (i.e., if you never want a mailing to go to all recipients on a mailing list) and if you usually create mailings by copying a previous mailing template, please tick the Mailings should only be sent with target group selection check box. The software will then generate an error message each time you try to copy and save a mailing without selecting any target groups first.
The option Mailings should only be sent with target group selection is not available as a default setting. If you are interested in using this option, please contact the AGNITAS Support.
- The two entry boxes Text version and HTML version, which are visible after a click on Frame Content, are for entering the actual mailing template text. The chapter Using text modules and Dynamic text module contains detailed instructions on how to formulate a template text. As for mailings, E-Marketing Manager makes the distinction between text and HTML versions for a template. This is why there are two entry boxes. You must nevertheless insert template text in both boxes (Text version and HTML version), since even when sending out HTML e-mails, the recipient also receives the text version, just to be sure (technically, this is called a multipart e-mail). If your template text is created in a word processing software outside E-Marketing Manager and then copied into the box, you should restrict yourself to ASCII characters (see chapter Creating text and HTML modules).
Tip: If templates are changed you can preset whether changes to the template are automatically transferred to all mailings that use this template or whether only individual mailings are updated by means of the Update mailing when template is modified (preference) slider.
- For information on the areas E-mail and Media types go to the chapters Media type: Email and Set the media type and details.
4.5.1.2 Set the media type and details
As with a mailing (see chapter Creating a new mailing), a template can also support one or more media types. Please make sure that the media types of the template match the media types of a mailing. If you later want to send mailings with the media types e-mail and fax, the template must also support these two media types. However, it is no problem to omit a media type in the mailing later, i.e. to send only e-mails and not faxes in the example. The setting options for the respective media types correspond 1:1 to the options that you can find under Media Type and Details in the chapter Creating a New Mailing.
4.5.1.3 Saving and copying templates
Once you have made all your entries, click on Save.
If you need another template with a slightly different requirement, you do not have to enter all the data again. In this case, you can simply copy an existing template and adjust it accordingly.
Open the detailed view for the template you wish to copy. By calling the drop-down menu Action in the uppermost right, you will find a Copy button. Clicking on it will call up the entry dialog for a new template in E-Marketing Manager.
All template settings were copied and are absolutely identical. The words Copy of have been added to the template Name. Now give your new template a meaningful name and description and click on the Save button. The various tabs will now be called up for you to enter settings and make any changes you may wish to make.
Please note: When copying an existing template, media types may not be altered.
4.5.1.4 Further details for creating templates
When you click on Save, further tabs are added to the Template tab: Content, Images, Attachments, Links, Preview and Testing. Here you have the possibility of creating your templates in detail. You can add further information that will be included in later mailings based on this template. You do not have to use the additional tabs and instead can make all the entries later when you are creating the mailing.
You will already know about these tabs from the chapter Mailings - Sending out newsletters where you can find a detailed description of the of all additional registers. The Check tab is similar to the Shipping tab in the mailing, but without the option of scheduling shipping. Furthermore, a template differs from a mailing in that the registers Statistics, Heatmap and Recipient are not offered here, since these registers are always linked to the dispatch of a mailing.
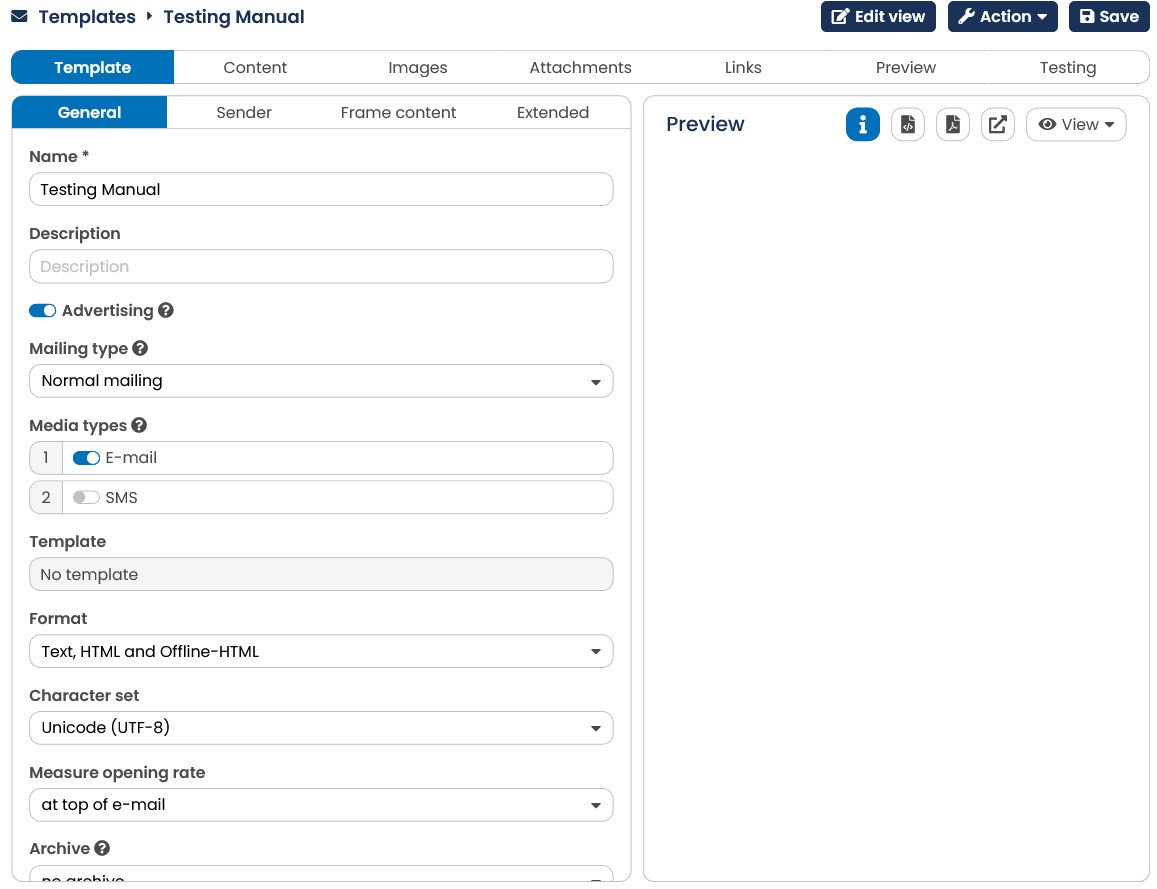
Fig. 3.86: After clicking Save there are more tabs available.
Content: You can only define the structure of the frame content in the template and only enter the content when you create the mailing. However, it is recommended that you store placeholder texts and pictures so that you can recognize the structure and effect of the mailing when you create a new mailing. If you use certain contents again and again unchanged, e.g. the imprint, you can of course also store the final contents in the corresponding building blocks and then simply use this in the mailing. For details, see chapter Creating text and HTML modules.
Images: Do you use some images regularly for your newsletter? Then paste these directly into the template. For details, see chapter: Using image elements.
Attachments: You can add an attachment which remains unchanged in all newsletters using this template here. For details, see chapter: Sending file attachments.
Links: You can determine the measurability of recurring links in the template. For details, see chapter Using trackable links.
Preview: Go to this tab to get a first impression of the mailing that this template will generate. For details, see chapter Preview - For in-depth checking.
Testing: To have as little errors as possible in your mailing, you have the possibility to run test mailings to either administrators or those on the test distribution list. Also you can check the links used in your template here. For details, see chapter Sending out test mailings.
4.5.1.5 Deleting a template
If required, a template can be deleted again. You can now do one of two things:
-
By clicking on Mailings and Templates in the navigation bar, open the list of all available templates. Click on the Delete symbol behind the corresponding entry of the list.
-
By clicking on Mailings and Templates in the navigation bar, open the list of all available templates. By clicking on the name of the required template, open the entry dialog for that template. Calling the drop-down menu Action in the right-edge of the screen, you will find the button Delete.
In both cases, E-Marketing Manager will ask you to answer a confirmation query to confirm that you do, indeed, wish to delete the template. Just click on the Delete button. If you click on x instead, the template will not be deleted.
4.5.2 Using text modules
Content modules can be used to define a fixed structure for the mailing. In this way, static content such as logo, imprint, etc. can be stored in the frame content and the flexible areas of the mailing can be defined in the content modules. Content modules can be used in both the HTML and the text version. The following chapters explain how to do this.
4.5.2.1 Inserting a text module using AGNITAS tags
A template works a bit like a form. It consists of areas, entry fields and placeholders. Text entered into a field will then be inserted into the e-mail and sent to the recipient. Any text may be customized, for instance including a personal address. Further information can be found in the mailings chapter Creating customized mailings.
We promised you flexible templates, didn’t we? The secret lies in linking a template to various text modules for a mailing. Inside the template text, you insert an AGNITAS tag acting as placeholder for a certain text module. You need not define the contents of the text module in the template. This is done later when creating a new mailing. If the content of the text module is to remain the same for multiple newsletters, you can define the contents of the text modules directly in the template and then use this in the mailing. For details, see chapter Further details for creating templates.
Let us give you an example. The following text is typed into the Text version field in the new template entry dialog.
[agnTITLE type=1]
Welcome to this week’s special offers from your Seed Shop!
[agnDYN name="maintext"/]
Yours sincerely
Your Seed Shop Newsletter Service
The first line inserts a customized greeting for the recipient, see chapter Creating customized mailings. The second line is normal text which the E-Marketing Manager will
insert into the mailing. The secret of templates lies in the third line: [agnDYN name="maintext"/] inserts the maintext text module into the finished e-mail. The template does not know which text will be inserted here. This is the whole point of templates. You must enter text into that module later under Content when creating a new mailing. All text modules defined in the template are listed in alphabetical respectively numerical order here. The remaining lines and blank lines will be integrated by the system into the mailing without any changes.
Please note: The AGNITAS tag uses special notation. The right square bracket is preceded by a slash. This shows the E-Marketing Manager that the tag is finished. The following chapter explains why.
The entries could result in the following e-mail (depending on the recipient and the contents of the maintext text module):
Dear Mr. Smith,
Welcome to this week's special offers from your Seed Shop catalog! Looking forward to banning your winter boots to the attic and doing some gardening? We can offer you all you need for a colorful garden. This week's special offer: spring flower seeds for your garden! Check out our latest online offers on https://www.my-company.com/springseed.htm
Yours sincerely
Your Seed Shop Newsletter Service
There is no limit to the number of text modules you may insert. It makes sense to create a unique text module for each special offer (as in the example). To save time and make working with text modules easier, you should select meaningful and explicit names for your text modules.
4.5.2.2 Dynamic text module
With additional AGNITAS tags, your templates will become even more flexible. Imagine you have inserted several special offers each included in a separate text module into your template. Between special offers, a line of dashes should act as delimiter.
[agnTITLE type=1],
Welcome to this week’s special offers from your seed catalog!
[agnDYN name="SpecialOffer1"/]
--------------------------------------------------------------------------
[agnDYN name="SpecialOffer2"/]
--------------------------------------------------------------------------
[agnDYN name="SpecialOffer3"/]
Yours sincerely
Your Seed Newsletter Service
Now what if a newsletter only features two special offers? There will be no SpecialOffer3 special offer or text module. The E-Marketing Manager will not insert anything there. This produces a redundant delimiter. A complex template with several text modules may look ugly as a result.
The special notation for the [agnDYN] AGNITAS tag can help:
[agnDYN name="SpecialOffer3"]
--------------------------------------------------------------------------
[agnDVALUE name="SpecialOffer3"/]
[/agnDYN name="SpecialOffer3"]
The line [agnDYN name="SpecialOffer3"] starts an area. Please note that the slash / is missing at the end of the tag. E-Marketing Manager now knows that it is not supposed to insert a text module, but that something else is to follow. The second line is the delimiter for
your special offer. The new tag [agnDVALUE name="SpecialOffer3"/] inserts the SpecialOffer3 text module. The tag ends with [/agnDYN name="SpecialOffer3"]. Note this tag starts with a slash. This tells the system that the tag ends an area. It is very important to include the same text module in all three tags.
The sequence of three AGNITAS tags does the following:
-
If there is a SpecialOffer3 text module, the system inserts the whole text between [agnDYN name="SpecialOffer3"] and [/agnDYN name="SpecialOffer3"] in the e-mail. The text module is called up using the line [agnDVALUE name="SpecialOffer3"]. Other AGNITAS tags could also be used.
-
If there is no SpecialOffer3 text module, the system deletes everything between [agnDYN name="SpecialOffer3"] and [/agnDYN name="SpecialOffer3"]. The finished e-mail will contain neither a blank line nor a delimiter.
4.5.3 Using templates
After having defined a template, you can use it in a new mailing. The following example uses the simple template with one text module from the chapter Using text modules. The principle is the same for templates requiring more than one text module.
-
In the navigation bar, click on the Mailings menu, then on the New button. Now choose Standard.
-
The system shows all defined templates in the displayed list. Choose a template and enter or modify all of the information necessary for the mailing, see chapter Inserting content. Then generate the new mailing by clicking on Save.
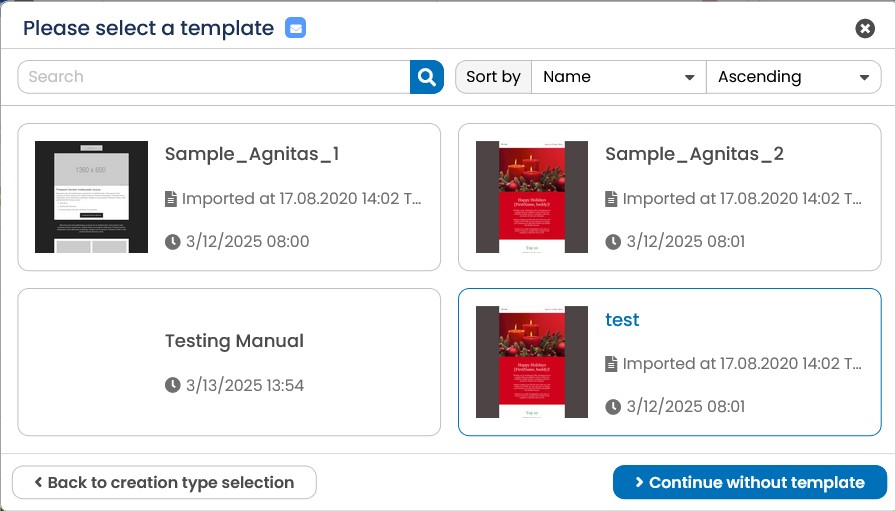
Fig. 3.87: Selecting the required template in the mailings entry dialog.
-
The additional tabs in E-Marketing Manager take further mailing settings. Please note that you may still change all mailing details, apart from the assigned template.
-
Open the Content tab by clicking on it. Now, the system displays only the text modules defined in the template.
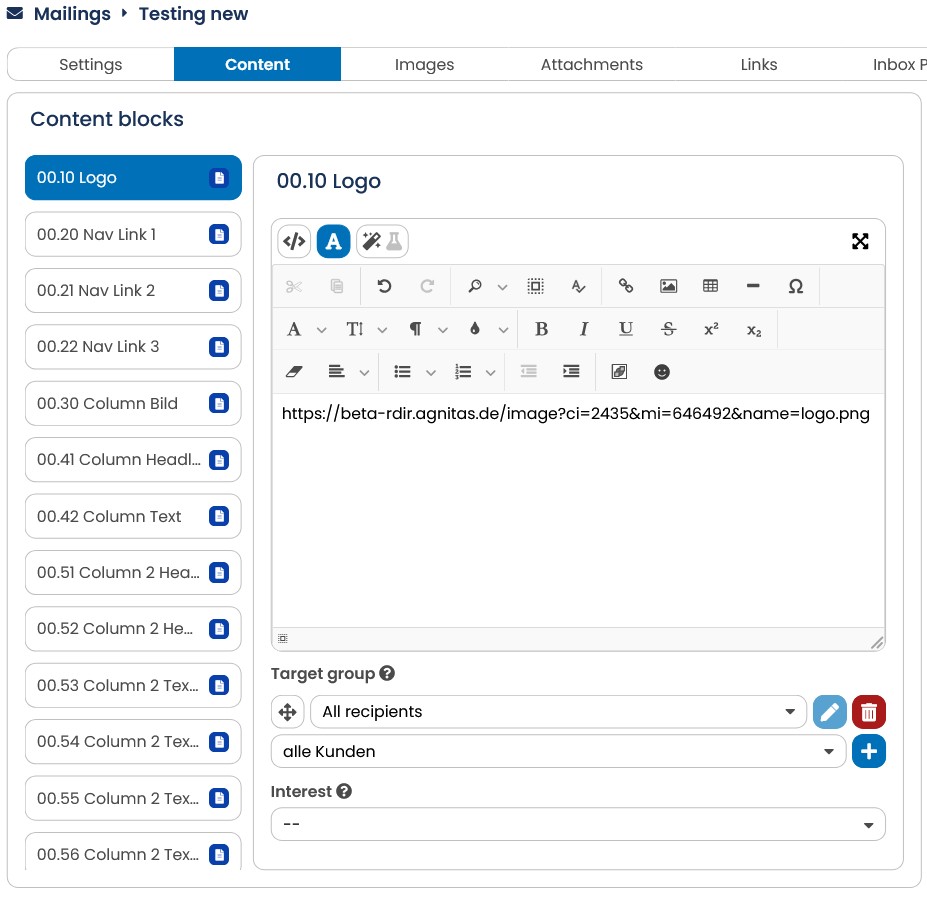
Fig. 3.88: E-Marketing Manager only displays those text modules used in the template.
-
Open the text module entry dialog by clicking on the module name.
-
Enter the required text into the content box. You must follow the same rules as for normal mailings. The Target group drop-down list is optional; it can be used for assigning a target group to a text module. Further information on dynamic mailings is contained in chapter Dynamic content generation. In our example, leave the All recipients setting unchanged.
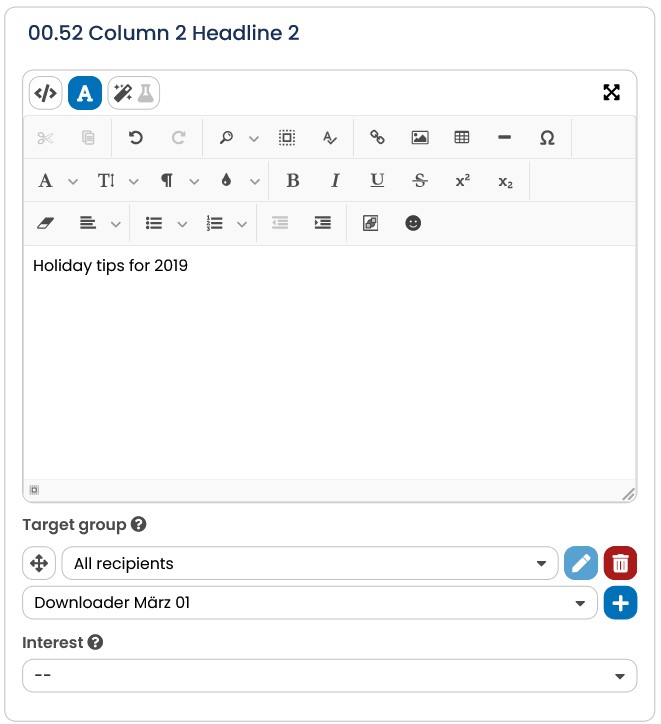
Fig. 3.89: Insert the content of the text module and confirm by clicking on Save.
- This completes the mailing which can now be tested and sent as described in chapter Testing and sending a mailing.
Please note: Sometimes, the content of a text building block must remain the same for multiple mailings. In this case, alternatively to the procedure described here, you can define the contents of the text building block directly in the template, see chapter Using text modules. You then no longer need to save the contents for each mailing.