1.2 Operating the E-Marketing Manager
This chapter should help you to quickly find your way around the user interface.
Content of this chapter
-
Everything about login, password forgotten, 2-factor authentication and logout
-
The Dashboard as a central page briefly introduced
-
Orientation and navigation in the E-Marketing Manager
-
Search and filter functions quickly explained
1.2.1 Login, access data and logout
The E-Marketing Manager (short: EMM) is a web-based service. You do not need to install and call up your own application. You carry out all actions via the Internet using your browser. The advantage is obvious: It is possible to start and operate the software from any desk anywhere in the world - provided you have Internet access.
The E-Marketing Manager uses the so-called HTTPS protocol and establishes a secure data transfer between browser and server to protect your data.
With the following steps you call up the E-Marketing Manager:
- Click on the AGNITAS website, click on Start EMM at the top right of Customer Login or enter the URL you received from your customer advisor in your browser, e.g.:
https://emm.agnitas.de/logon.do This will take you to the E-Marketing Manager login page.*
-
Enter the access data that you received from or your system administrator in the input fields Username and Password. You will be prompted to change your password after the first login.Enter the access data in the input fields username and password.
-
Finally, click on the Login button.
* If you do not see the login screen immediately, but are prompted to enter a 6-digit code or scan a QR code, then 2-factor authentication via app is enabled on your system. You can find more information about this below in the section How 2-factor authentication works.
To ensure the security of your data, you should change your login password regularly (see chapter Creating and managing users, Changing the password). After 90 days without changing it, you will receive a reminder after login. For optimum security, a password always contains a combination of upper and lower case letters, numbers and special characters.
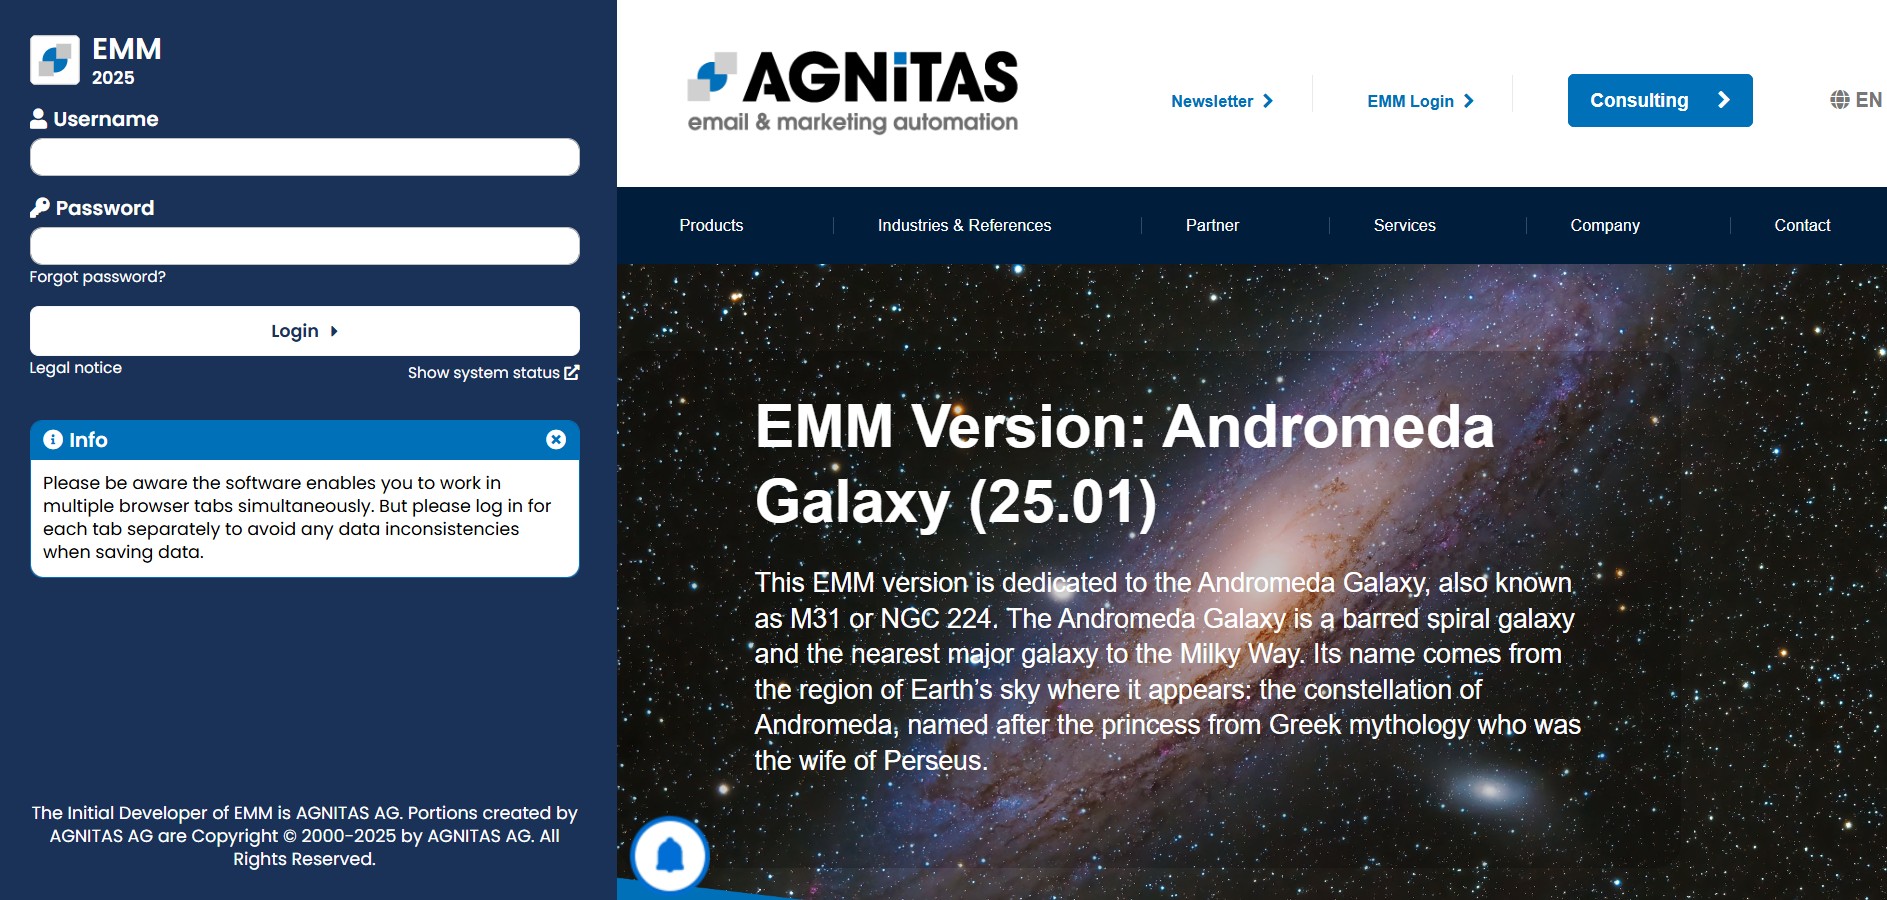
Fig. 16.4: The login page of the E-Marketing Manager.
If you have forgotten the password to your account, the E-Marketing Manager can reset it automatically. At the same time you will have the opportunity to set a new password for your account. To reset the password, click on the link Forgot password? In the login area. In the following dialog for authentication, enter your username and the password specified in your user access, enter the e-mail address stored in the user account. If the data is correct, the E-Marketing Manager will send you a message to the e-mail address you entered. You can then use the link contained in the e-mail to set a new password for your access.
Login lock
By default, access to the E-Marketing Manager is blocked for one minute after ten failed login attempts. The following applies:
-
For security reasons, the lockout time is increased to one minute for each login attempted and failed during the lockout period.
-
If you successfully log in to the E-Marketing Manager during the blocking period, access will still be temporarily blocked to prevent bots from automatically trying out passwords. Unlike logging in with incorrect access data, the blocking period is not increased again to a full minute.
-
You can only log back into the system with your access data after the blocking period has expired.
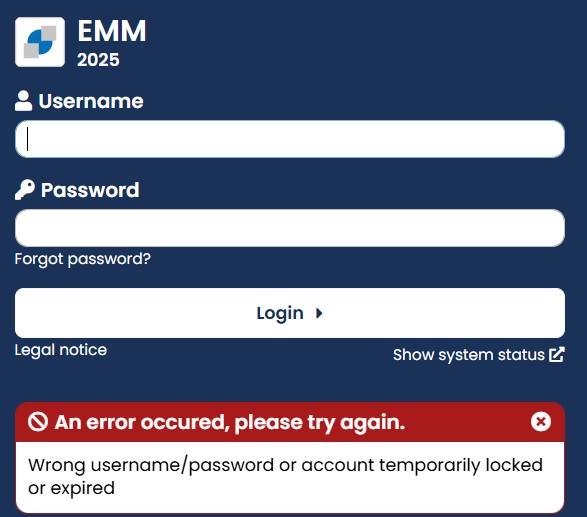
Fig. 16.5: In the default setting, access to the E-Marketing Manager is blocked for one minute after ten failed login attempts.
Please note: In your user profile, you can adjust and tighten the default settings for both the blocking period and the number of login attempts according to your individual needs.
As an additional protection mechanism, a 2-factor authentication is used in addition to the access data. It prevents third parties who have gained unauthorized access to your access data from logging in to the E-Marketing Manager without further ado.
This is how 2-factor authentication works:
You must confirm that the login from a particular computer or device is legitimate. For this purpose you will receive a security code to the e-mail address stored in your user profile. The security code only needs to be entered the first time you log in from a specific device.
Alternatively, you can also obtain the security code via an Authenticator app, e.g. Google Authenticator, Microsoft Authenticator or Sophos Authenticator (premium feature, please contact your account manager if you are interested). In this case, the user must authenticate once using a QR code and then receives the 6-digit code via app.
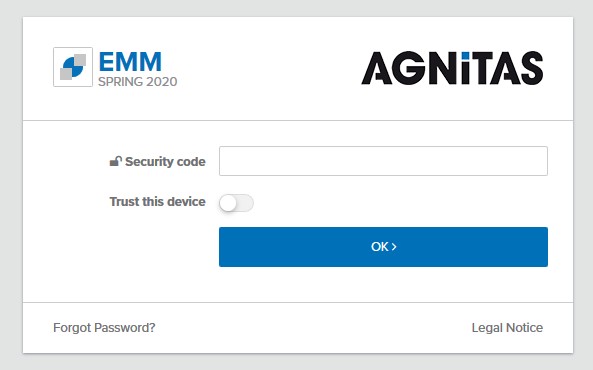
Fig. 16.6: The 2-factor authentication makes the login even more secure. Every device is registered that has been used to log in with a valid security code.
In order to avoid too much work for you, every device is registered that has been used to log in with a valid security code. However, the registration of this device only applies to your user account. If another user logs in from the same computer, he/she must enter his/her own security code.
90 days after the last login or by deleting cookies the authentication and you will receive a new security code for registration. If you do not want to use the 2-factor authentication, please contact AGNITAS Support.
After logging in, you will get access to the E-Marketing Manager and the dashboard will be displayed. The functions of the dashboard are described in the following chapter.
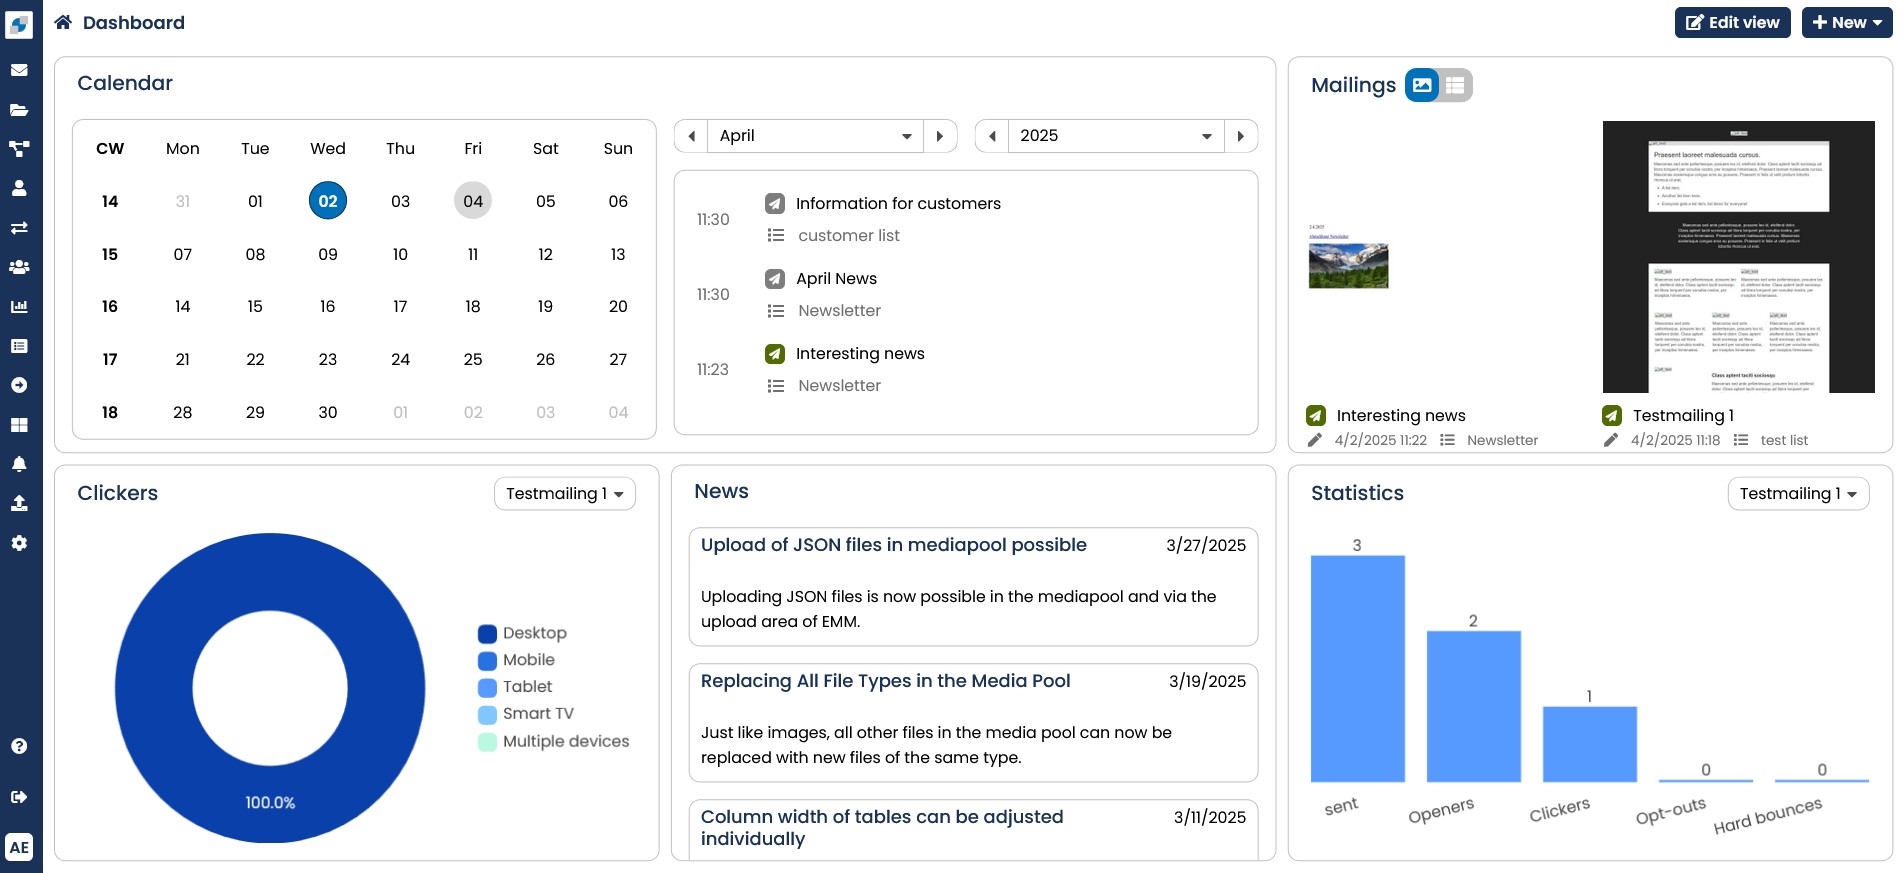
Fig. 16.7: The front page of the E-Marketing Manager shows the navigation and the dashboard.
If you want to end your session, please click on the Logout button on the left below the menu. Here you will find your user data and the CompanyID of your EMM client.
Please note: For security reasons, the system will automatically log you out after 30 minutes if you do not work with the system during this time. For the last 10 minutes, a timer displays the remaining time until the timeout. With each click, the timer is reset and starts again at 30 minutes.
Fig.
16.8:
The
timer
shows the
emainin time until
Parallel working in several browser windows
You can easily open the E-Marketing Manager in several browser windows at the same time, for example in several tabs.
Please note: In order to be able to work with the E-Marketing Manager in several windows at the same time, it is essential that you first log in separately in each window so that each window is assigned its own so-called "session". In this way you can ensure that no data inconsistencies occur when saving.
1.2.2 Dashboard - ideal introduction to the EMM
The E-Marketing Manager is divided into several functional areas with regard to content. The Dashboard provides you with a central control unit as your start page to quickly get an overview of tasks and actions that have been performed. It is also the perfect introduction to the most important functions of the E-Marketing Manager with just a few clicks.
To enable you to use the full scope of the dashboard for yourself, we briefly explain the individual features that can be found here.
In the left bar you will find:
-
The EMM logo, which allows you to quickly access the dashboard from any page
-
The navigation with all functional areas.
-
A help button that you can use to open the online help. Clicking on Help opens the appropriate manual chapter directly, so that you can quickly find the appropriate description
-
The logout button and the timer for the remaining session duration
(appears only 10 minutes before expiration)
-
Your user name, which you can also use to call up your user profile with one click.
-
Further details about your EMM client.
In the headline is located:
-
a breadcrumb navigation with display of the active element (here: Dashboard).
-
a support button where you can contact us for assistance. You can also report errors or submit suggestions in this way.
-
a news button. In this area you will find important announcements, a short description of new functions and documents that you can download
-
a view button with which you can configure the display of the dashboard.
-
a new button that allows you to create new mailings, templates, target groups, etc. with just one click
Depending on your preferences, the dashboard can display content such as:
- Recently used mailings
Here you can see all mailings (as list or preview) that were last edited with information on the shipping status and mailing list. With one click you can access the respective mailing. You can also create a new mailing with the New button.
- Statistics:
By default, the most important key figures of the last mailing sent are displayed here immediately. If you click on Recently sent, a dropdown appears which you can also use to call up any other direct mailing. Clicking directly on the diagrams takes you to the overall statistics for the respective mailing. Via the Analysis tab, also known as MIA (Marketing Intelligence Analyzer), you can obtain mailing independent key figures about your EMM client, such as new, unsubscribed, boosted recipients of the last 30 days.
- Calendar:
The calendar makes it easier for you to navigate and search the EMM. At a glance, you can see all actions in the displayed period (as a monthly view or weekly view) and you can scroll or jump to the past or future.
For each day you can see the planned or sent mailings (the colour shows sending status, a distinction is made between new, edited, finished, scheduled, admin test, sending, sent and cancelled) as well as push messages. With mouseover you receive a small preview and the most important key figures. With one click you can switch to the respective element. In addition, unplanned mailings are displayed to the right of the calendar so that they are not forgotten.
If you move the mouse over a date field, a small plus symbol appears in the upper righthand corner, which you can use to store comments and tasks for other users and send them by email if required. By choosing Display, you can display the comments and unplanned mailings or mailings that have not yet been sent.
Fig. 16.9: The dashboard provides a quick introduction to the E-Marketing Manager.
Note: Depending on the functions booked and your individual user rights, you may not see all menu items of the system.
1.2.3 Navigation in the E-Marketing Manager
General information about navigation
The navigation in the E-Marketing Manager works the same way as you are used to on many websites. In the left column all main areas are displayed with a symbol. If the respective area has sub-items, the area opens via mouseover and you can see the subitems. The active menu item is highlighted in color.
Bread-Crumb-Navigation
In the headline on each page, you will see the area you are in and the name of the current element. In the breadcrumb navigation you can easily navigate to higher levels by clicking on this part of the path.

Fig. 16.10: The breadcrumb navigation shows you where you are and allows you to navigate to higher levels.
The main areas of the navigation briefly introduced
-
Mailings: In this section you create mailings for the channels email and SMS. In addition to creating the content, sending and analyzing your mailings, you also have the option of creating templates, creating archives - to group your mailings, define individual forms of address and prioritize several mailings on the same day.
-
Mediapool: In this media organization system you can store images, PDF files, JSON files, save fonts and video files and use them in mailings and forms into the system. For better organization, you can define categories and use titles and keywords to improve the search.
-
Campaigns: In a campaign, you send one or more mailings to a group of recipients according to a predefined plan. The campaign can be controlled in detail by a number of parameters. You can therefore treat recipients differently depending on their reaction to an initial direct mailing. You can have mailshots or other actions follow one another in sequence over a defined period of time. Complex processes can thus be planned and executed simply and clearly. Statistical data show you in real time how the campaign is received by the addressees.
-
Recipient: The most important thing for newsletters is a database with customers or leads and their email address. In the jargon of the E-Marketing Manager, these are the recipients. For each recipient there is a so-called profile, which contains name, e-mail address and, above all, which newsletters (more precisely: mailing lists) the recipient has subscribed to. You can define any profile fields in which you store the characteristics of each recipient. You can exclude particularly critical recipients from further distribution using the Blocklist.
-
Data management: In this area you have the possibility to create, change, delete or export larger amounts of data at once. For regularly recurring imports, you can define a fixed import profile. With Auto Import and Auto Export, these processes can also be performed automatically. The edit field contents function allows you to make changes for several recipients at once. Logs are stored for each import and export, and Data Source IDs are generated for new recipients. In addition to recipient data, you can also import templates in this area, e.g. mailings or forms. The submenu item Reference tables can also be found here.
-
Target groups: It often makes sense not to send a newsletter to all recipients of a mailing list. A target group filters out only certain recipients, such as all women in postal code area 8, so that you can make relevant content available to certain groups of people or carry out test runs. A target group is dynamic: When you add new recipients to the database, a target group also includes them, provided they meet the criteria.
-
Statistics: To monitor the success of a direct mailing and plan further mailings, you need key figures with which you can measure this. You can use direct mailing (individual) or the direct mailing (comparison) to do this. Customer Insights and Recipients are concerned with the recipient behavior or the development of your distributor. The device, domain and monthly overview provides you with further insights for your marketing. If required, you can also have reports sent to you by email.
-
Pages & Forms: Using the forms, you can set up landing pages where people interested in newsletters can, for example, subscribe, unsubscribe or re-register themselves.
-
Trigger management: In it, you can define and manage triggers that release certain processes in EMM. For example, by clicking on a link in an email the recipient activates a defined trigger.
-
Layout Builder: The Layout Builder is a premium feature for creating individual email templates for the Email Creator (specific creation method in the modular system). You can use a grid design mailings like on a drawing board. By defining fixed building blocks (div building block or div container), users can build and design in the Email Creator using drag & drop.
-
Push notifications: With the Web Push Service from AGNITAS you can provide your customers with current news in their browser. You can reach the consumers directly while they are surfing the web - via overlay window. Has your prospective customer or client signed up for the notification Service registered on your website, he will receive your web push messages below, regardless of which website he is currently on. Triggers can also be used to send welcome messages, for example. The statistics show the distribution development for push messages.
-
Upload: The Upload menu item provides E-Marketing Manager with a function that allows you to exchange data quickly and, above all, securely via the AGNITAS servers. For more information, please refer to the chapter Upload file.
-
Administration: In this area you will find all functions that serve to manage, group or configure the client for your users and their rights. This also includes response processing, tracking points, content source and premium features. In addition, you will also receive information on usage in the activity log or on security management.
-
News: This menu item informs you of new notifications in your system in the form of a megaphone. The icon only appears at the bottom left of the navigation bar if there are new notifications in the system and you have not activated the News tile in the dashboard.
1.2.4 Search and filter
To help you quickly find what you are looking for in the E-Marketing Manager, there are filter functions in numerous areas. The classic Filter is always located on the right hand side of your screen. You can search for specific content in free text fields. If you cannot remember the exact spelling, you can use wildcards. The wildcards * and % stand for any number of characters. The placeholders _ and ? each stand for one variable character. Without the use of wildcards, the system searches for the exact entry. After selecting the desired values, the filter must be confirmed with Apply filter. Click on Reset filter to display all unfiltered results again.
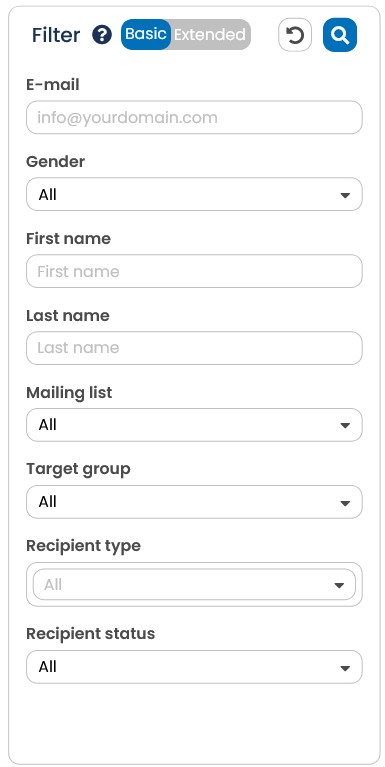
Fig. 16.11: The filter supports the use of wildcards. Here the filter of the recipient overview is shown.
In addition to the filter, you can influence the result lists of most tables in EMM by using the sort options in the table header. By clicking on a column name, its contents are sorted either chronologically or alphabetically. By clicking several times, you can change the order from ascending to descending or cancel the sort order. Sorted columns are highlighted by blue column names.
In the table header, you also have the option of adjusting the width of each column individually.
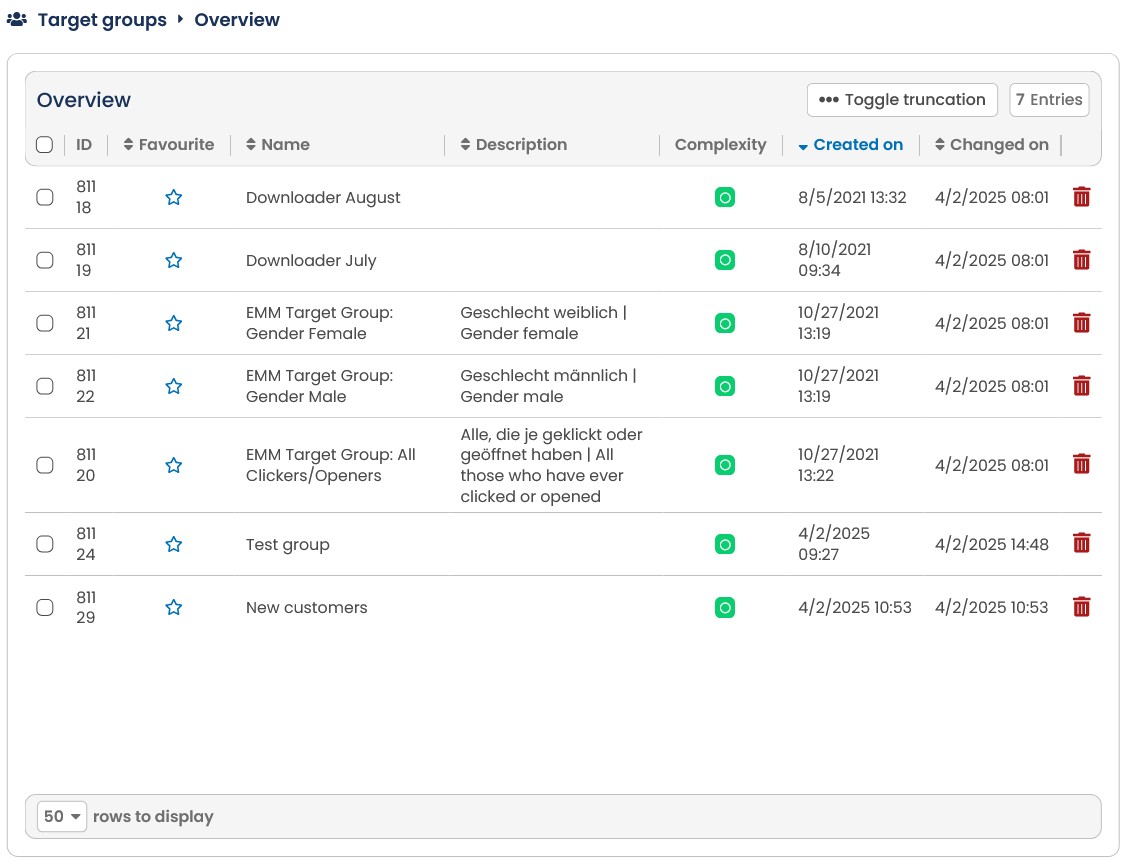
Fig. 16.12: The header of tables offers sorting options.
There are extended filter options in the area of recipients and target groups. Here you can filter on the one hand with selection lists and on the other hand work with the following operators:
| is equal to (=) | The field content is identical to the comparison value. You can enter a number or a text as the comparison value. Please note: When using the equality operator, the comparison value must correspond exactly to the existing field content. However, there is no difference between upper and lower case: Axel is identical to axel. |
|---|---|
| is not equal to (<>) | Field content and comparison value are different (unequal). You can specify a number or a text as the comparison value. |
| is greater than (>) | The field content is greater than the comparison value. You can specify a number or a text as the comparison value. For text, the alphabetical order applies, so b is greater than a. |
| is less than (<) | The field content is smaller than the comparison value. You can specify a number or a text as the comparison value. For text, the alphabetical order applies, that is, a is smaller than b. |
| MOD | Modulo-Operator, explanation see chapter List split using MOD |
| LIKE | The field content corresponds to a comparison text with wildcards (see chapter Drop-down list for relational operators ). |
| NOT LIKE | The field contents do not correspond to the comparison text with wildcards (see chapter Drop-down list for relational operators ). |
| is less than or equal to (=<) |
The field content is less than or equal to the comparison value. You can specify a number or a text as the comparison value. For text, the alphabetical order applies, so b is greater than a. |
| is greater than or equal to (=>) | The field content is greater than or equal to the comparison value. You can specify a number or a text as the comparison value. For text, the alphabetical order applies, that is, a is smaller than b. |
| is empty (is NULL) | This expression checks whether a profile field is empty or has a database value of null. Erklärung siehe Kapitel IS and NULL or NOT NULL |
| is not empty (is not NULL) | Checks whether the profile field is neither empty nor has the database value null. Erklärung siehe Kapitel IS and NULL or NOT NULL |
| starts with | Filters for entries that begin with exactly the word or value you specify, regardless of the other content. |
| not starts with | Filters for entries that may contain the value you specify, but do not start with it. |
| contains | Searches for a specific value in a field that contains multiple values. e.g.a special voucher code. |
| not contains | Excludes entries that contain a specific value. |
In the header of a table and at the bottom, you also have the possibility to influence the display of the content. For example, you can change the list lengths, add or remove columns and also use other display options.